I’M GARY NAVA, A PROFESSIONAL LUTHIER MAKING MANDOLINS AND GUITARS BY HAND, TO THE HIGHEST STANDARDS, IN MY ANALOGUE WORKSHOP. HERE ARE VARIOUS TALES FROM MY WORK BENCH.
Had a great day! John and his wife (a delightful couple) came over to pick up his new Nava mandolin. So, for me, happiness is seeing the delight that a client has with their new mandolin and also, hearing it played properly! And for John, well he is clearly very happy with his new mandolin. I’ve never bothered with customer endorsements but have a read of his wonderful comment on the last YouTube…
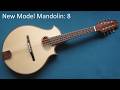
My "New Model" mandolin (as I'm currently calling it) has now been completed. I'm incredibly happy with the final outcome and looking forward to building the next one! Here is the last video in the series and below that a whole batch of photos for you. Cheers Gary
Well, this is another long video but so, so much to get through! The bridge is made and I have brief chat about its design, the strings go on and I show you how I set-up my mandolins. And finally……..the New Model Mandolin gets to sing its first notes! So, cuppa at the ready and off we go. Cheers Gary
Time now to shape the neck! Also, I have a brief chat about the tools needed for this process. After running through the shaping process, I start the clean-up in preparation for setting-up the mandolin, “in the white.” Cheers Gary
In this episode, I design and make a new jig for routing the neck joint. Then: fit the neck, the fretboard’s supporting wedge, and the fretboard itself. Quite a lot there to take in! I skim over the fretting process as I’ve demoed this many times before, but if you’re interested in how I fret, have a look at thisvideo- Although I fret my short scale bass, the actual process is the same, just the…
As you’ll know, once in a while, I like to do resto project: just for fun really! I’d been hankering for a Westone bass made in the legendary Matsumoku factory and I finally managed to get my hands on one. So, this series of videos is all about bring a 44 year old bass back to life! Part 1 Part 2 Part 3
The body of the mandolin is now together, so what’s next? In this video, I look at routing the rebate for the purflings and bindings. The purflings take quite a while to fit as there are tricky mitres to cut and the bindings (made from walnut) need to be bent on the bending iron to fit exactly. All good fun! Oh, and a bit about the fretboard too! Cheers Gary
Here’s Part 3 of my New Model Mandolin build series. In this one, I look at joining the Adirondack soundboard and making and fitting the rosette. There’s also a bit more on the neck and last but certainly not least, the back gets braced and fitted and you’ll see how the radius dish (seen in part 1) continues to help the process. Cheers Gary
I would have bent my first set of sides during my first year at the London College of Furniture (1976/77) and I’ve bent a fair few bits of wood since. It never ceases to amaze me what you can do with a drop of moisture and a bending iron. I wasn’t 100% sure about the extreme bending that this new shape would need but as you’ll see (spoiler alert) it all went well. So, in part two, I make the rim…
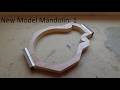
No sooner one mandolin is complete than another comes along! So, after a very long gestation period, my New Model Mandolin is finally being realised. In this first episode of a new build series of videos, I look at its overall shape and go into detail about the making of the external mould. The mould is used for accurate construction of the mandolin’s rim.