
Hi folks,
It’s that time of year again, that of: garden a’plenty, if we’re lucky! I’ve got beans coming on strong right now, alas, the dill I seeded last fall sprouted right quick and is already past its prime. Hoping the farmer’s market has some so I can do a round of Dilly Beans!
Of note, some of the recipes list the author as unknown. This is because I found a recipe on-line and printed it out, only to realize later that I didn’t get the website/author, or was gifted a copy of the recipe without an author listed.
Also, if you want to sign up for any of the Wild Plant Walks, the 13 Plants you can Chew up and Use on a Bug Bite class, or the Cold & Flu class held at Farm & Hive in Inkom, ID: REGISTER HERE.
As always, all photos are my own, as is the text unless otherwise indicated. This is probably the most info that I’ve quoted from outside sources — I’m not a master canner by any stretch of the imagination. These are beginner friendly tips and recipes that you can certainly learn from!
#1 Always start with a clean kitchen, (trust me, you’ll thank me later)
#2 If it’s super-hot out, get an early start
#3 You can use your dishwasher to sanitize jars, unless your dishwasher sucks and leaves a film; then handwash
#4 If you can’t get a jam/jelly to set using Pomona’s, try using Sure Jel—I said what I said
#5 Adjust for elevation!
If your altitude in feet is:
0-1,000 -- process as recipe calls
1,001-3,000 -- increase processing time by 5 minutes
3,001-6,000 -- increase processing time by 10 minutes
Over 6,000 -- increase processing time by 15 minutes
I’ve really enjoyed having these canning books on hand:
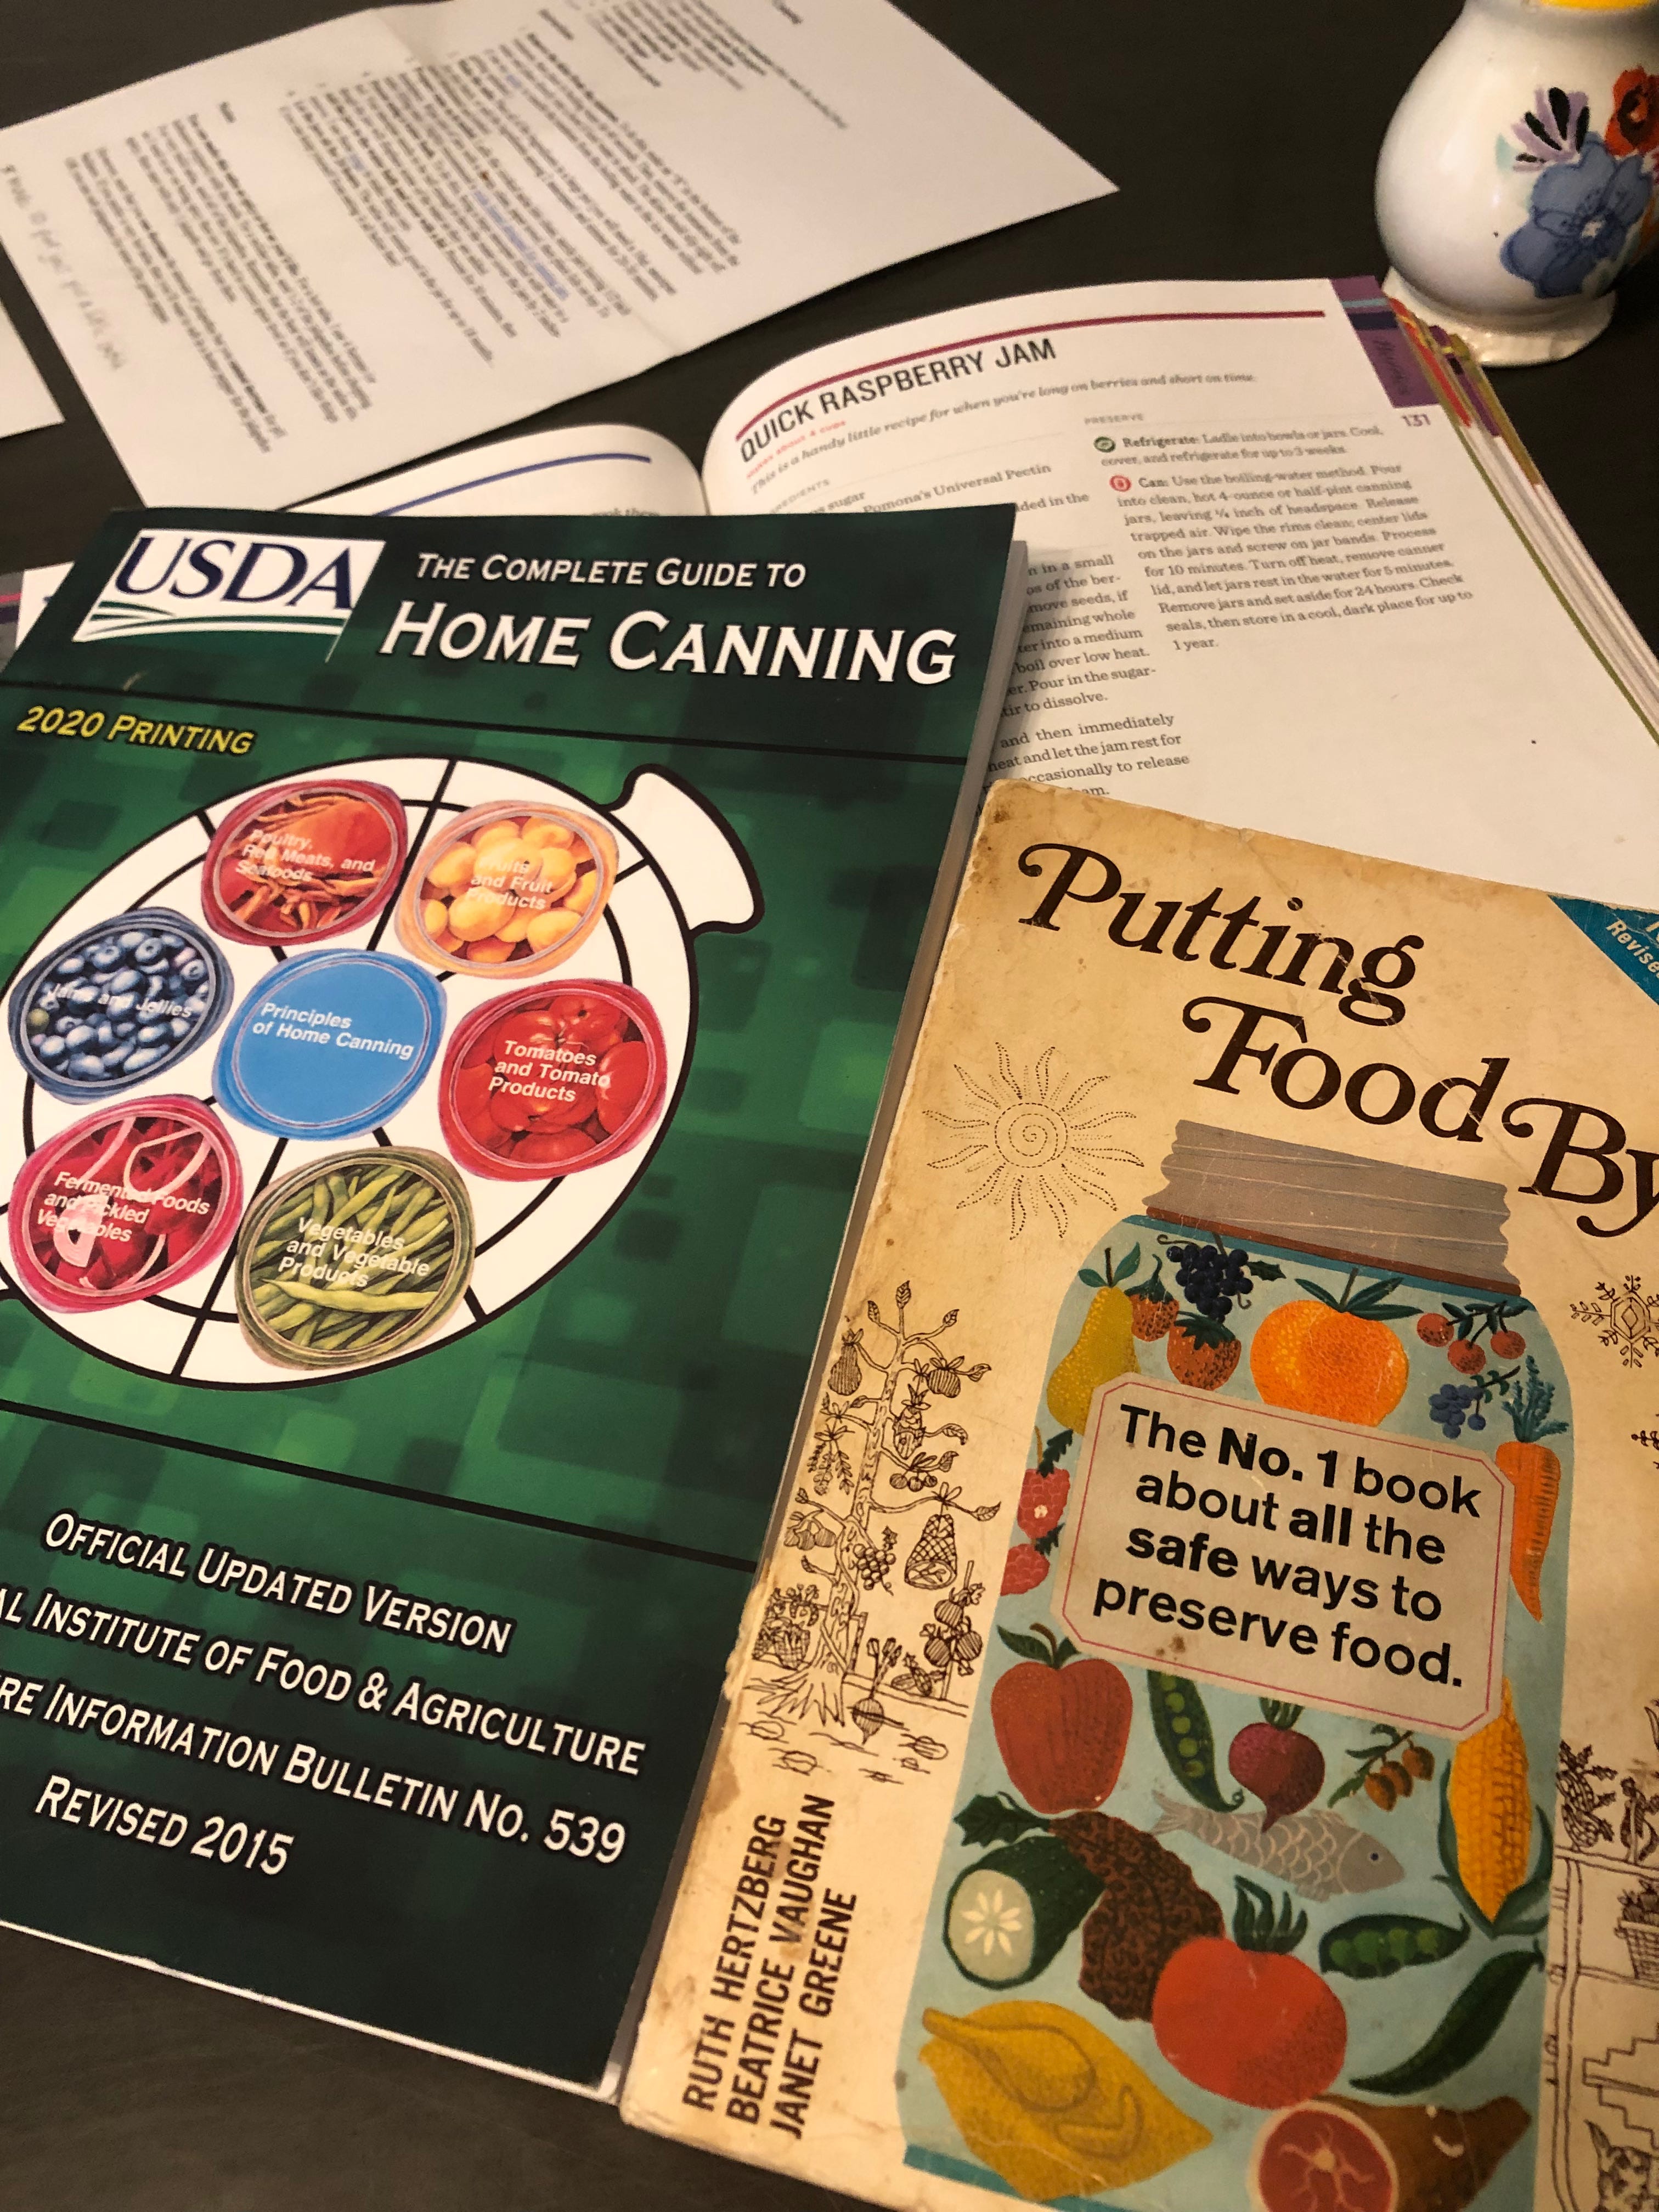
Putting Food By – Ruth Hertzberg, Beatrice Vaughan & Janet Greene
Old school canning book my mother swears by. I found it more difficult to understand when just starting out then the next two books; however, it’s very thorough and I’m glad I have a copy.
Put ‘em Up – Sherri Brooks Vinton
A nice book with fun, interesting and lots of beginner friendly recipes. Pretty pictures and pleasing to the eye. Smaller quantities, so it’s nice if you don’t have a lot of produce and if you do, double or triple the recipe!
USDA The Complete Guide to Home Canning
I have the 2020 printing. The crushed tomato recipe is great. Beginner friendly + more advanced. Quality, sound advice that’s easy to understand. Text is plain Jane, very useful.
· Sanitation is super important.
· Following tried and true recipes is key. Know when it’s okay to make substitutions & when it’s not.
· Ratios are important.
· A kitchen scale is helpful for weighing.
· Water bath canning is good for fruits, jams, jellies, salsa, dilly beans, pickled beets, etc. Acidity must be high for it to preserve properly. Canned veggies (plain) and meats are pressure canned (a different process).
· Canning tongs, canning funnel and a lid magnet are non-negotiable tools for me
· If you can use a propane fueled two burner stove outside – this is an option to create less heat in the kitchen, or do multiple batches.
· Always wipe your rims. (I keep a paper towel nearby to help me remember.)
· Adjust for elevation.
· A nice big canning pot is essential. You can also start with small batches in a stock pot.
· Use canning rings on the bottom if you don’t have a canning rack (jars shouldn’t rest directly on the pan bottom).
· Make sure the water level is high enough over the jars. This ensures proper heating.
· Water bath canning is a very safe, effective and worthwhile investment to preserve your own foods. If done right there is little chance of an issue.
· If by chance there’s mold, fizziness or bubbling, a foul odor or lid swelling on your final product—discard.
{The following Supplies and Step-by-Step Guide come from the Farmer’s Almanac website: https://www.almanac.com/water-bath-canning-beginners-guide}
If you’re starting out, you’ll need to assemble some gear.
A boiling water canner is a large deep pot usually made of aluminum. They have fitted lids and are deep enough so that you can completely submerge the jars, leaving at least 1 inch above their tops. Flat bottoms are best (to work on all cooktops). You don’t have to have a boiling water canner, but any stockpot needs to work similarly.
Also essential is a rack that fits inside the canner to keep your jars elevated above the direct heat at the bottom of the stockpot. Don’t allow jars to sit directly on the bottom of your canner because they will crack from the heat.
Canning jars—usually by Mason, Ball, or Kerr brands—come in many sizes, from four-ounce, to half-pints, pints, three-quarter quarts, and quarts, in both narrow- and wide-mouth versions. You can always reuse your jars. (Note: Even if you have access to hundreds of ornamental glass storage jars, recycled pickle, and mayonnaise, or the old-fashioned canning jars with wire bails and glass lids that are sealed with jar rubbers, do NOT use them for canning.)
Clean, rust-free, undented metal bands that fit your jars. These screw onto the threaded rims of the jars, holding the lids in place until the products are processed, sealed, and cooled. You can reuse your bands if they aren’t dented or damaged.
Single-use metal canning lids that fit your jars. You must use brand-new lids every time you process food. These lids are designed with an inner gasket that softens during processing (heating in the canner), allowing air to escape from the jar during cooling and forming an airtight seal as the jars cool.
A canning funnel. Ideally stainless steel or plastic, this wide-mouthed funnel keeps food from spilling onto the rim of the jar while you’re filling it.
A stainless-steel ladle. You may already have a nice soup ladle that will work well for filling canning jars, but if you’re buying a new one, go for a long-handled model with a pouring spout or rim.
A jar lifter. These are specialized tongs that fit around the base of the canning-jar rims to safely grasp and lift hot jars straight up and out of the canner after processing or to lower them into a canner of boiling water.
A food mill or strainer. There are many styles and sizes of these devices, designed for mashing soft, cooked foods, and sieving them to remove skins and seeds from the pulp.
A stainless-steel stockpot large enough to hold and cook a big batch of tomatoes, berries, or other products before you ladle them into the canning jars for processing in the canner.
Here’s the step-by-step process for canning produce using a water bath.
In advance: Have your supplies and produce on hand. All jars, lids, and bands should be clean, either washed in a dishwasher or washed in hot water with soap. Make sure your bands fit. Also, there shouldn’t be any nicks or cracks on the rim of the jars or the jar itself. Lids should be brand-new every time.
Your jars need to be hot prior to being filled with hot ingredients and placed in a hot canner. Put the clean jars in a separate large pot (not the canner), cover with water (fully immersed), and boil the water for 10 minutes. Note: The bands and lids do not need to be heated. Lids on the market today no longer need the seal to be heat-activated if they are new and clean.
Separately, heat the water-bath canning pot. Fill halfway full with water. Turn on the heat and let the water simmer (180°F). If you have a jar rack, hang it inside the canning pot. Keep the water simmering on your stovetop until Step 8, below, when you have filled each jar with the prepared food, and put the jars immediately into the canner.
Remove and dry the jars. Then, while they’re still heated, fill the jars with the prepared recipe. Use a wide-mouth funnel, and ladle the food into the jar. Leave a ¼- or 1/2-inch headspace at the top.
Gently use a clean spatula or plastic canning wand to swirl along the inside of the jar to release trapped air bubbles.
Wipe the rims of jars with a clean, damp cloth and remove any food residue. Put the lid on each jar and then apply the band. Screw the jar until finger-tight but not too tight.
Using the jar lifter, put sealed jars in the canner on the rack. Don’t allow the jars to touch each other. Jars must be covered by water—about 1 to 2 inches of water. Add more hot water from a separate kettle, if needed.
Turn up the heat to get water in canner to boil. Start timer when water starts boiling. Every recipe is different, but you’ll usually boil the filled jars for about 10 minutes.
Once finished, shut off the heat and remove the canner lid, allowing steam to escape away from you. Let jars rest in the canner for 5 to 10 minutes.
Remove jars using the jar lifter from canner and stand on a towel or rack, not touching. As they cool, you should hear the jars “ping” which means the jars have properly sealed.
Leave jars undisturbed for 12 to 24 hours to cool. DO NOT retighten bands, as this may interfere with the sealing process.
After the jars are completely cool, double-check the seals. Unscrew the bands and press down gently on the center of each lid. If you don’t feel any give, the jar has properly sealed. If the lid springs back up, the lid doesn’t seal, so put the jar in the fridge and eat within 2 weeks.”
Okay, normally I’m very good about citing my sources for info and recipes, etc. as it’s important to give credit where credit is due. However, I didn’t write the source when I printed out some of these recipes to try some years. However, they are such good recipes for the beginning canner, I really want to share them! I’ll always cite my sources, and when I don’t, I’ll let you know. Like with this cowboy candy recipe. Sweet and spicy, so yummy. Great on eggs, burritos, rice…so many things!
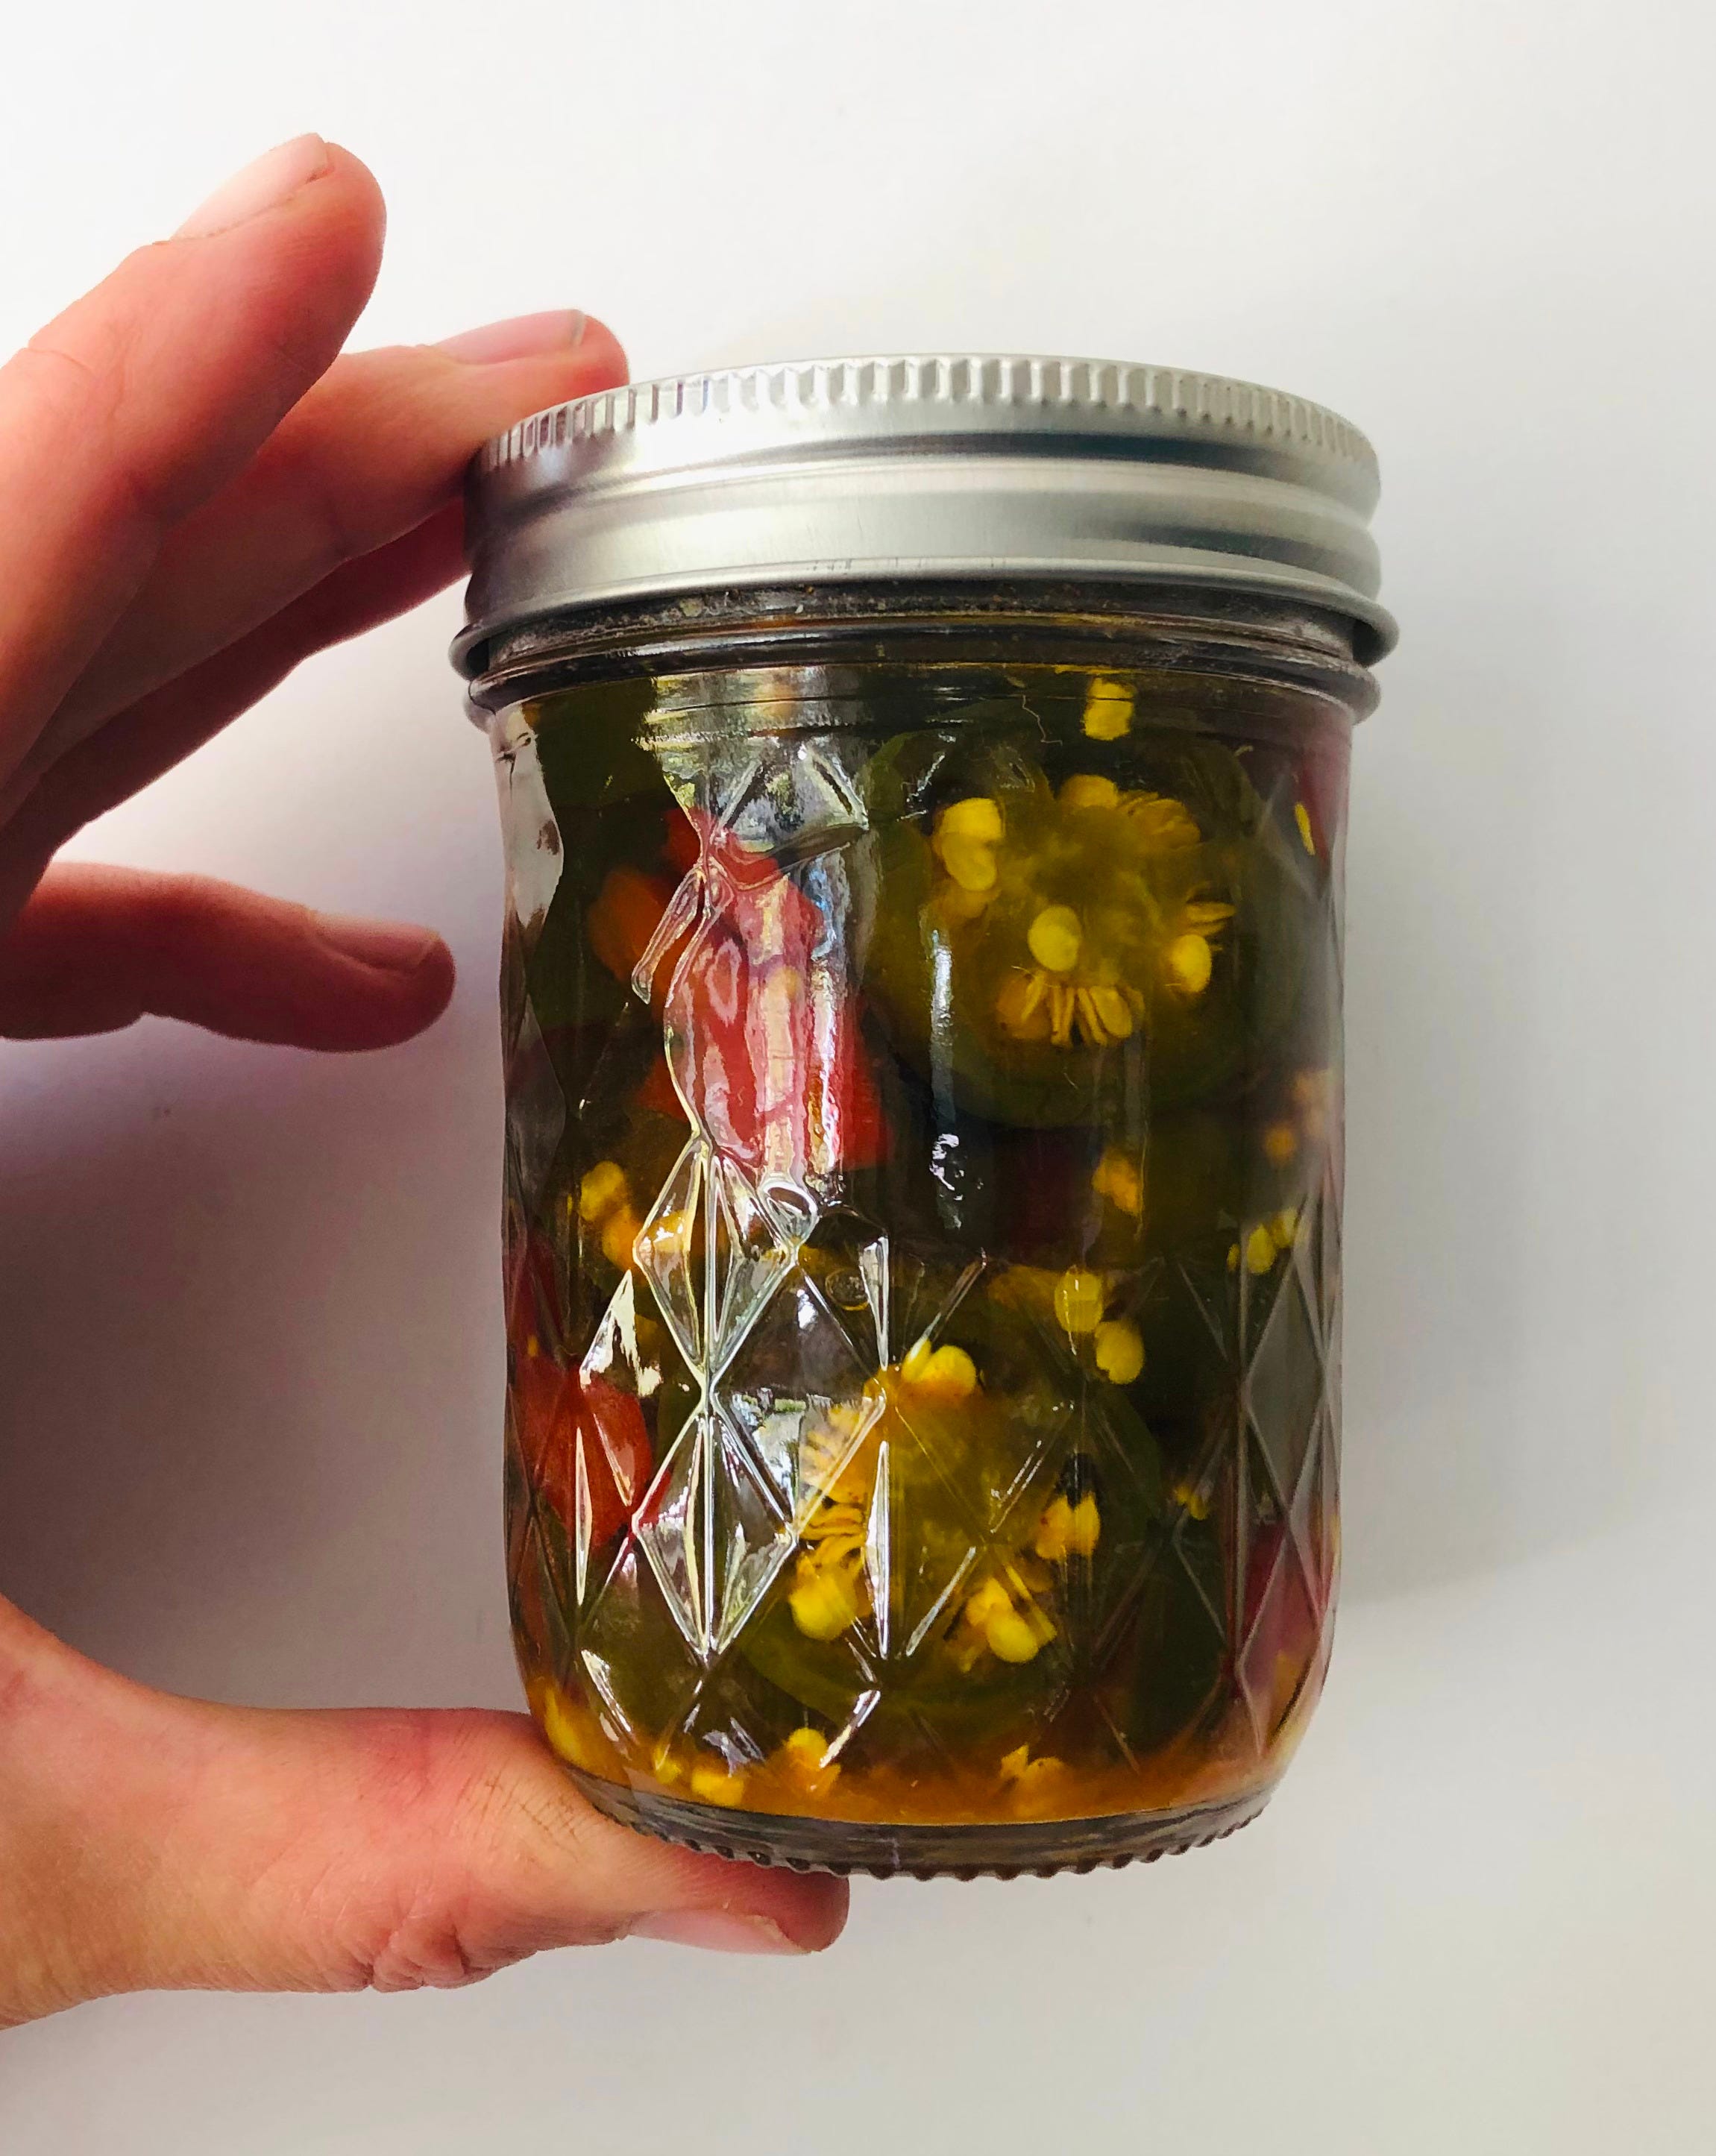
(Original author unknown)
Comments
Nothing yet. Say the first thing.
Sign in to join the conversation.