Welcome to Omarchy!
Legacy: The latest release of Omarchy, called Quattro, has its own manual at https://omarchy.org/manual/ — this is the legacy manual for Omarchy v3.
Omarchy is an omakase Linux distribution based on Arch and the tiling window manager Hyprland. It ships with everything a modern software developer needs to be productive immediately from Neovim (btw) to Spotify, Chromium to Typora, and Alacritty to LibreOffice. Hell, even Zoom is there!
This isn't just a grab bag of preinstalled packages, though. It's a complete system designed with both aesthetics and productivity in mind. Because a beautiful system is a motivating system, and productivity has always been downstream from motivation. There's zero bloat here: Just everything I use.
It's tru
Getting Started
Omarchy is installed using an ISO. It's designed for a dedicated drive, so dual-booting requires two disks in your machine (unless you do a manual install to work around this). The installation will wipe the selected drive and use full-disk encryption, so be sure to take a backup before using an existing drive!
Download the Omarchy ISO first, put it on a USB stick (use balenaEtcher on Mac/Windows or caligula on Linux), and boot off the stick.
You must turn off Secure Boot and/or TPM in the BIOS. You have to turn these off to be able to install Omarchy. They're Microsoft security schemes meant for Windows and Microsoft-affiliated Linux distributions.
Then answer the configuration questions, and confirm them like this:
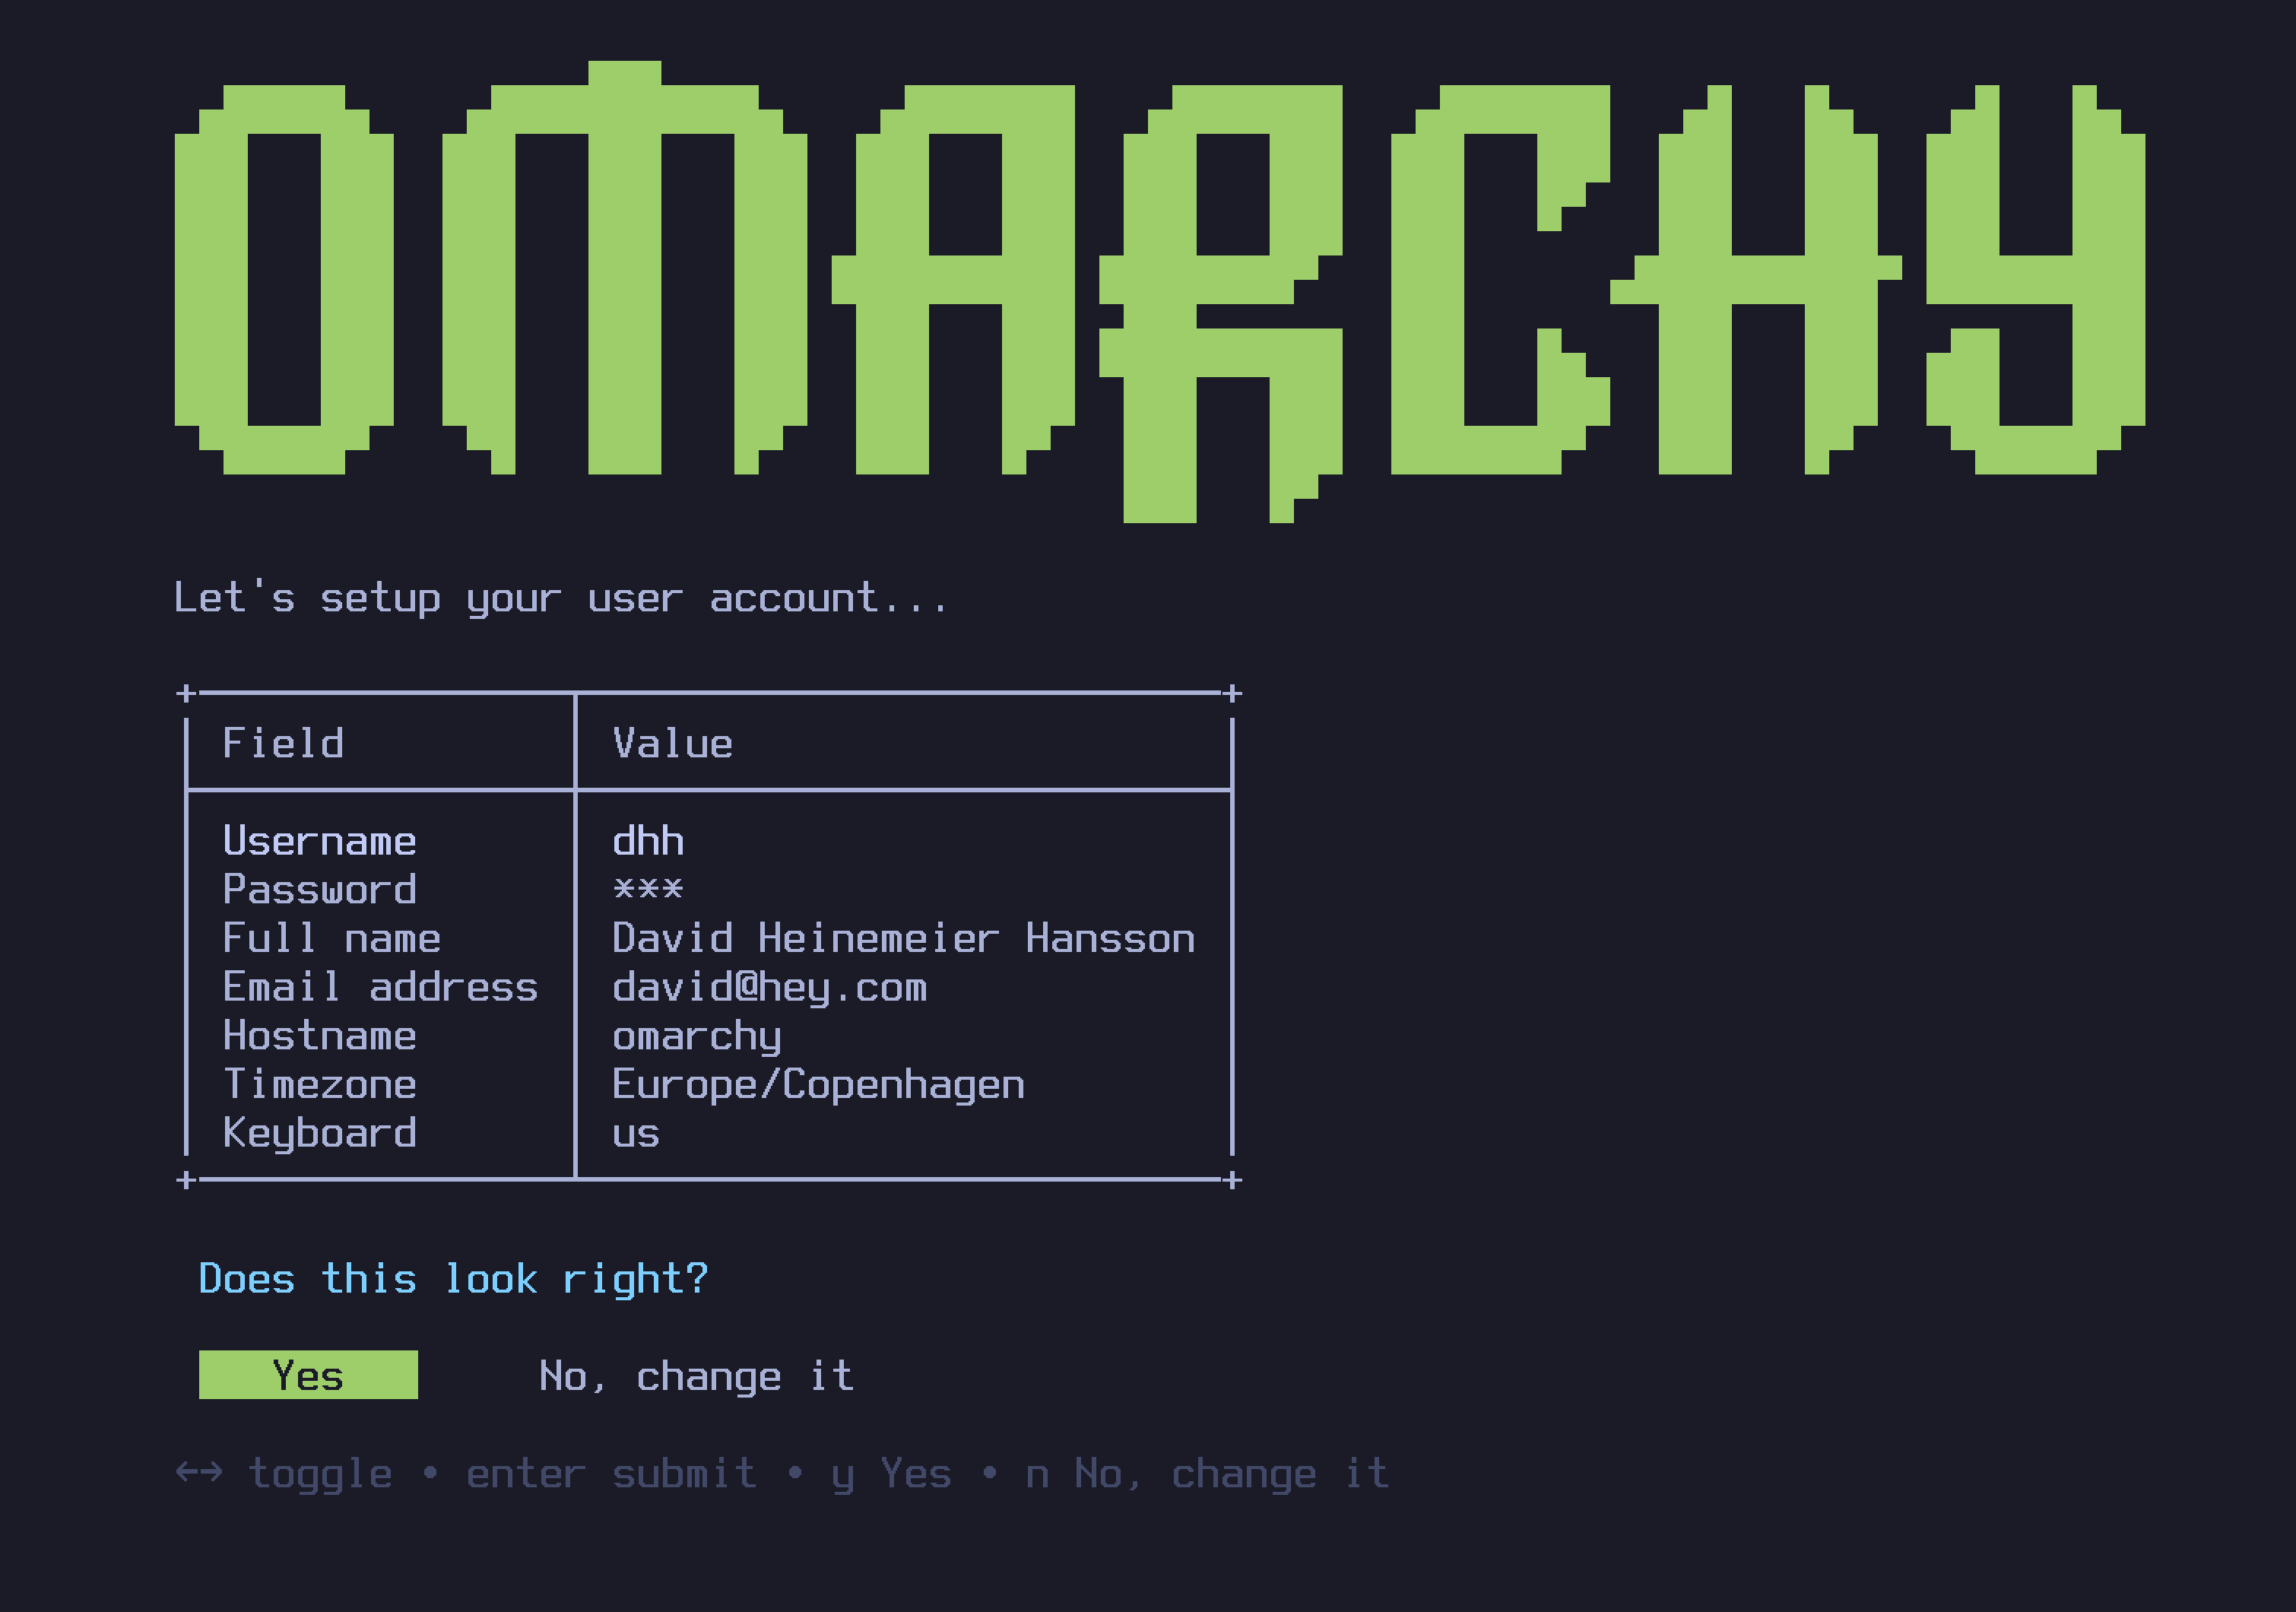
Then select a drive for your installation, and sit back and watch
Navigation
Everything in Omarchy happens via the keyboard — EVERYTHING! When the system first starts, you literally can't do a thing with the mouse alone. But you can hit Super + Space to reveal the application launcher and Super + Alt + Space to open the Omarchy Menu. These two commands allow you to do just about everything.
But the application launcher is not intended to be the main way to operate the system most of the time. We can get faster than that! All the most important applications are bound directly to individual hotkeys. You start the terminal with Super + Return and a browser with Super + Shift + Return. Try doing one after the other, and you'll see the magic of Hyprland's tiling in action:

You can then hit Super + J to stack them horizontally instead of vertically:

Hit Super + J again to return them to horizontal positions. Then try `Super +
Themes
Omarchy comes with nineteen beautiful themes. You can select between them via Style > Theme in the Omarchy Menu (Super + Alt + Space) or hop directly to the theme selector using Super + Ctrl + Shift + Space.
Each theme styles the desktop, terminal, neovim, activity screen (btop), notifications (mako), top bar (waybar), application launcher (walker), and the lock screen (hyprlock). (For Obsidian, you must manually select the Omarchy theme via Appearance > Themes inside the app).
Themes have a set of background images that you can pick between using Super + Ctrl + Space.
You can find even more themes on the extra themes page or even make your own theme.
 Tokyo Night
 Catppuccin
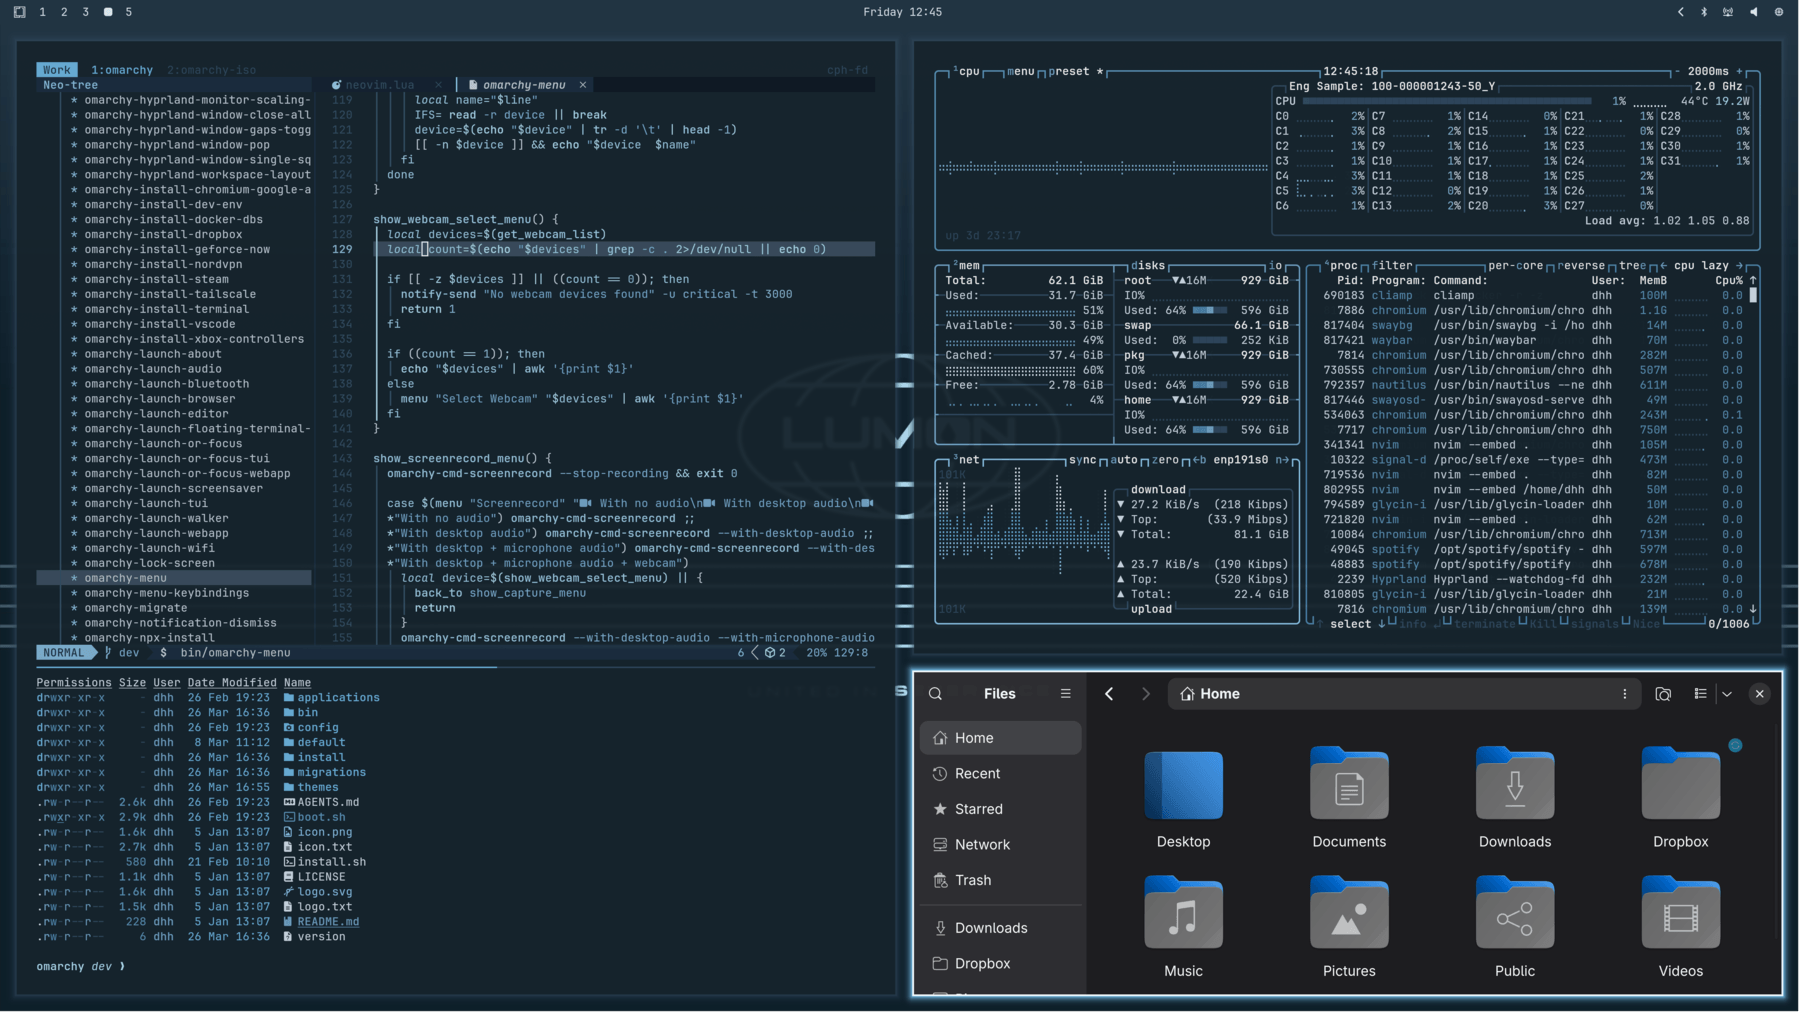 Lumon
Lumon
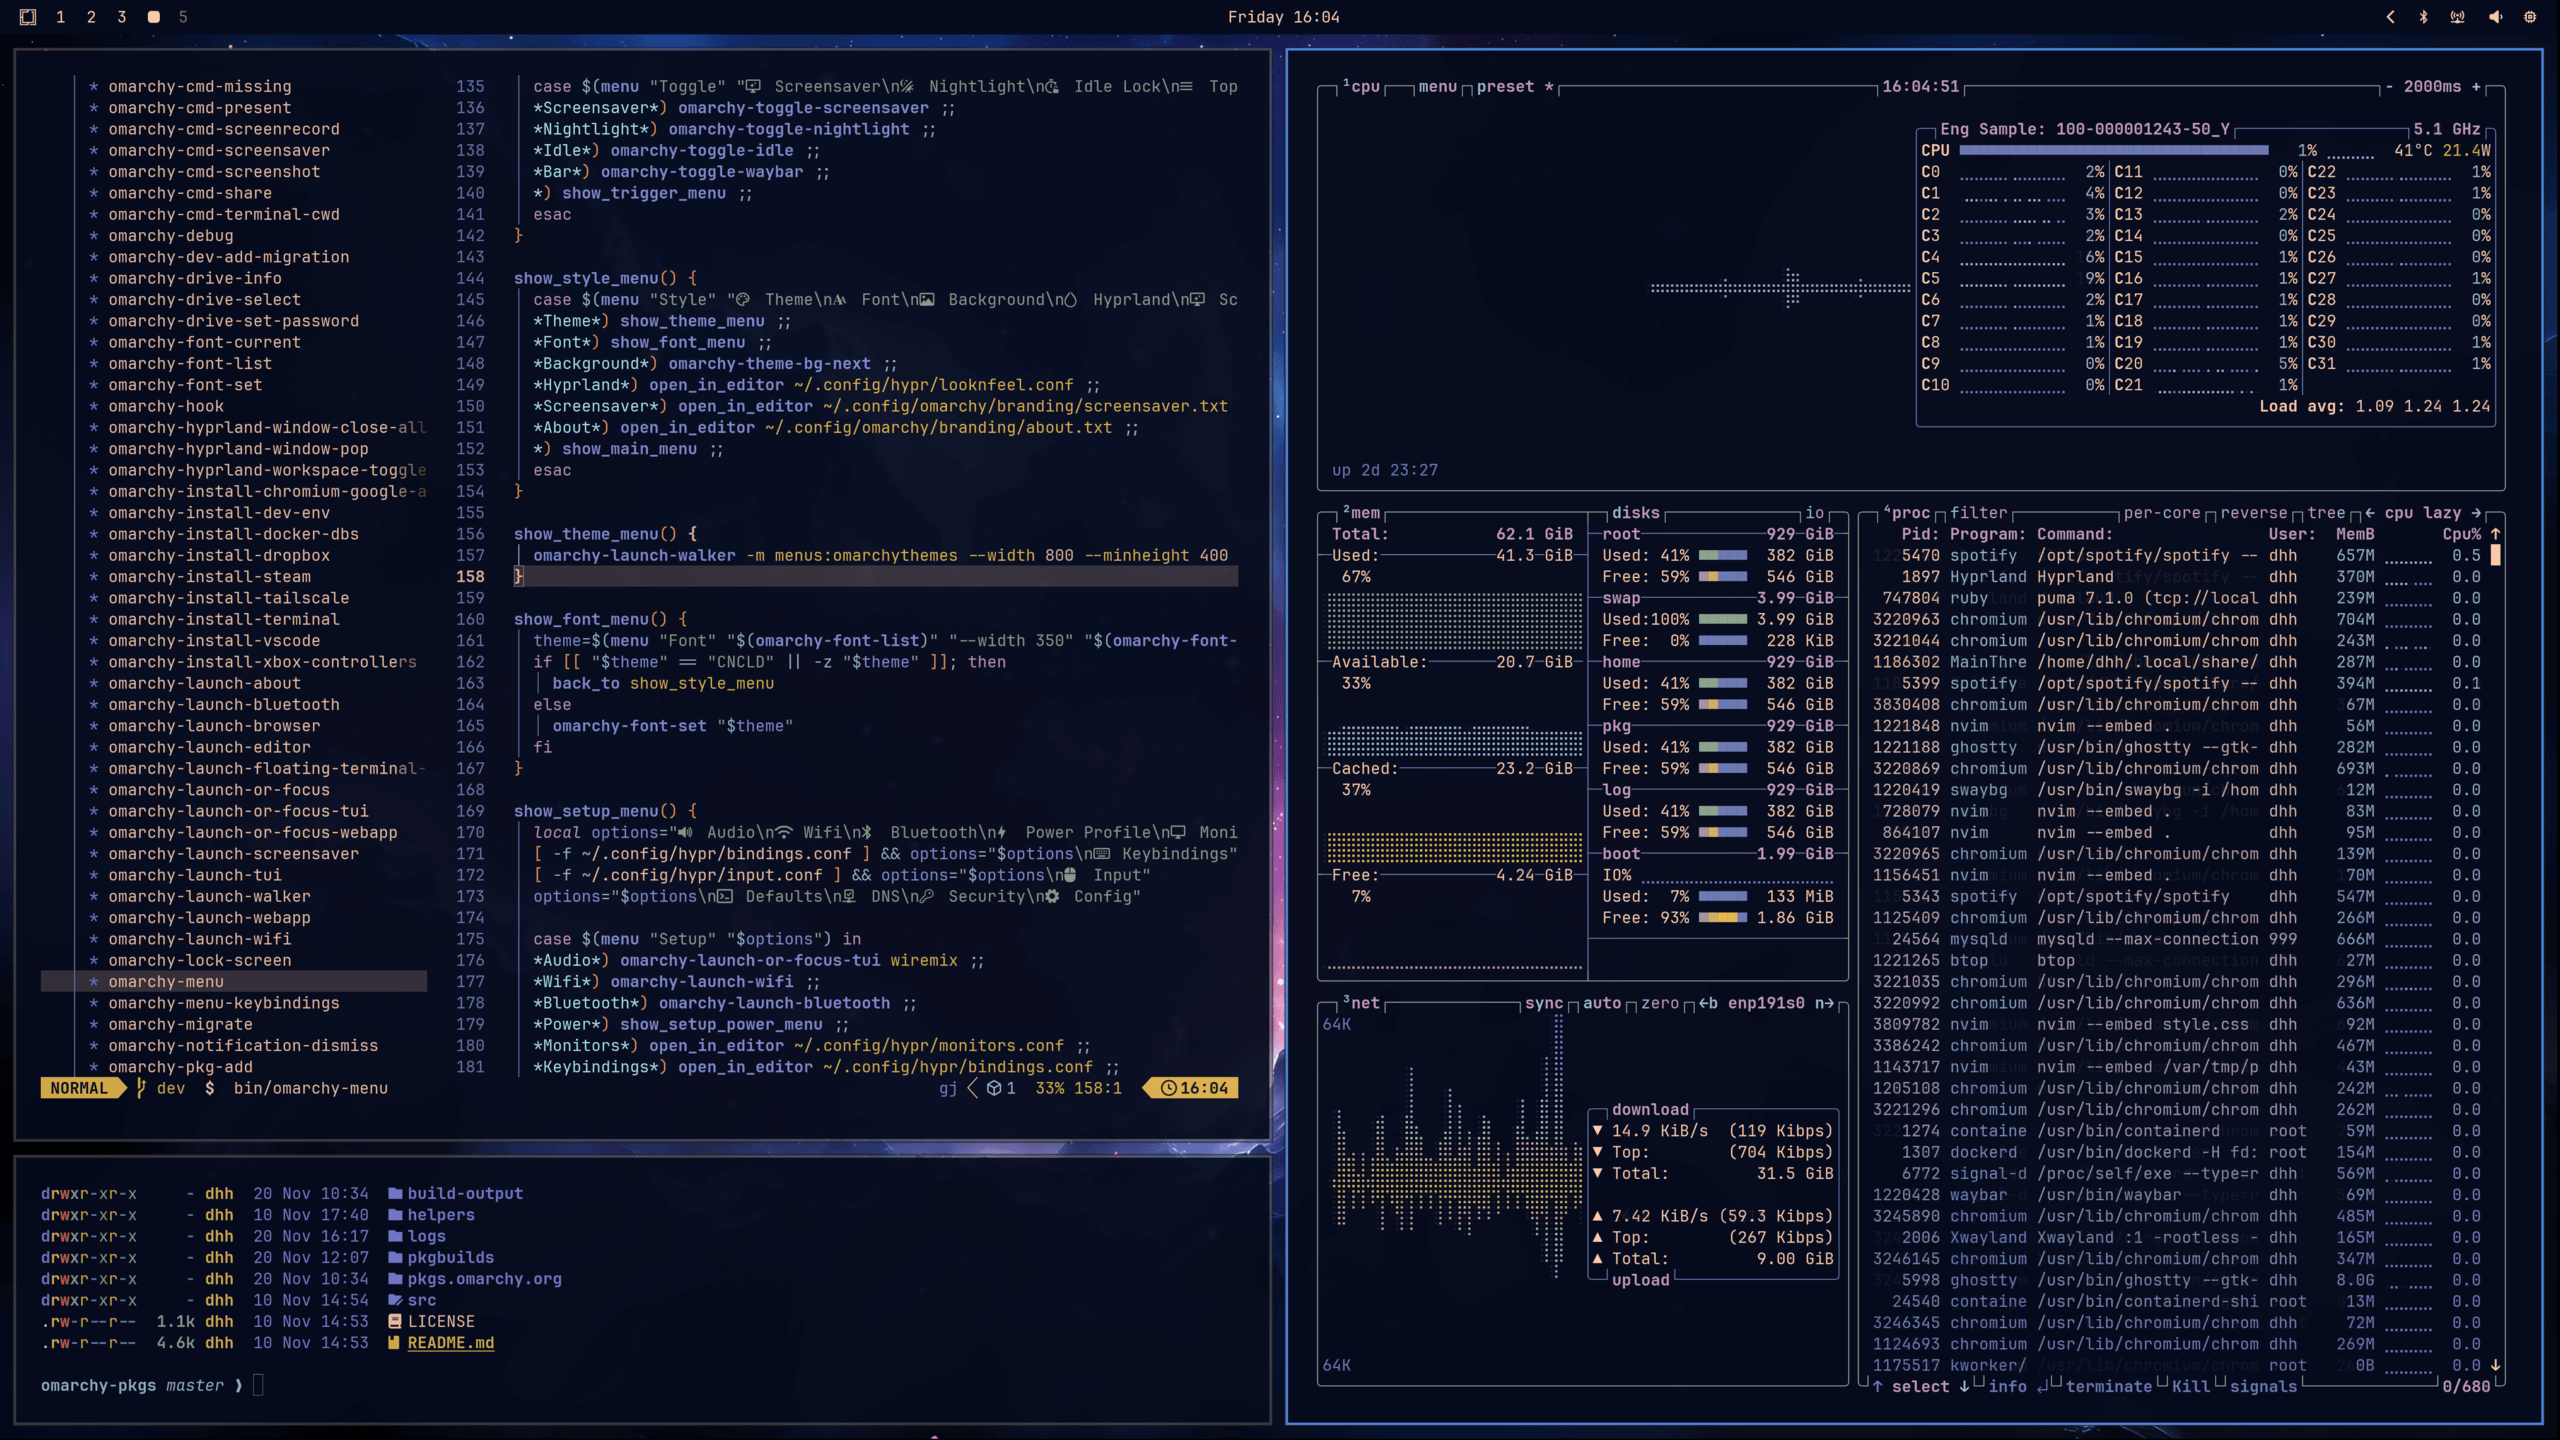 Ethereal
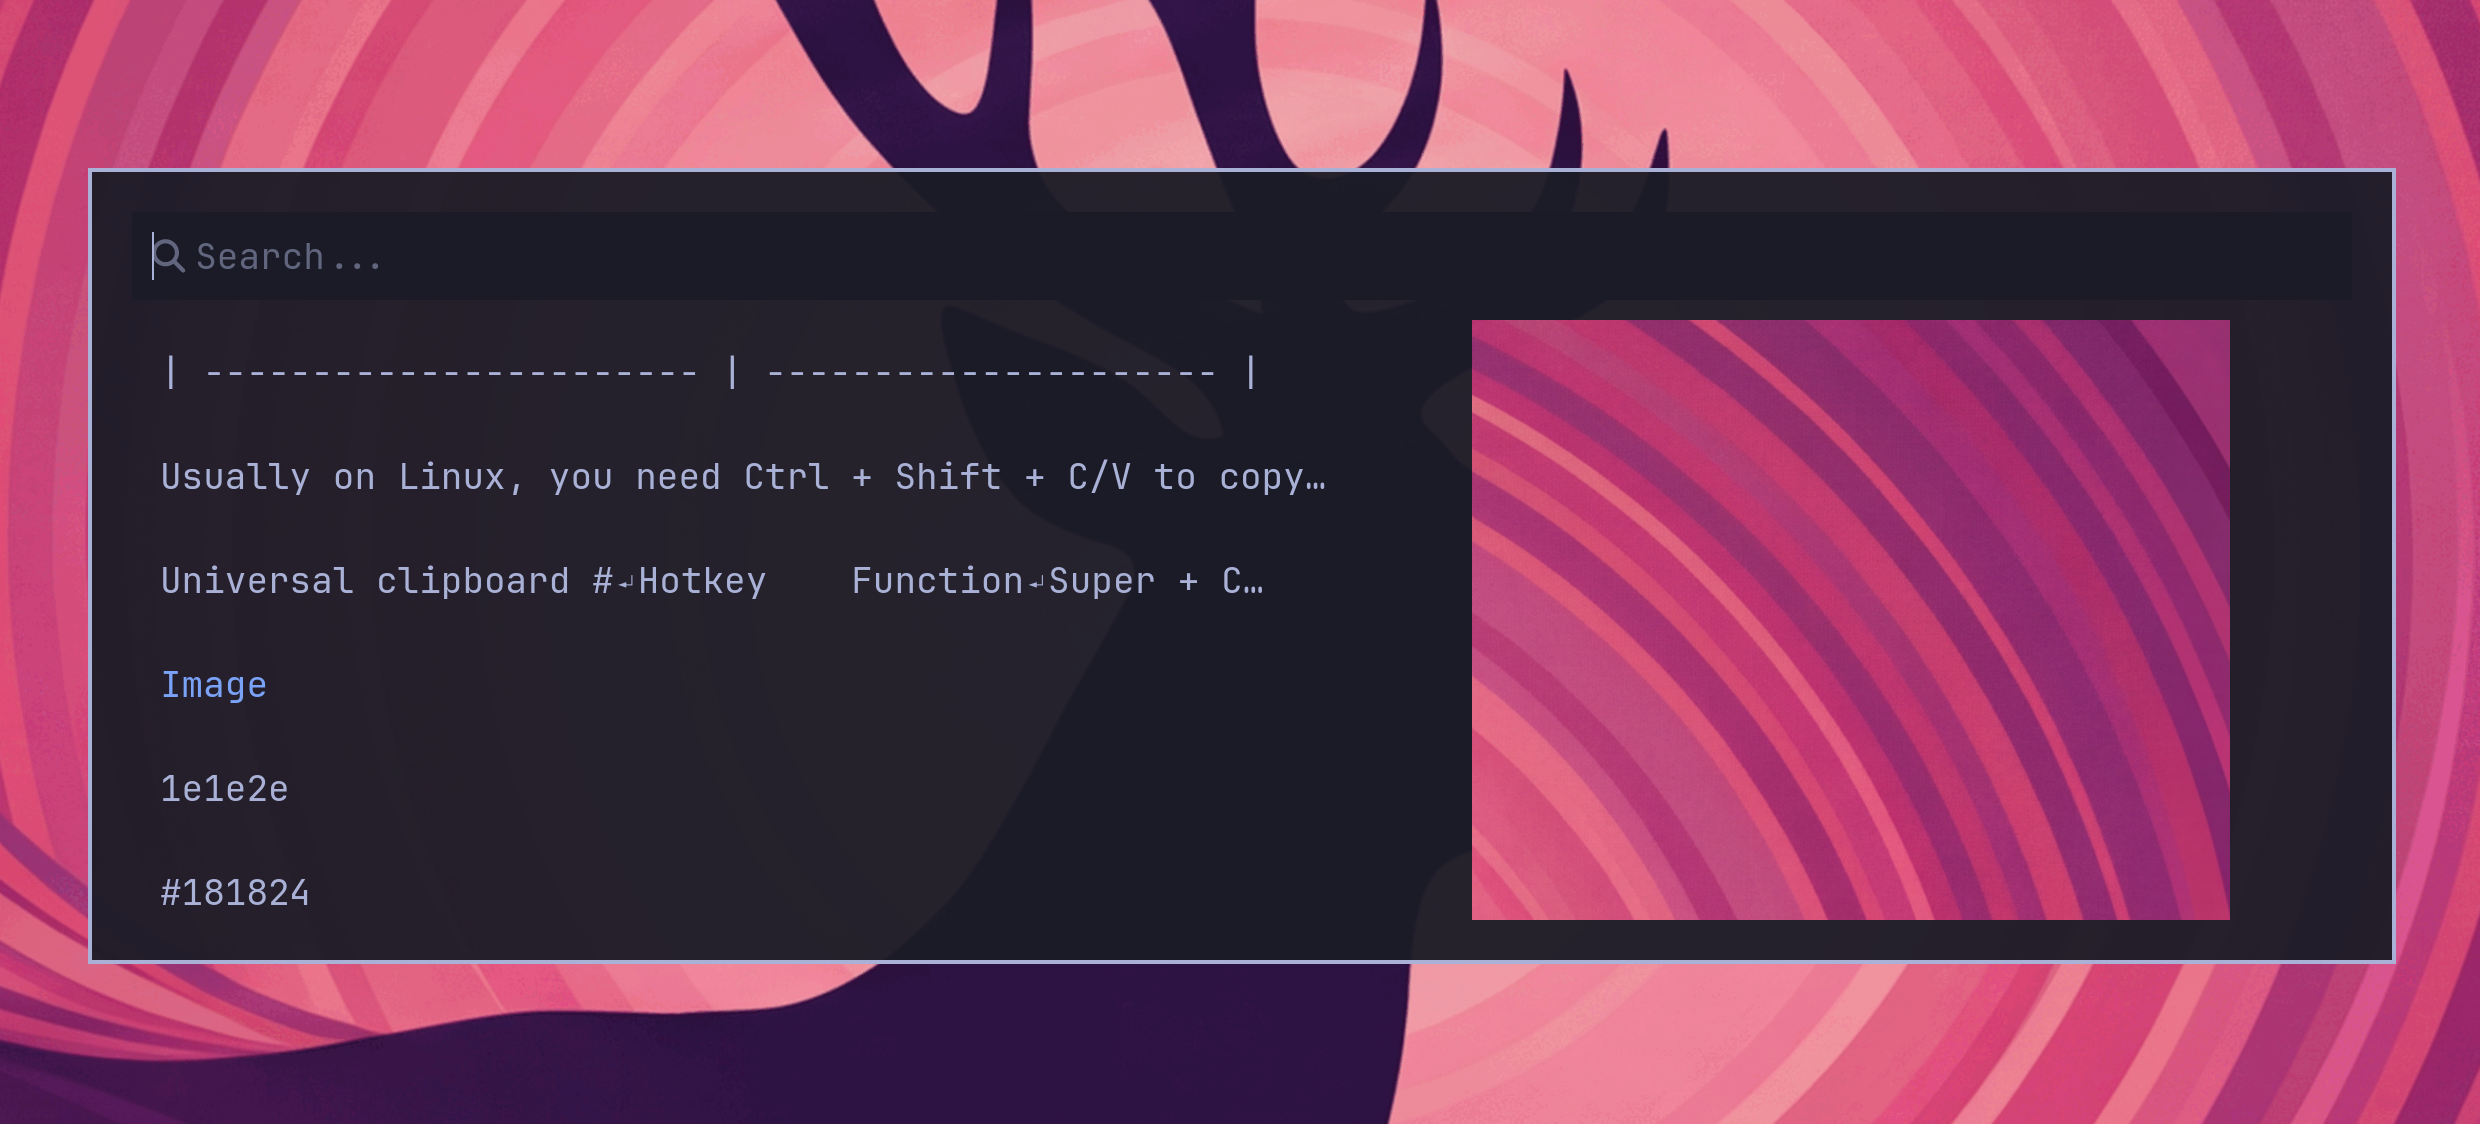
You can also search th
Reminders
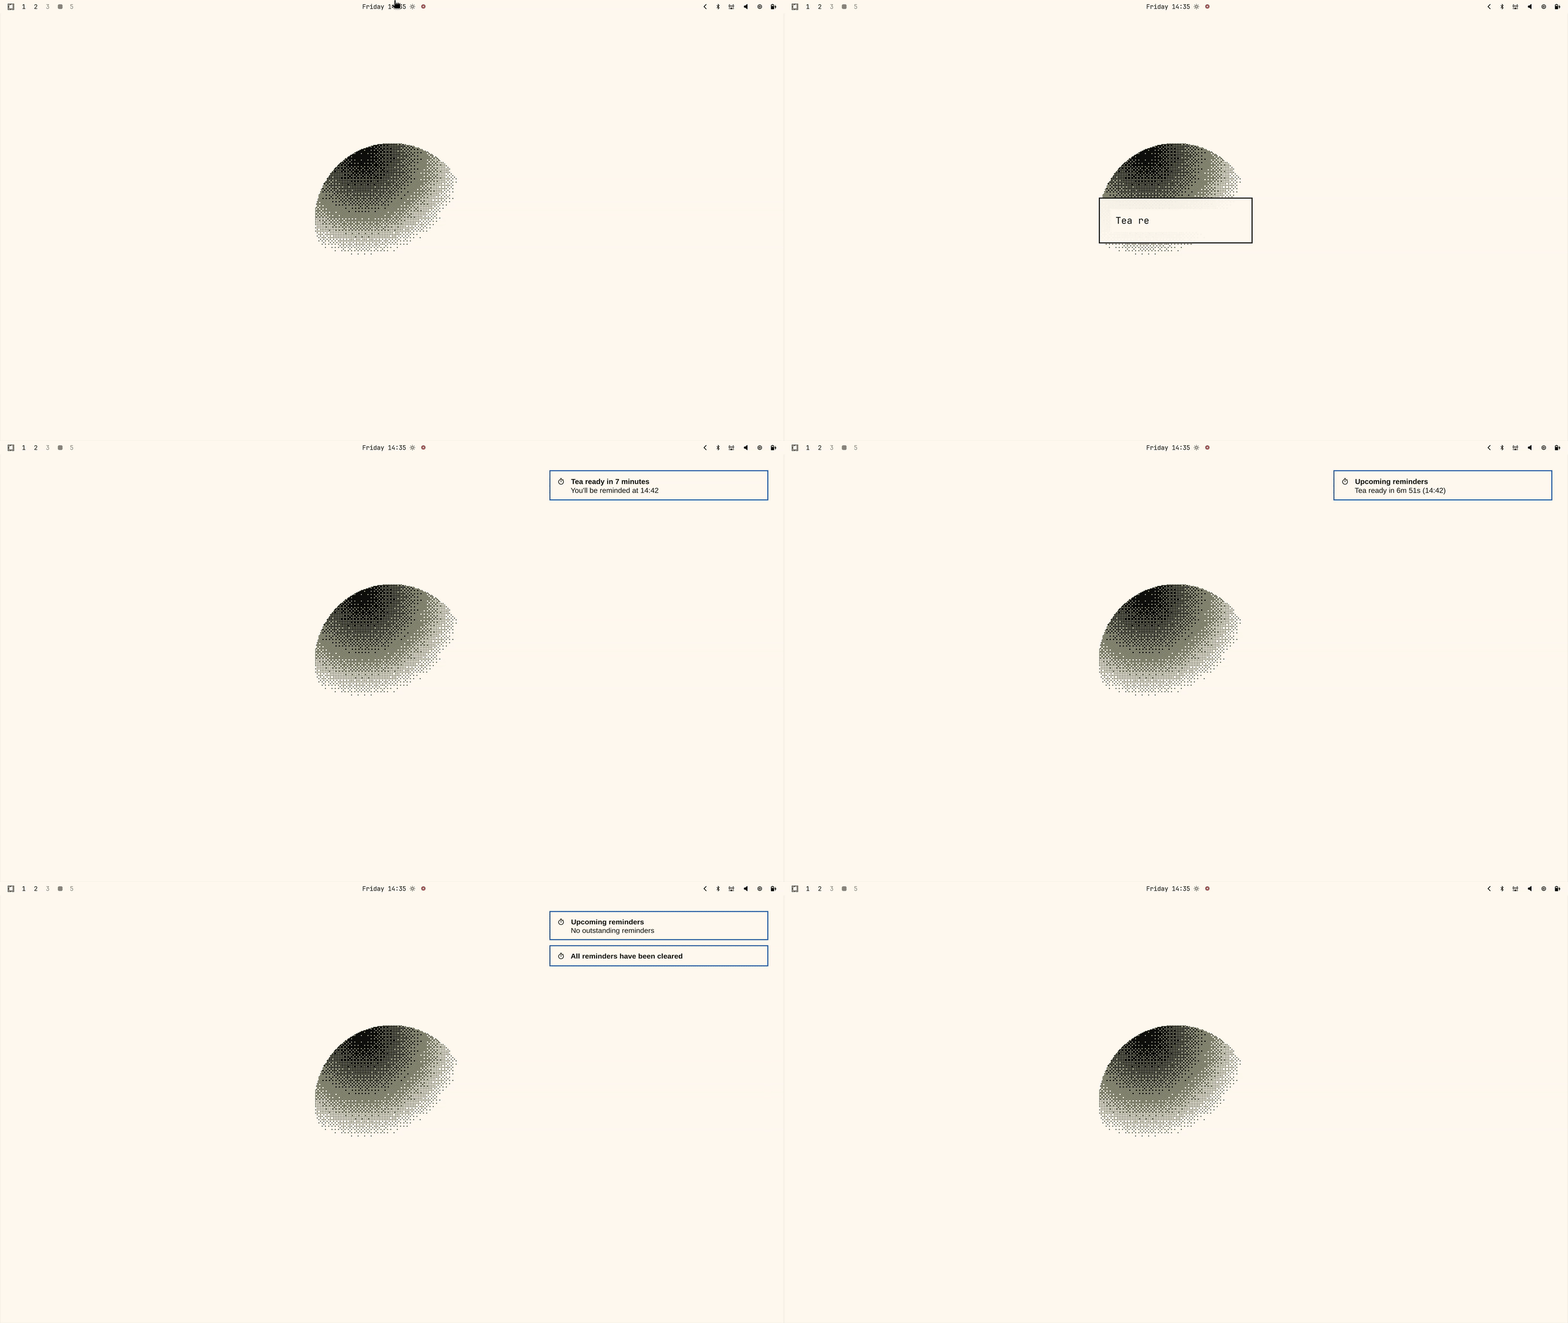
Omarchy has a built-in way to set simple reminders based on a countdown timer and with a message. You can do this via Super + Ctrl + R, seeing all the ones set via Super + Ctrl + Alt + R, and clearing all via Super + Ctrl + Shift + R. Everything also accessible via Trigger > Reminder. You can also use the cli with omarchy reminder 7 'Tea ready'.
Notices
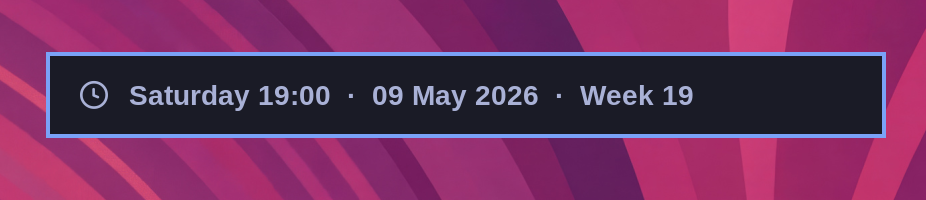
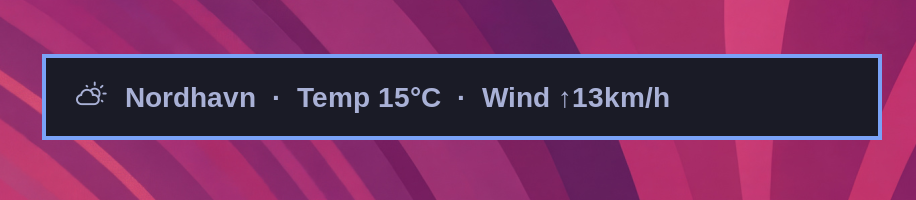
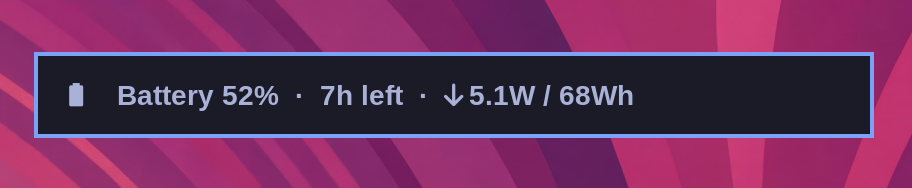
You can quickly access the date and time, battery status, and current weather using the hotkey notices.
Date & Time
Super + Ctrl + At + T
Weather
Super + Ctrl + Alt + W
Battery
Super + Ctrl + Alt + B
Open Text Extraction & Dictation
Text Extraction & Dictation
Text Extraction
Hit Super + Ctrl + PrtScr to select a region on the screen for text extraction. The tesseract open source OCR model will then quickly convert that selection into text and place it on the clipboard. Then you just hit Super + V to paste.
This is very helpful for grabbing addresses out of image footers or phone numbers embedded in website headlines.

Dictation
Omarchy offers AI dictation via Voxtype. You install it via Install > AI > Dictation through the Omarchy menu. By default, it'll load a base English model that takes up 150MB. But you can tweak which model you'd like to use by running voxtype setup model in the terminal. And you can tweak all the settings via ~/.config/voxtype/config.toml.
Once installed, you dictate by holding down F9 or by toggling with Super + Ctrl + X, and the dictated text will appear in the focused input area.
Omarchy CLI
Omarchy is usually controlled through the hotkeys and the Omarchy menu (Super + Alt + Space). But you can also control it through the omarchy CLI. This is particularly helpful when you're having an AI agent work with you on customization or configuration.
The CLI has access to all the internal tooling that is used both via the menu and otherwise. You can see everything that's available by running omarchy in the terminal.
It looks something like this:
~ ❯ omarchy
Omarchy command center
Usage:
  omarchy <command> [args...]
  omarchy commands [--all] [--json] [--check]
  omarchy <group> --help
  omarchy <group> <command> --help
Common commands:
  omarchy update              Update Omarchy and system packages
  omarchy theme list          List available themes
  omarchy theme set <name>    Apply a theme
  omarchy font list           List available fonts
  omarchy screenshot          Take a screenshot
  omarchy debug               Print debugging information
Terminal
Alacritty is the default terminal for Omarchy. It's fast, beautiful, and compatible with even old computers. It does not, however, support native tabs, splits, or image rendering.
If you use Tmux, you may not mind, but if not, we fully support Ghostty, Foot, and Kitty as options as well. Pick your preference under Install > Terminal in the Omarchy menu.
You start a new terminal using Super + Return. (This binding will automatically point to whichever Terminal you've installed via Install > Terminal.)
Tmux
Tmux provides a consistent, programmable interface for panes, windows (aka tabs), and resumable sessions regardless of your terminal. It even works on remote hosts, so when you're SSH'ing into a server, you can use the same approach.
You start a new Tmux session in a fresh terminal using Super + Alt + Return, and because Tmux is a persistent process, you can resume your session even if you close that terminal. Just hit Ctrl + Space (c
Neovim
Neovim is a modern implementation of the vi editor created by Bill Joy all the way back in 1976. It's a modal editor where insert mode and command mode are separated, and it's a bit of a superpower once you learn even just a subset of the incredibly deep key command set. But it's also quite the learning curve!
If you're totally new to vim-style editing, I recommend you checkout ThePrimeagen's Vim As Your Editor series on YouTube. That'll teach you the basics. Just know that unlike more similar mainstream editors, it's going to take you longer to get basic proficiency with vim. But once you do, the payoff is also larger.
Now Neovim is basically infinitely configurable. If you really want to go nuts, you can create your own Neovim configuration from scratch. There's a great course from [Typecraft on setting up Neovim from scratch](http
AI
Omarchy ships with OpenCode and Claude Code as the default agent harnesses for programmers. OpenCode lets you use models from all the major commercial providers as well as the rapidly improving open-weight models.
The best way to use OpenCode is by going to the directory you're going to work on in the terminal, then invoke the c alias to start OpenCode within that directory. Claude Code let's you use Anthropic's models with their proprietary subscriptions, and can be started in danger mode using the cx alias.
Alternative agent CLIs
Beyond the default c (OpenCode) and cx (Claude Code) aliases, Omarchy ships pre-wired lazy-loaded launchers for every major coding-agent CLI. The launchers themselves are tiny shell stubs in ~/.local/bin/, so on first run, each one fetches its npm package through npx against a mise-managed node@latest, so nothing is downloaded until you actually invoke it. Run any of these and authen
Development Tools
Alternative Editors
Omarchy ships with Neovim by default, but if you'd like something a bit more mainstream and familiar, you can run the Omarchy Menu (Super + Alt + Space) and see the options under Install > Editor. We have VSCode, Cursor, Zed, Sublime Text, and Helix listed there. If you don't find what you're looking for, checkout Install > Package, and see if it isn't in an Arch package (and if not, try Install > AUR to check the AUR).
Theme matching is offered for VSCode, Cursor, VSCodium, Helix, and Zed.
You can set the system-wide default editor under Setup > Defaults > Editor.
Environment
Omarchy supports setting up a whole host of development environments through the Install > Development section of the Omarchy Menu (Super + Alt + Space). You'll of course find Ruby on Rails, but also all three major runtimes for JavaScript (Node.js, bun, Deno), as well as popular PHP frameworks like Laravel and Symfony. Oh, a
Shell Tools
In addition to the standard Linux tools, Omarchy also ships with a bunch of enhanced shell tools. Here are the key ones.
fzf
fzf gives you fuzzy finding of files via the ff alias. Go to any directory, type ff, and you'll be able to fuzzy find your way to any file in that tree, while seeing a preview of the files you're narrowing down on the right-hand side.
You can use Ctrl + R to use fzf to fuzzy find through your command history.
This tool is also used by Neovim when you type Space Space.
The full manual can be found via man fzf.
Zoxide
Zoxide is a replacement for cd. It remembers the directories you've been in, so you can more easily jump to them next time. Say you do cd ~/.local/share/omarchy once. Next time, you can just do cd omarchy (or even just cd oma), and Zoxide will take you directly there.
The full manual can be found via man zoxide.
ripgrep
[ripgre
Shell Functions
Omarchy comes with a set of shell functions to simplify common tasks and encapsulate convoluted parameter calls.
Compression
compress [file/dir]: Create a tar.gz archive from the file/dir.decompress [file.tar.gz]: Expand a tar.gz file.
Drives
-
iso2sd [image.iso]: Create a bootable drive on an SD card using the referenced iso file and picking the drive interactively. format-drive: Select an entire disk to format with a single exFAT partition (which works on Windows and macOS too). Be careful!
SSH Portforwarding
Ideal for doing web development with localhost secure-context privileges against a remote box.
fip: Forward one or more ports from a remote host to localhost via SSH.dip: Disconnect one or more forwarded ports.lip: List all active SSH port forwards.
Say you start a dev server on port 3000 on a machine accessible as nyc-dev, then you can run fip nyc-dev 3000 to forward that port, so localhost:3000 actually re
TUIs
Lazygit
Lazygit is a delightful alternative to something like the GitHub Desktop application, and it runs inside the terminal.
You can run it directly, by going to any directory managed by git and running lazygit. Or you can run it inside Neovim where it can be started with Space G G.
You hop between the different panes using Tab. In the Files pane, you select files for staging using Space, and then you can create a new commit using c. You can see all the commands available using ?.
Lazydocker
Lazydocker is made in the same spirit like Lazygit, and also gives you a terminal interface for managing your containers and images.
You can start it with Super + Shift + D.
You stop a container using s or start/restart it using r. See all commands using ?.
Btop
Btop is a beautiful resource manager that shows memory, CPU, di
GUIs
Obsidian
Obsidian is a free and highly extensible note taking application that uses simple Markdown files for storage.
Obsidian is free for all purposes, including personal, commercial, and non-profit use.
Obsidian also offers a commercial add-on for syncing with mobile apps on iOS and Android. (https://obsidian.md/pricing).
You start Obsidian with Super + Shift + O. To use theme syncing, you must select the Omarchy theme under settings.
Pinta
Pinta is a basic image editing tool that's great for cropping, resizing, and other basic manipulations. Just don't expect a Photoshop alternative. But it's still got a Magic Wand and layers!
You start Pinta via the application launcher (Super + Space).
LocalSend
LocalSend lets you send files to other devices on the same network running the app, like Apple's AirDrop. It's cross-platform, though, so you can se
Commercial apps/services
Omarchy is mostly focused on providing free, open source software, but it's not religious about it. Sometimes the best solution is a commercial offering, and that's just fine. Here are some of the options we provide an easy installation for.
1Password
Keeping your passwords in a password manager is a best practice. Doubly so if you're working with a team. And 1password is a great solution, which also comes with a command line tool for integrating key lookups in scripts.
You start 1Password with Super + Shift + /.
Typora
Typora is a minimal, distraction-free writing tool in the same spirit as iA Writer for the Mac and Windows. Like Obsidian, it uses Markdown for formatting, but in a way that's focused on writing individual pieces or essays and very little else.
Best used in full screen mode (F11) for that totally immersive nothing-but-words look.
It comes with a 15-day free trial, and is then a $15 one-ti
Web Apps
You can add your own web apps using Install > Web App in the Omarchy menu (Super + Alt + Space). It'll ask you for the app name, app URL, and the icon URL, if it can't retrieve it via favicon. You can get great PNG icons for many popular web apps on Dashboard Icons.
They'll then be accessible through the app launcher (Super + Space), and use the beautiful frameless web-app window.
If you wish to remove a web app, just go to Remove > Web App in the Omarchy menu.
It's best if you log into all your accounts using a regular browser before using the web app shortcuts. The thin wrapper frame doesn't work well with 1password, so just easier to be logged in directly first.
All the keyboard hotkeys for these web apps can be changed in ~/.config/hypr/bindings.conf.
When you're in a web app, you can copy the current URL to the clipboard using Shift + Alt + L.
By default, Omarchy already ships with an assortment of default apps:
HEY
[HEY](
Gaming
Omarchy isn't just for pRoDUcTiVItY, it's also for having fun, and what's more fun than gaming? Omarchy ships with a whole suite of gaming options — Steam and RetroArch for native and retro play, Lutris and Heroic for non-Steam stores, Moonlight for PC streaming, Xbox Cloud Gaming + NVIDIA GeForce NOW for cloud, plus the evergreen Minecraft.
Thanks to Valve's incredible work on the proton compatibility layer, there are now tens of thousands of playable modern games on Linux. Oh, and did you know that the Steam Deck actually runs Arch!
All gaming installers live under Install > Gaming in the Omarchy menu (Super + Alt + Space). If you ever want to undo one, use Install > Gaming > Remove.
Steam
Install Steam by selecting Install > Gaming > Steam from the Omarchy menu (Super + Alt + Space).
After you've installed it, you'll be able to l
Filling out PDFs
Omarchy ships with a nice, basic PDF viewer called Document Viewer. This is the program that'll open any PDFs you just double click on.
But you can only use Document Viewer to fill out PDFs that have been setup as forms. If you need to fill out PDFs that haven't, or you need to sign a PDF, you'll have to right-click the file, select Open With..., and pick Xournal++.
Xournal++ will let you write anywhere on a PDF using the T tool. If you need to sign a document, you'll need an image of your signature, and you can use the Image tool to insert this signature and resize it.
When you're done filling out the PDF, use File > Export as PDF to save the final version.
Windows VM
Omarchy offers an easy way to run Windows through a Docker VM. You can install it using Install > Windows from the Omarchy menu (Super + Alt + Space). It takes a while, but you can follow the progress in the browser.
When the installation is complete, you can launch Windows using the app launcher, and that'll give you a RDP connection to your installation. There's no GPU passthrough with this setup, so it's not suitable for gaming or video editing, but it's a great way to run apps like Microsoft Office or whatever else if you absolutely must have that.
The directory ~/Windows in your home directory is automatically shared with this Windows VM. So you put files there if you want to make them accessible to Windows. The VM does not have access to any other files on your system, so you're safe from malware or viruses on the Linux side.
You can change the resource allocation by editing ~/.config/windows/docker-compose.yml. You can also edit this file to mount USB devices. See all t
Other Packages
Arch has an amazing wealth of packages available for almost any type of software between the official repository and the Arch User Repository (AUR).
It couldn't be easier to use either. You install a new Arch package by going to Install > Package in the Omarchy menu (Super + Alt + Space) and typing the package you want. It'll automatically fuzzy filter the list of all packages. (You can also do it manually using with omarchy pkg add [package] in the terminal).
You can do the same with AUR, just use Install > AUR. Just remember that the AUR isn't vetted by the Arch team. It's like RubyGems or npm. Anyone can upload.
If you want to remove a package, you can use Remove > Package from the Omarchy menu. It'll remove package, config files, and dependencies. (You can also do it manually using omarchy pkg drop [package]).
Updates
Omarchy and your packages are kept up to date via Update > Omarchy in the Omarchy menu (Super + Alt + Space).
This pulls the latest Omarchy code and configs, runs any pending migrations to get your system in sync with the latest, and updates all system packages from the Omarchy Arch Mirror, Omarchy Package Repository, and AUR (if you have installed any AUR packages).
When new releases are made, a circle arrow icon will appear to the right of your clock. Click it and the update process will start.

Four channels
Omarchy is updated along four channels: stable, RC, edge, and dev. New installations start on the stable channel, which tracks the [official releases](https://github.com/basecamp/omarchy
Dotfiles
Omarchy is primarily configured through the so-called dotfiles that live in ~/.config. Those are considered your files for your changes. The files that live in ~/.local/share/omarchy belong to Omarchy itself, and you ideally shouldn't be messing with those. If you need to change anything in ~/.local/share/omarchy, you should be overwriting the value in ~/.config instead.
Almost everything can be edited through Setup > Configs > [process] through the Omarchy menu (Super + Alt + Space). When you do it this way, any process that needs restarting after config edits automatically will be after you quit the Neovim editor (:wq, remember!).
Here's a list of the key files in ~/.config and what they control:
| File | Purpose |
|---|---|
~/.config/hypr/hyprland.conf |
Controls keybindings, default apps, and everything Hyprland. Learn more about Hyprland configs. |
Monitors
Omarchy assumes you're running on a 2x-capable retina-class display by default. This is what you need to get those nice, crisp programmer fonts. It's what almost all new premium laptops with high-resolution screens are optimized for. It's what you'd want to run on a 27" 5K Apple Studio Display/ProArt PA27JCV/Samsung S9/Kuycon G27P or 32" 6K Apple XDR/ProArt PA32QCV/Kuycon G32P.
But if you're not running a display with a PPI of 218 or above, you'll want to change the monitor settings. For example, if you have a 27" or 32" 4K,
Open Keyboard, Mouse, Trackpad
Keyboard, Mouse, Trackpad
Hyprland let's you configure all your inputs in great detail. You can change the keyboard repeat to be supersonically fast or make the trackpad use natural scrolling. You change all of it in ~/.config/hypr/input.conf, which you can also reach via Setup > Input in the Omarchy menu (Super + Alt + Space).
Here's an example:
input {
  # Use multiple keyboard layouts and switch between them with Alt + Space
  kb_layout = us,dk
  kb_options = compose:caps,grp:alt_space_toggle
  # Change speed of keyboard repeat
  repeat_rate = 40
  repeat_delay = 600
  # Increase sensitity for mouse/trackpack (default: 0)
  sensitivity = 0.35
  touchpad {
    # Use natural (inverse) scrolling
    natural_scroll = true
    # Use two-finger clicks for right-click instead of lower-right corner
    clickfinger_behavior = true
    # Control the speed of your scrolling
    scroll_factor = 0.3
  }
}
# Scroll faster in the terminal
windowrule = scrolltouchpad
System sleep
Omarchy enables suspend and hibernation by default, but if you're having issues with either on your machine, you can toggle them off.
Toggle suspend
You toggle suspend under Setup > System Sleep > Enable/Disable Suspend. That just reveals/hides the option under System (or Super + Esc), and then you can see if it works consistently on your system. If not, you can turn it off again using Setup > System Sleep > Disable Suspend.
Toggle hibernation
You toggle hibernation under Setup > System Sleep > Enable/Disable Hibernation. Hibernation creates a /swap subvolume on your boot drive the size of our physical RAM allocation, so make sure you have plenty of room to spare. On a 32GB machine, you'll always need 32GB+ free for this volume.
When enabled, you'll see the hibernate option under System (or Super + Esc), and then you can see if it works consistently on your system. If not, you can turn it off again using Setup > System Sleep > Disable Hibernate.
Hardware authentication
Fingerprint authentication
A lot of laptops come with a fingerprint sensor to do authentication. You can use this with Omarchy by running Setup > Security > Fingerprint in the Omarchy menu (Super + Alt + Space).
That'll install the fingerprint package, collect your print, verify it, and you'll be set to go using your fingerprint to unlock from the lock screen (which you can trigger with Super + Escape), enter sudo mode, and authorize system prompts.
If you've setup fingerprint authentication, but then need to work on an external keyboard that doesn't have it, just hit CTRL + C, when you're prompted for your fingerprint during sudo.
You can remove the fingerprint authentication under Remove > Fingerprint in the Omarchy menu.
Fido2 authentication
If you're using a Fido2 device, you can set it up for sudo authentication using Setup > Security > Fido2 in the Omarchy menu (Super + Alt + Space). It's only for sudo, though, not unlocking you
Fonts
Omarchy uses JetBrainsMono Nerd Font as both the terminal and system font by default.
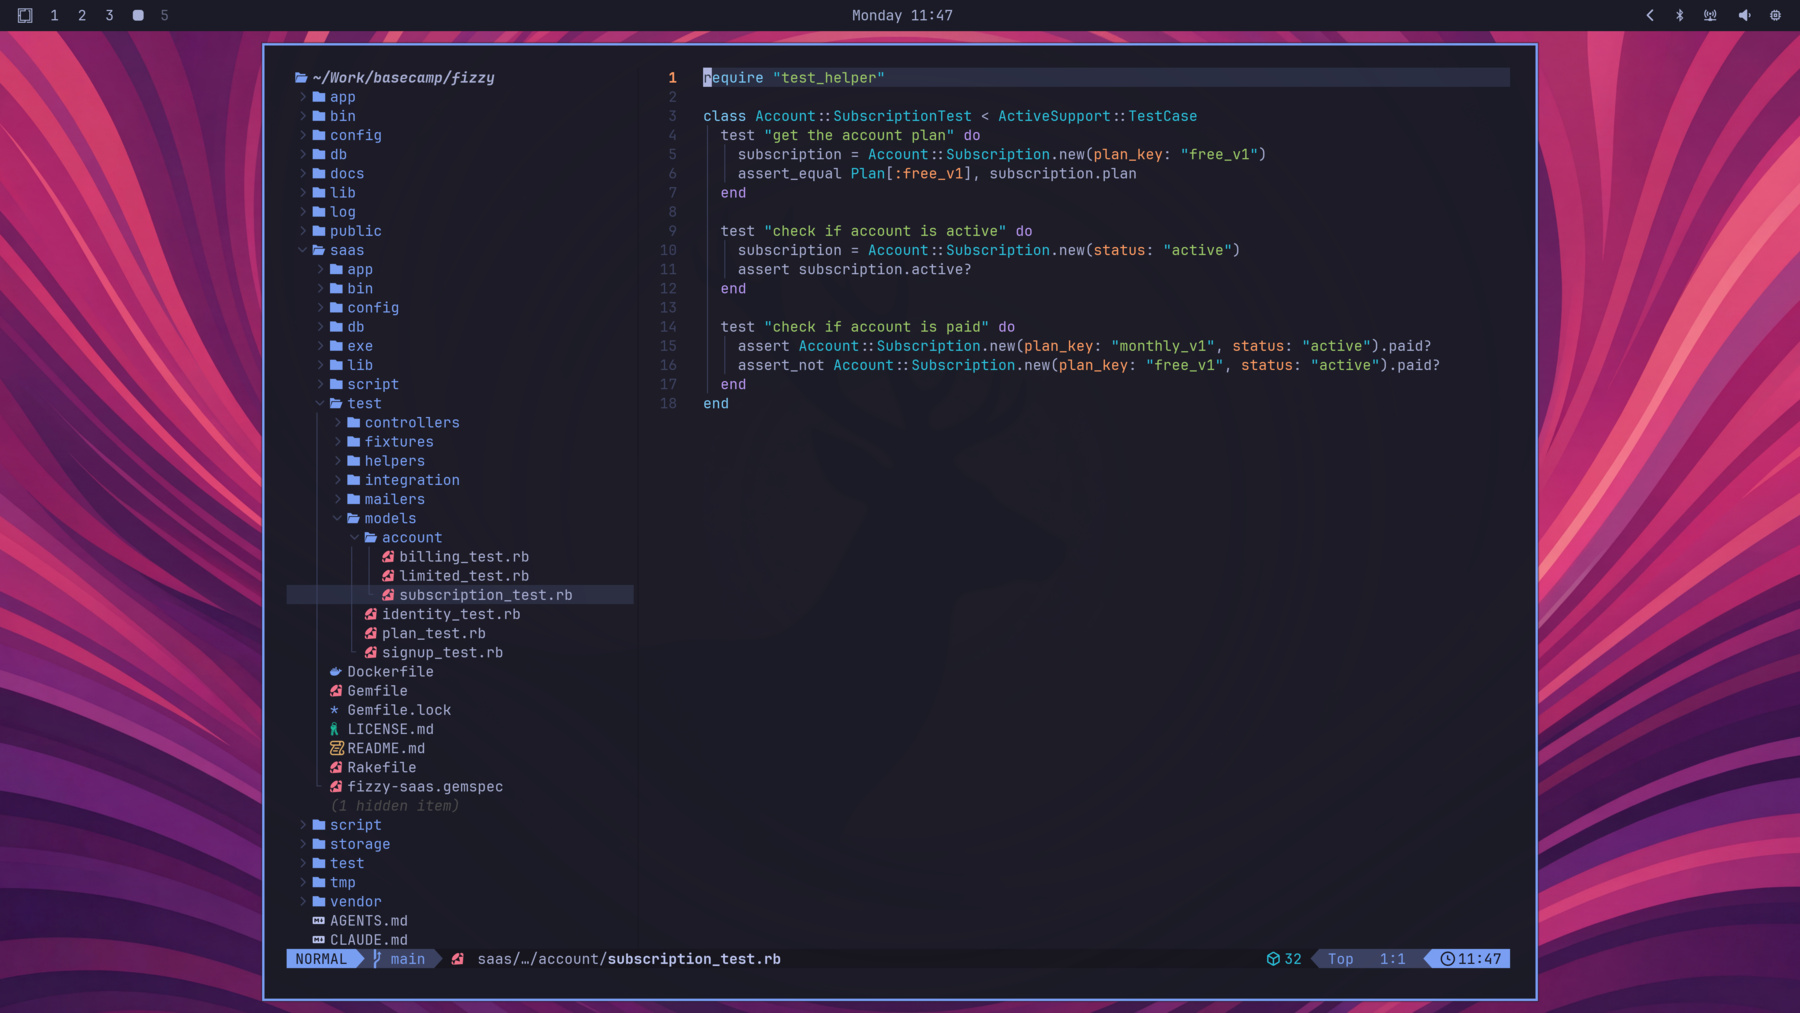
You can change this for the terminal through the Style > Font menu in the Omarchy menu (Super + Alt + Space).
You can install other popular programming fonts via Install > Style > Font in the Omarchy menu.
Backgrounds
All the backgrounds for Omarchy live in ~/.config/omarchy/backgrounds/[theme]. If you want to add an extra background image to, say, the nord theme, you just put the file in ~/.config/omarchy/backgrounds/nord.
You can do this most easily by going to Install > Style > Background in the Omarchy Menu. That'll bring up the folder where the backgrounds for that theme is stored. Hit Super + Shift + F to start another file manager, find your background, copy it over. Now it'll be included in the choices of backgrounds you can select between using Super + Ctrl + Space.
You can find a huge collection of cool curated backgrounds on https://github.com/dharmx/walls.
Prompt
Omarchy ships with a minimal Starship prompt by default. That's how I like to keep my prompt. I don't need to know the user, because it's always me, and I don't need to know the time, because it's always at the top.
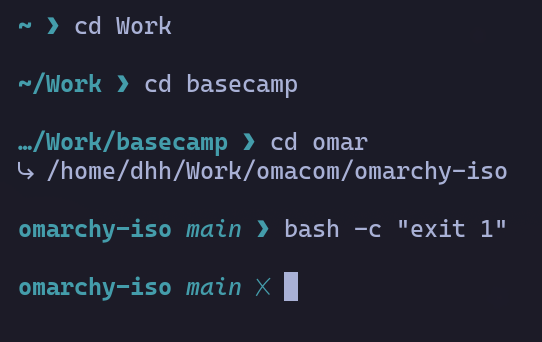
If you want more information or style, you can change the Starship.rs configuration in ~/.config/starship.toml. There's a lot you can do. Just don't go overboard (or do go overboard, do whatever you want, it's your computer!)
Branding
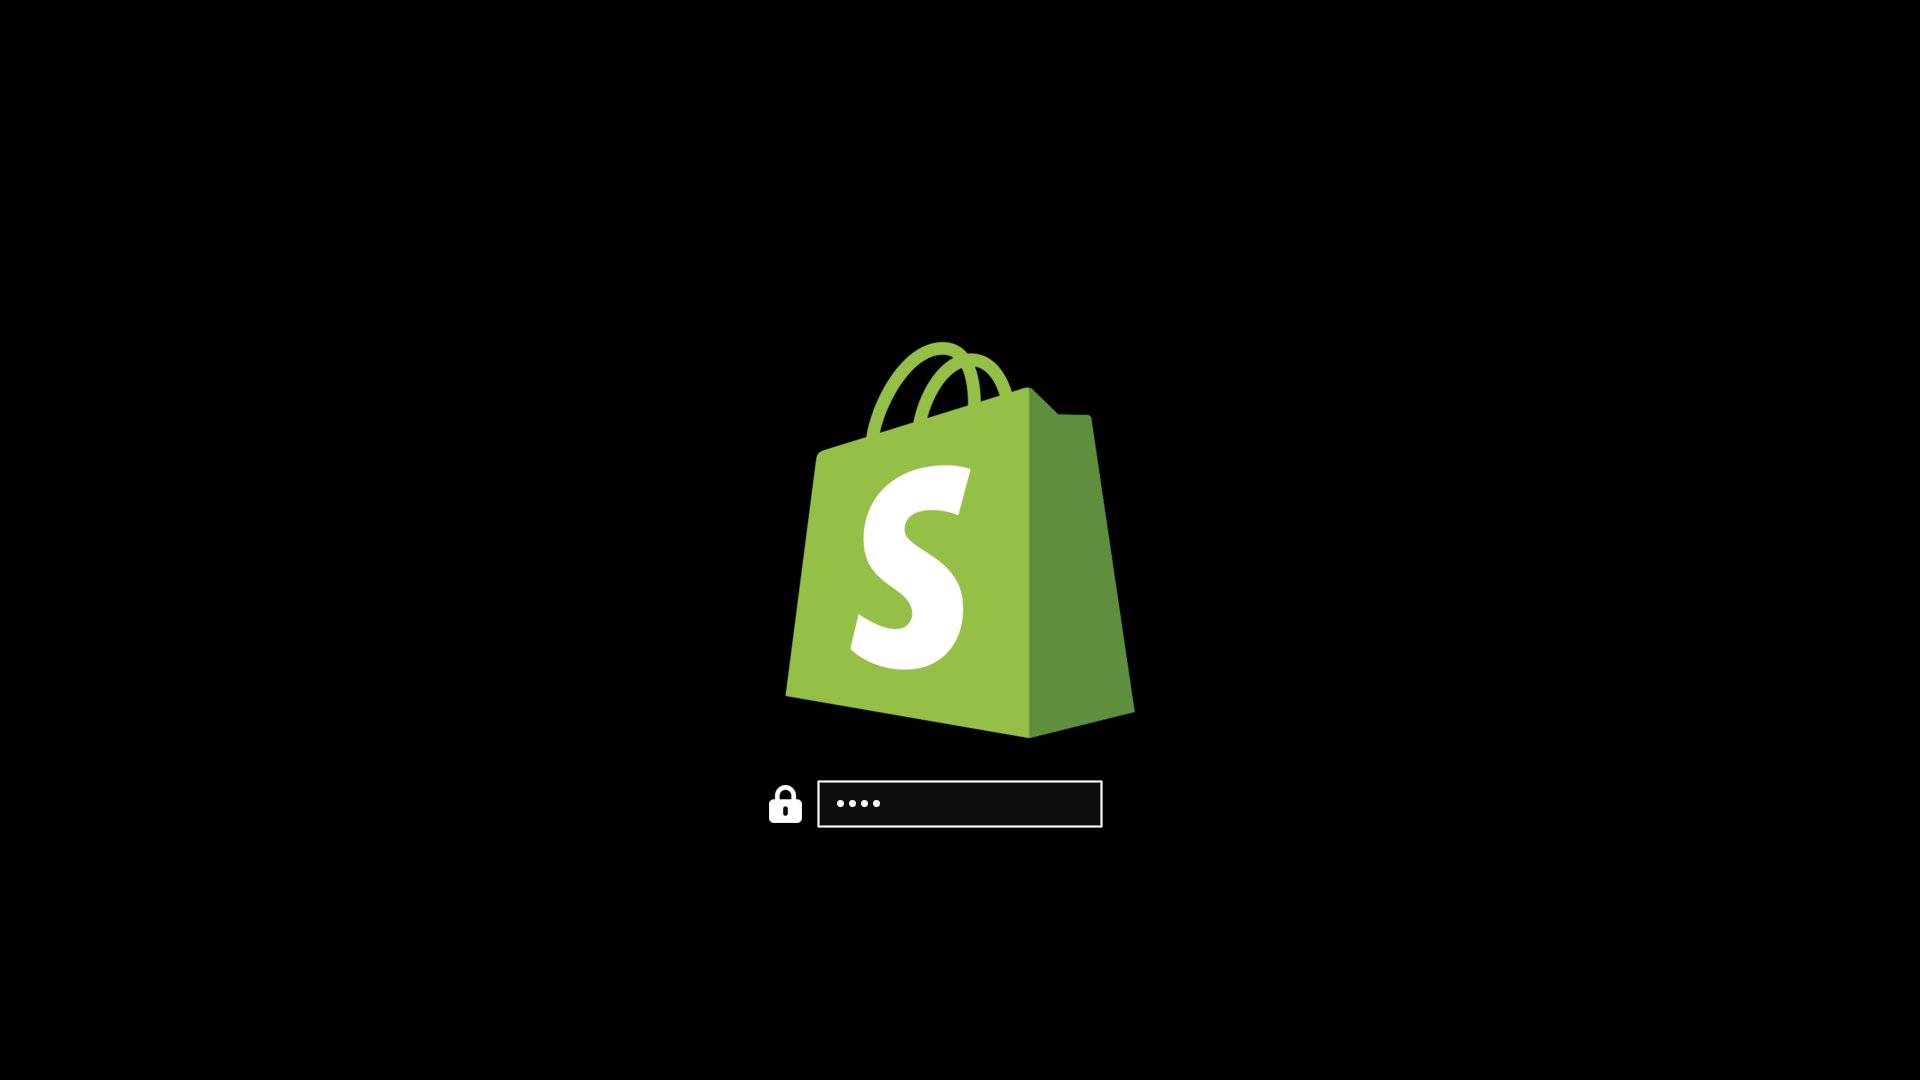
Omarchy allows you to set your company logo or personal image for both the boot unlock, the screensaver, and the about screen.
Boot unlock
You can use omarchy plymouth preview to see what your custom logo and colors would look like. Then apply the setup with omarchy plymouth set. If you want to revert, you can use omarchy plymouth reset.
Screensaver
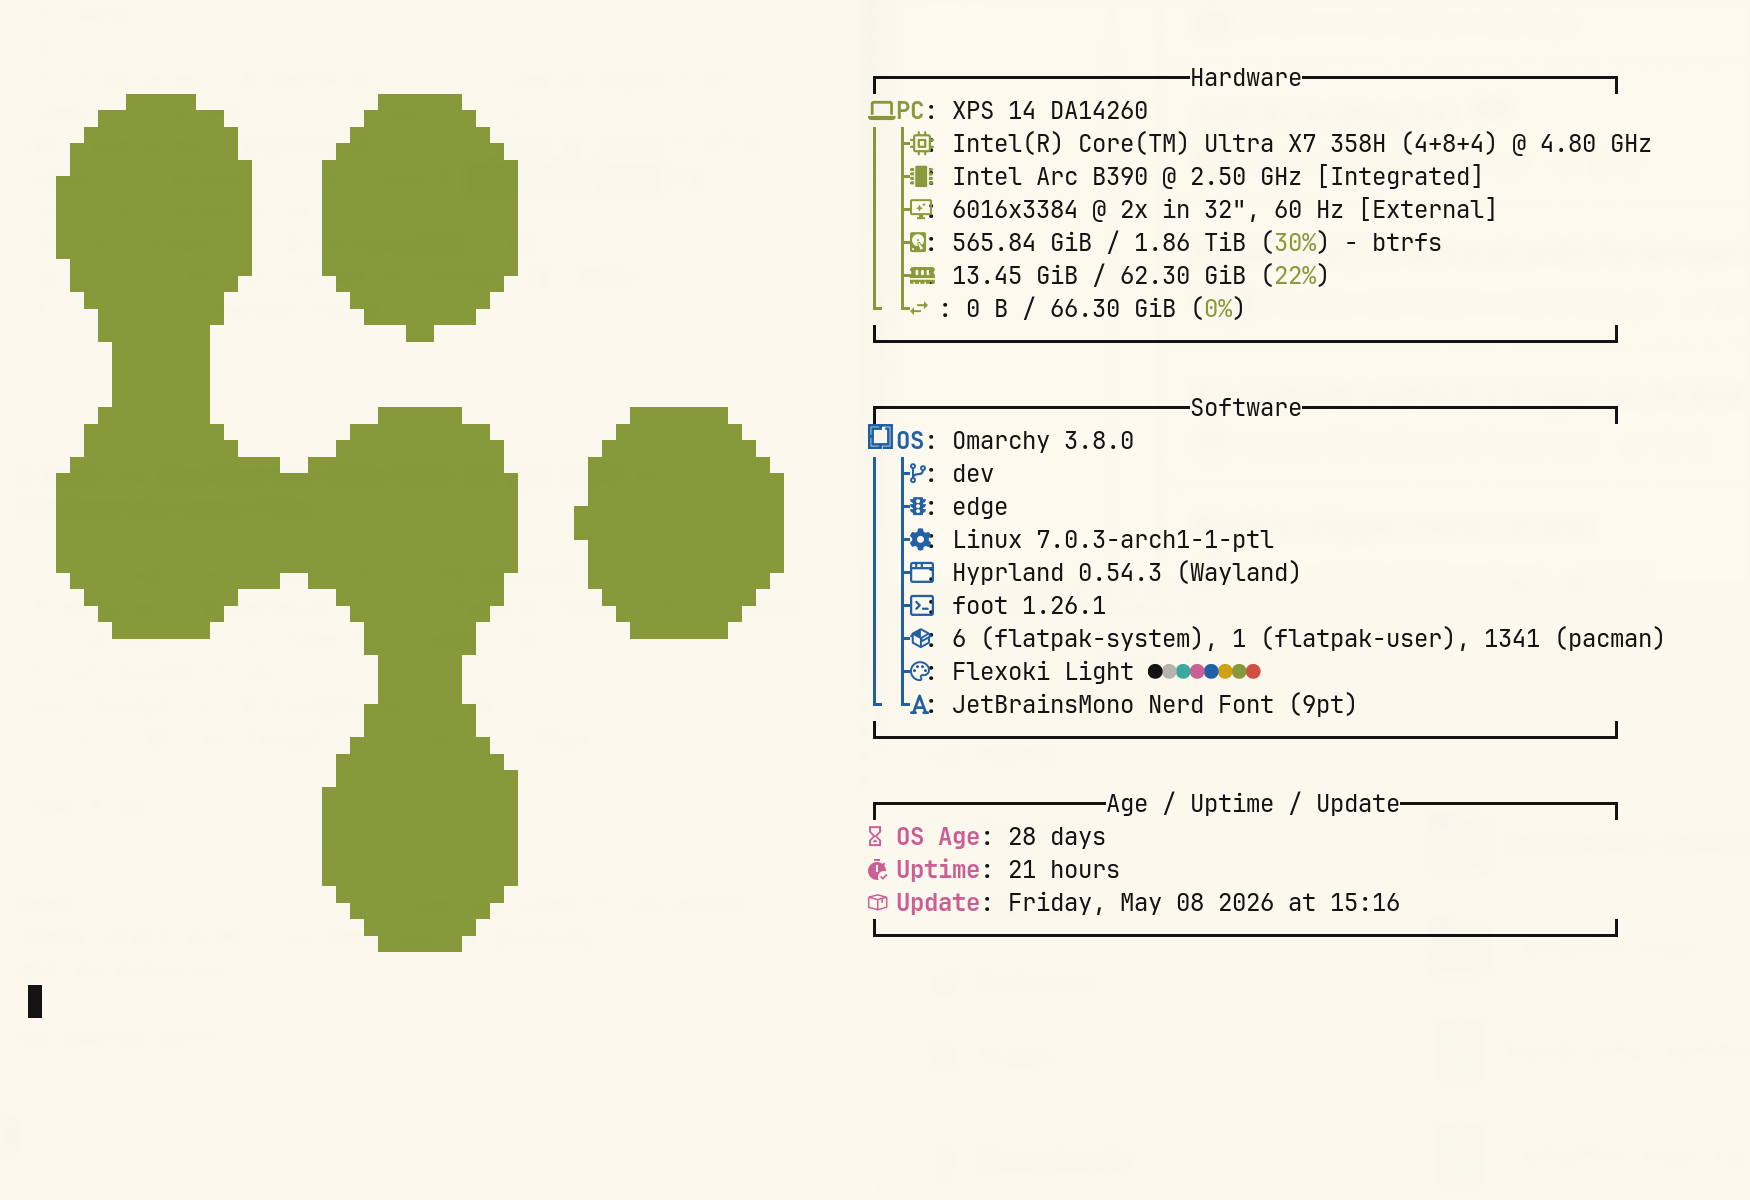
You can change the logo used for the screensaver under Style > Screensaver. It's an ASCII logo, so you can edit the text directly, but you can also upload a png or svg image, and we'll convert that to ASCII. It looks pretty cool.

About screen
The same can be done with the About screen accessible from the Omarchy menu. Same options as with the screensaver under Style > About.
Common tweaks
This is a collection of common tailorings to the Omarchy setup. Know that it might occasionally be necessary for system updates to restore certain configs to their original condition. If this happens, your changes won't be lost, but put in a .bak file in the same directory.
If you screw something up, you can restore individual configs to their original setup via Update > Config in the Omarchy menu. If you really screw everything up, you can reset all configs via omarchy-reinstall.
Reveal all tray icons all the time
By default, tray icons, like Dropbox, 1password, or Steam, are hidden behind the tray expander icon. If you'd like to have them exposed all the time, you can change the group/tray-expander line to tray in Waybar's ~/.config/waybar/config.jsonc (access via Setup > Config > Waybar).
Rounded window corners
Omarchy's default design is one of square corners, but if you like to soften that up a bit, you can change `~/.config/hypr/loo
Extra themes
You can install any of these themes by copying the GitHub URL and selecting Install > Style > Theme via the Omarchy menu (Super + Alt + Space). If you want to remove it again, just use Remove > Style > Theme and select it there.
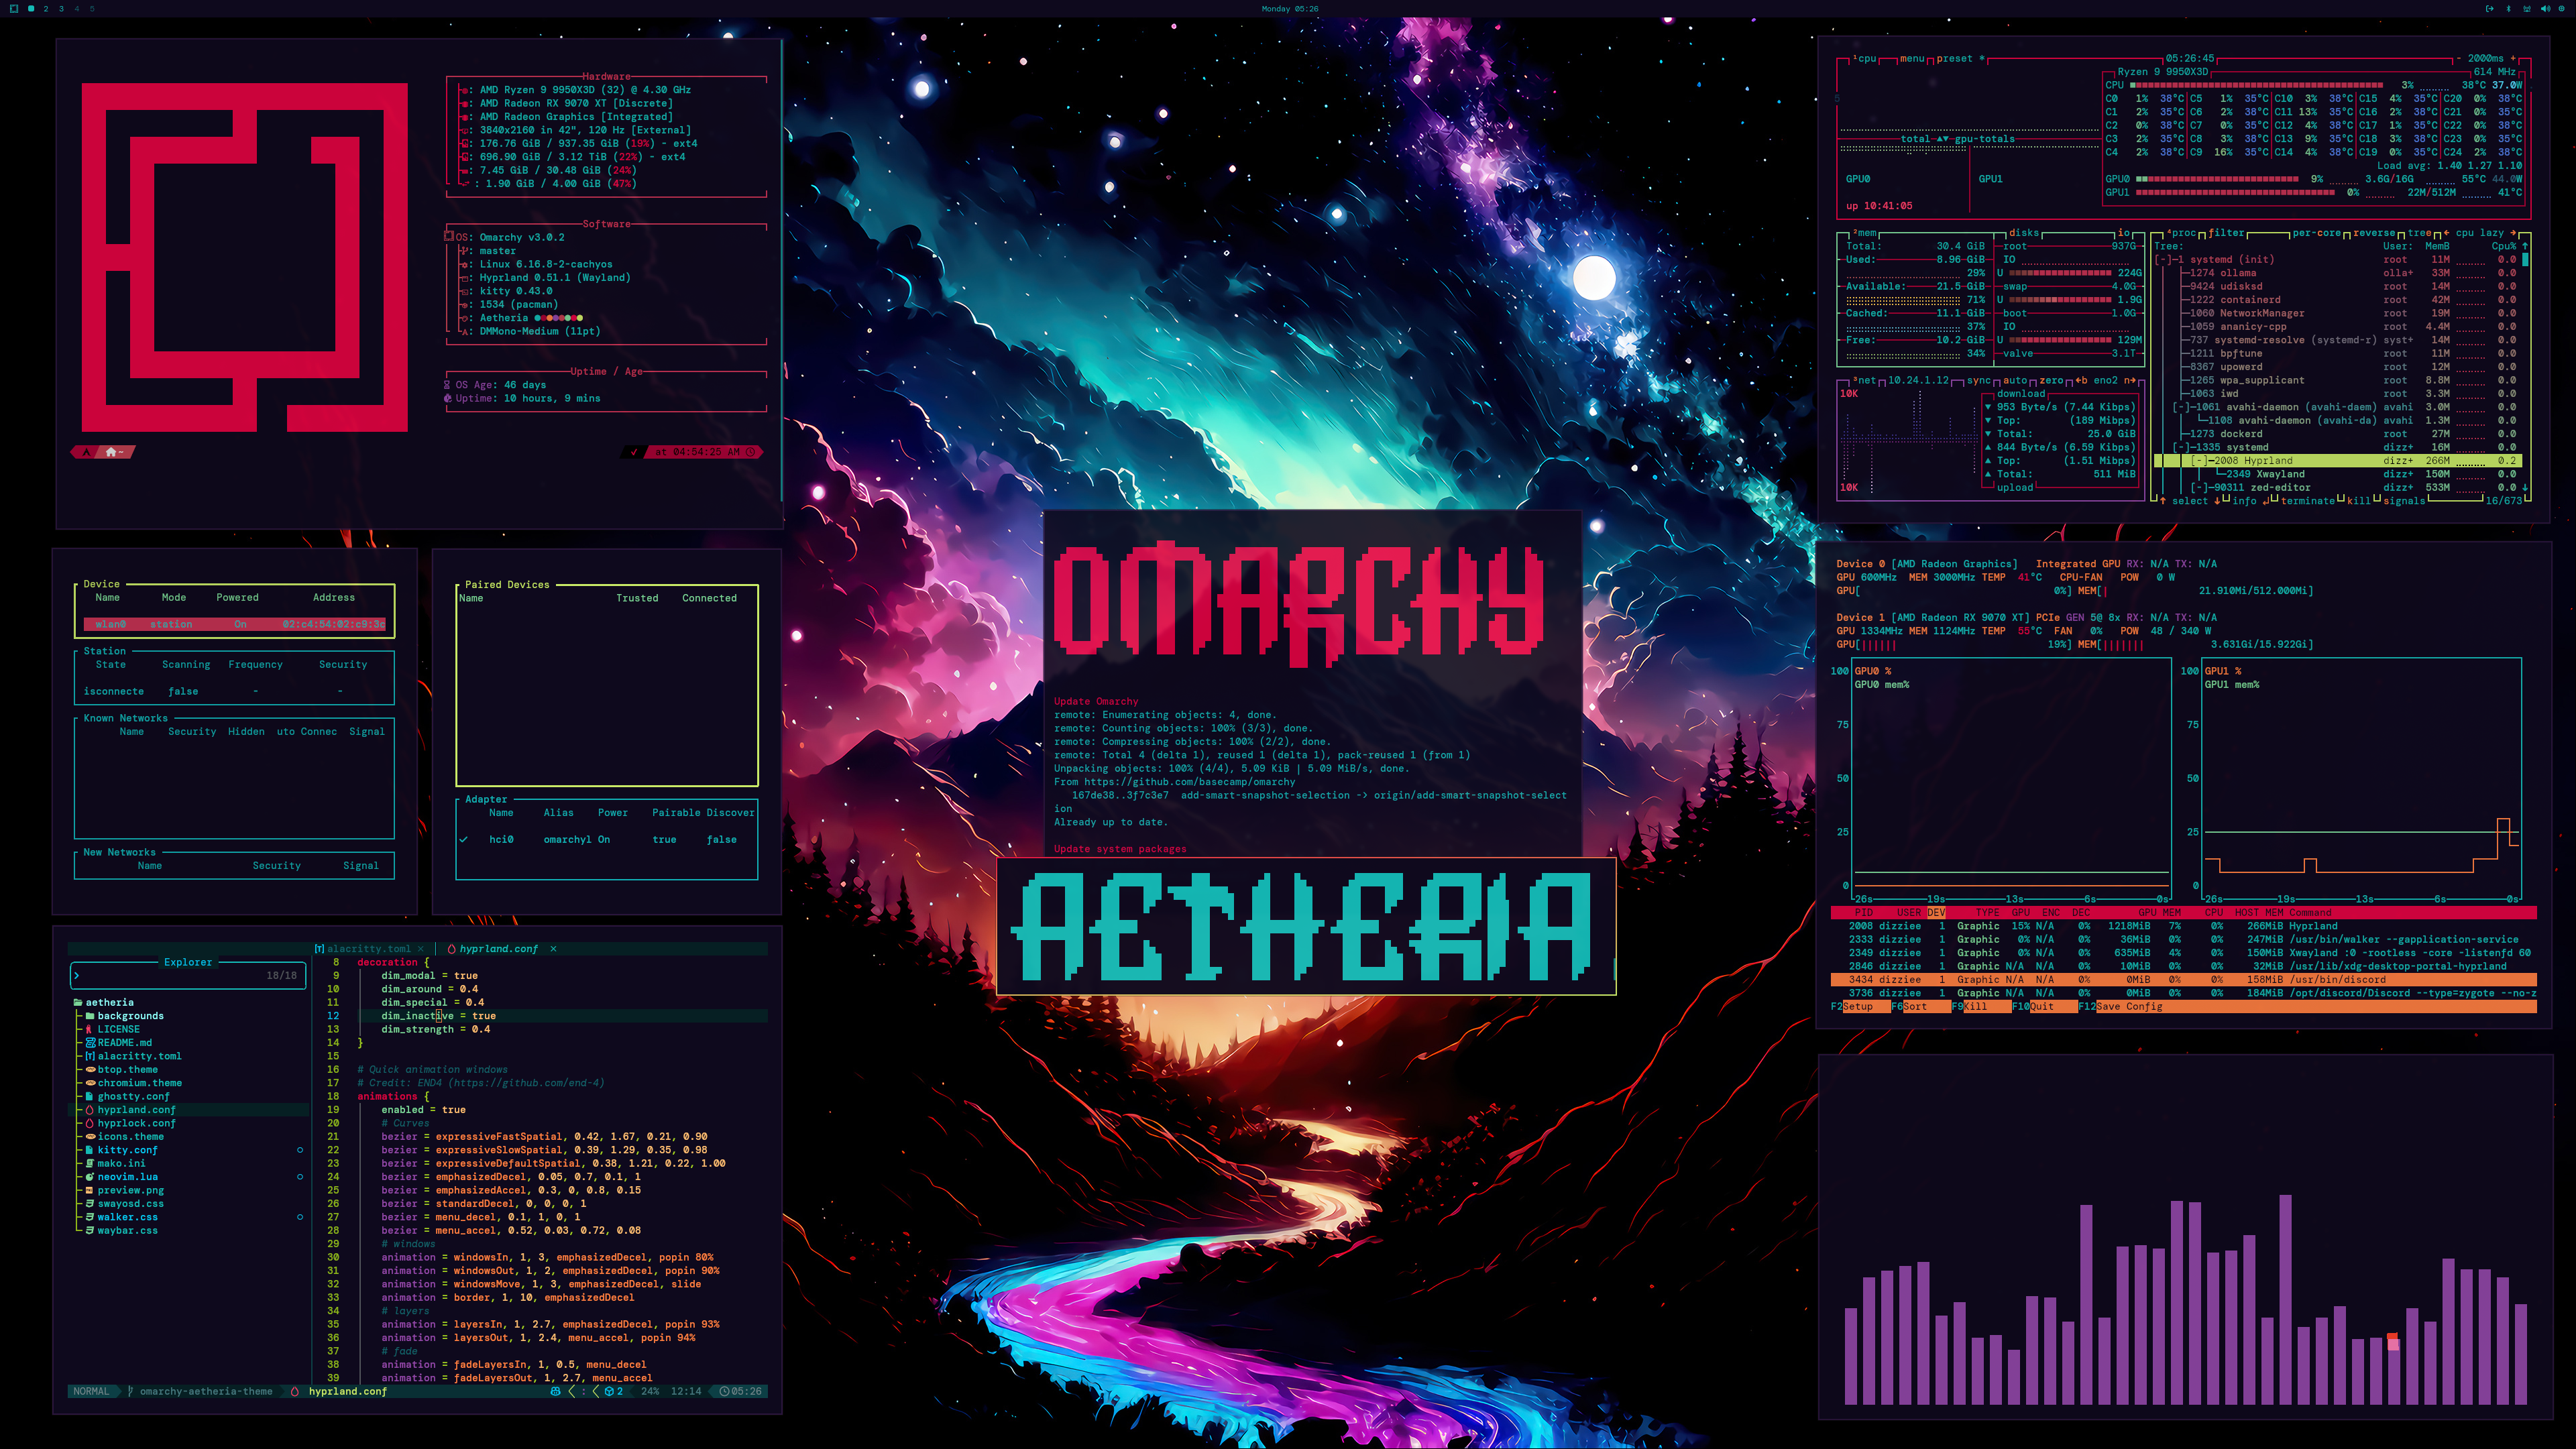

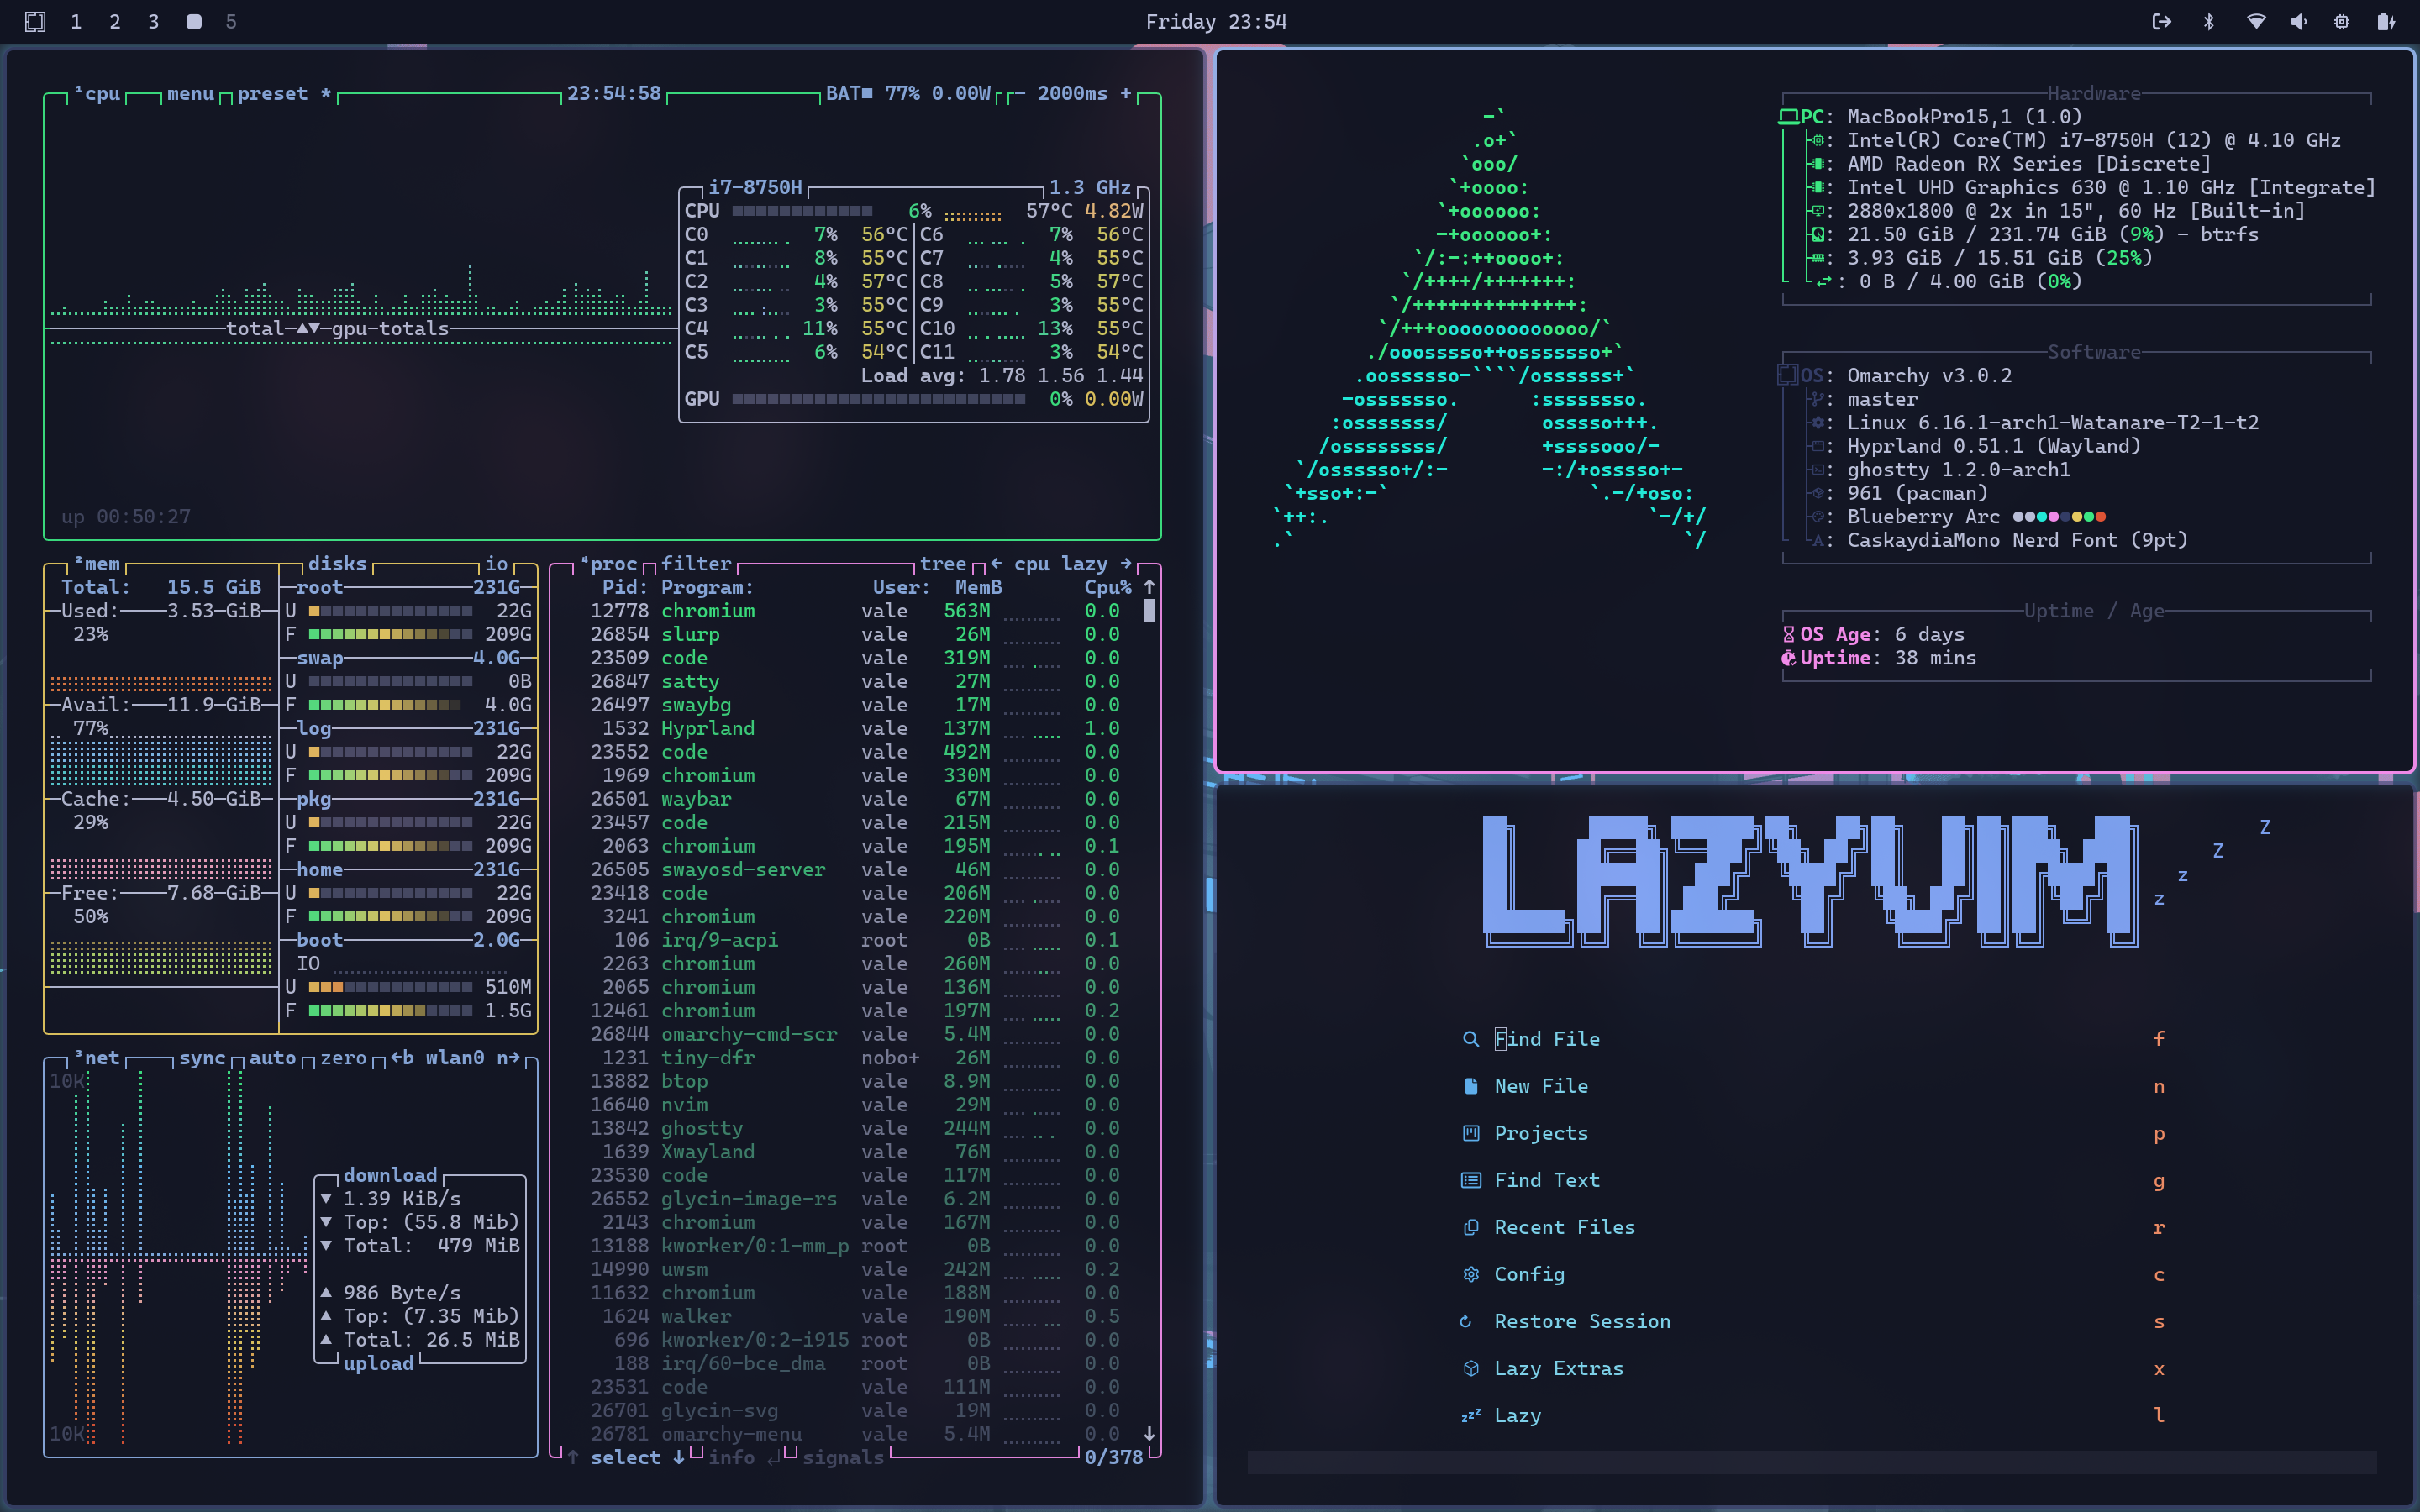


, then tweak to your delight. As long as your theme is inside that folder, it'll be included in the theme selection menu.
The main file you have to tweak is colors.toml. That defines the color set that's then used to generate configurations for the terminal (Ghostty/Alacritty/Kitty), btop, Chromium, Hyprland, Hyprlock, Mako, SwayOSD, Walker, and Waybar.
You can also use the included Aether application to create a new theme using a lovely GUI interface to play with colors and search for backgrounds. Just start it via the app launcher on Super + Space.
Light mode
If you're making a light mode theme, drop an empty file called light.mode in the root of your theme. Then it'll automatically be paired with light mode for all the apps.
Icon colors
If you'd like to color-match the file manager icons to
Manual installation
If you can't use the Omarchy ISO, you can do a manual installation using the vanilla arch ISO, archinstall, and following the steps in this guide. This is not something most people should attempt, but if you know what you're doing, and why you're doing it, this is how.
- Download the Arch Linux ISO, put it on a USB stick (use balenaEtcher on Mac/Windows), and boot off the stick (remember to turn off Secure Boot in the BIOS!).
- If you're on wifi, start by running
iwctl, then typestation wlan0 scan, thenstation wlan0 connect <tab>, pick your network, and enter the password. If you're on ethernet, you don't need this. - Run
archinstalland pick these options (and leave anything not mentioned as-is):
| Section | Option |
|---|---|
| Mirrors and repositories | Select regions > Your country |
| Disk configuration | Partitioning > Default partitioning layout > Select disk (with |
Mac support
As of Omarchy 3, there's built-in support for Intel Macs. There are a couple of known limitations at the moment, but as long as you're aware and OK with those; you can breathe some new life into your old Macs by loading Omarchy.
Please note that installing on an M-series Mac is not directly supported at this time. You can find out more about the state of this in #omarchy-on-other in our Discord.
In a simple test, we were able to achieve 36% performance gains on a 2019 MacBook Pro just by installing Omarchy.
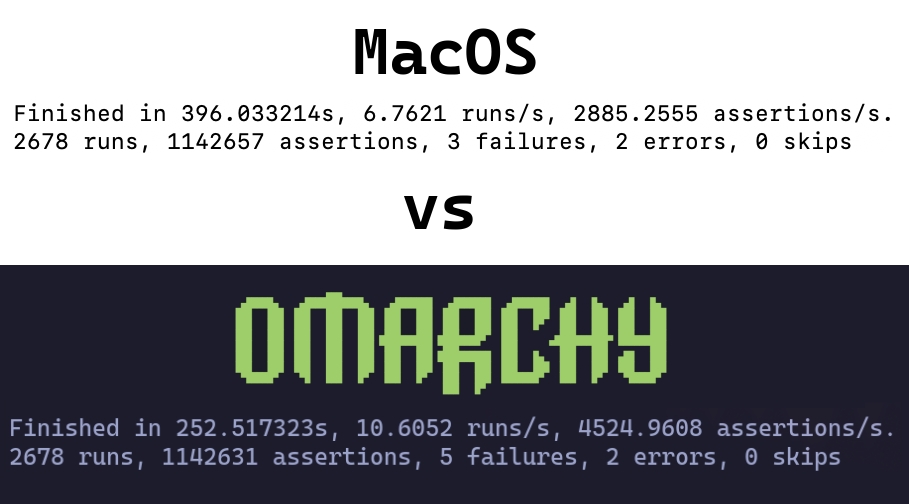
Installing Omarchy on Mac
Omarchy only supports being the only OS installed at the moment. During the installation, the drive will be wiped and MacOS will no longer be bootable.
You can still restore it later via Internet Recovery if you'd like.
For the sake of this part, we'll assume you've already reviewed [Getting Started](https://lea
Troubleshooting
I broke my system with an update!
First try to rollback your system the version before your recent update. If that doesn't work, use omarchy-debug to share with your problem on #omarchy-help in the Discord. And if all that fails, you can reinstall the defaults configs and packages using omarchy-reinstall.
Why are some apps so large on my display?
Omarchy assumes a 2x high-resolution display, which requires setting GDK_SCALE to 2 in ~/.config/hypr/hyprland.conf. But if you're on a 1x display, you can change this to 1 (and then restart any app that's oversized). See the manual on monitors.
For Spotify, you can use Ctrl + Minus to shrink the UI (and Ctrl + Plus to make it bigger).
Why isn't Caps Lock working?
In Omarchy, Caps Lock has been designated to be the xcompose key. That's how you get [quick emojis](https://manuals.omamix.org/2/the-omarchy-manual/
FAQ
How do I switch between keyboard layouts?
Edit your ~/.config/hypr/input.conf file and add this to switch between layouts on Left Alt + Right Alt:
# Use multiple keyboard layouts and switch between them with Left Alt + Right Alt
input {
    kb_layout = us,fr
    kb_options = compose:caps,grp:alts_toggle
}
You can even configure Waybar to showing your current keyboard layout in the top bar.
How do I change the clock format to 12-hour?
Edit your ~/.config/waybar/config.jsonc file and replace this:
  "clock": {
    "format": "{:%A %H:%M}",
with:
  "clock": {
    "format": "{:%A %I:%M %p}",
This will display Sunday 10:55 AM.
How do I change where screenshots or screenrecordings are saved?
If you screenshots to be saved to ~/Pictures/Screenshots instead of just ~/Pictures, you can open Setup > Defaults via the Omarchy menu and set this:
System snapshots
We create snapshots automatically on every Omarchy update, but should you want to create your own, you can use omarchy-snapshot create.
To boot and restore a snapshot, you select it from the Limine boot loader. (If you're currently booting straight into the Omarchy decryption screen, you'll need to select Limine as a boot option via the BIOS first).
From that screen, choose the snapshot you'd like to boot into based on the date and version. The version of Omarchy at the time of the snapshot can be seen at the bottom left corner.
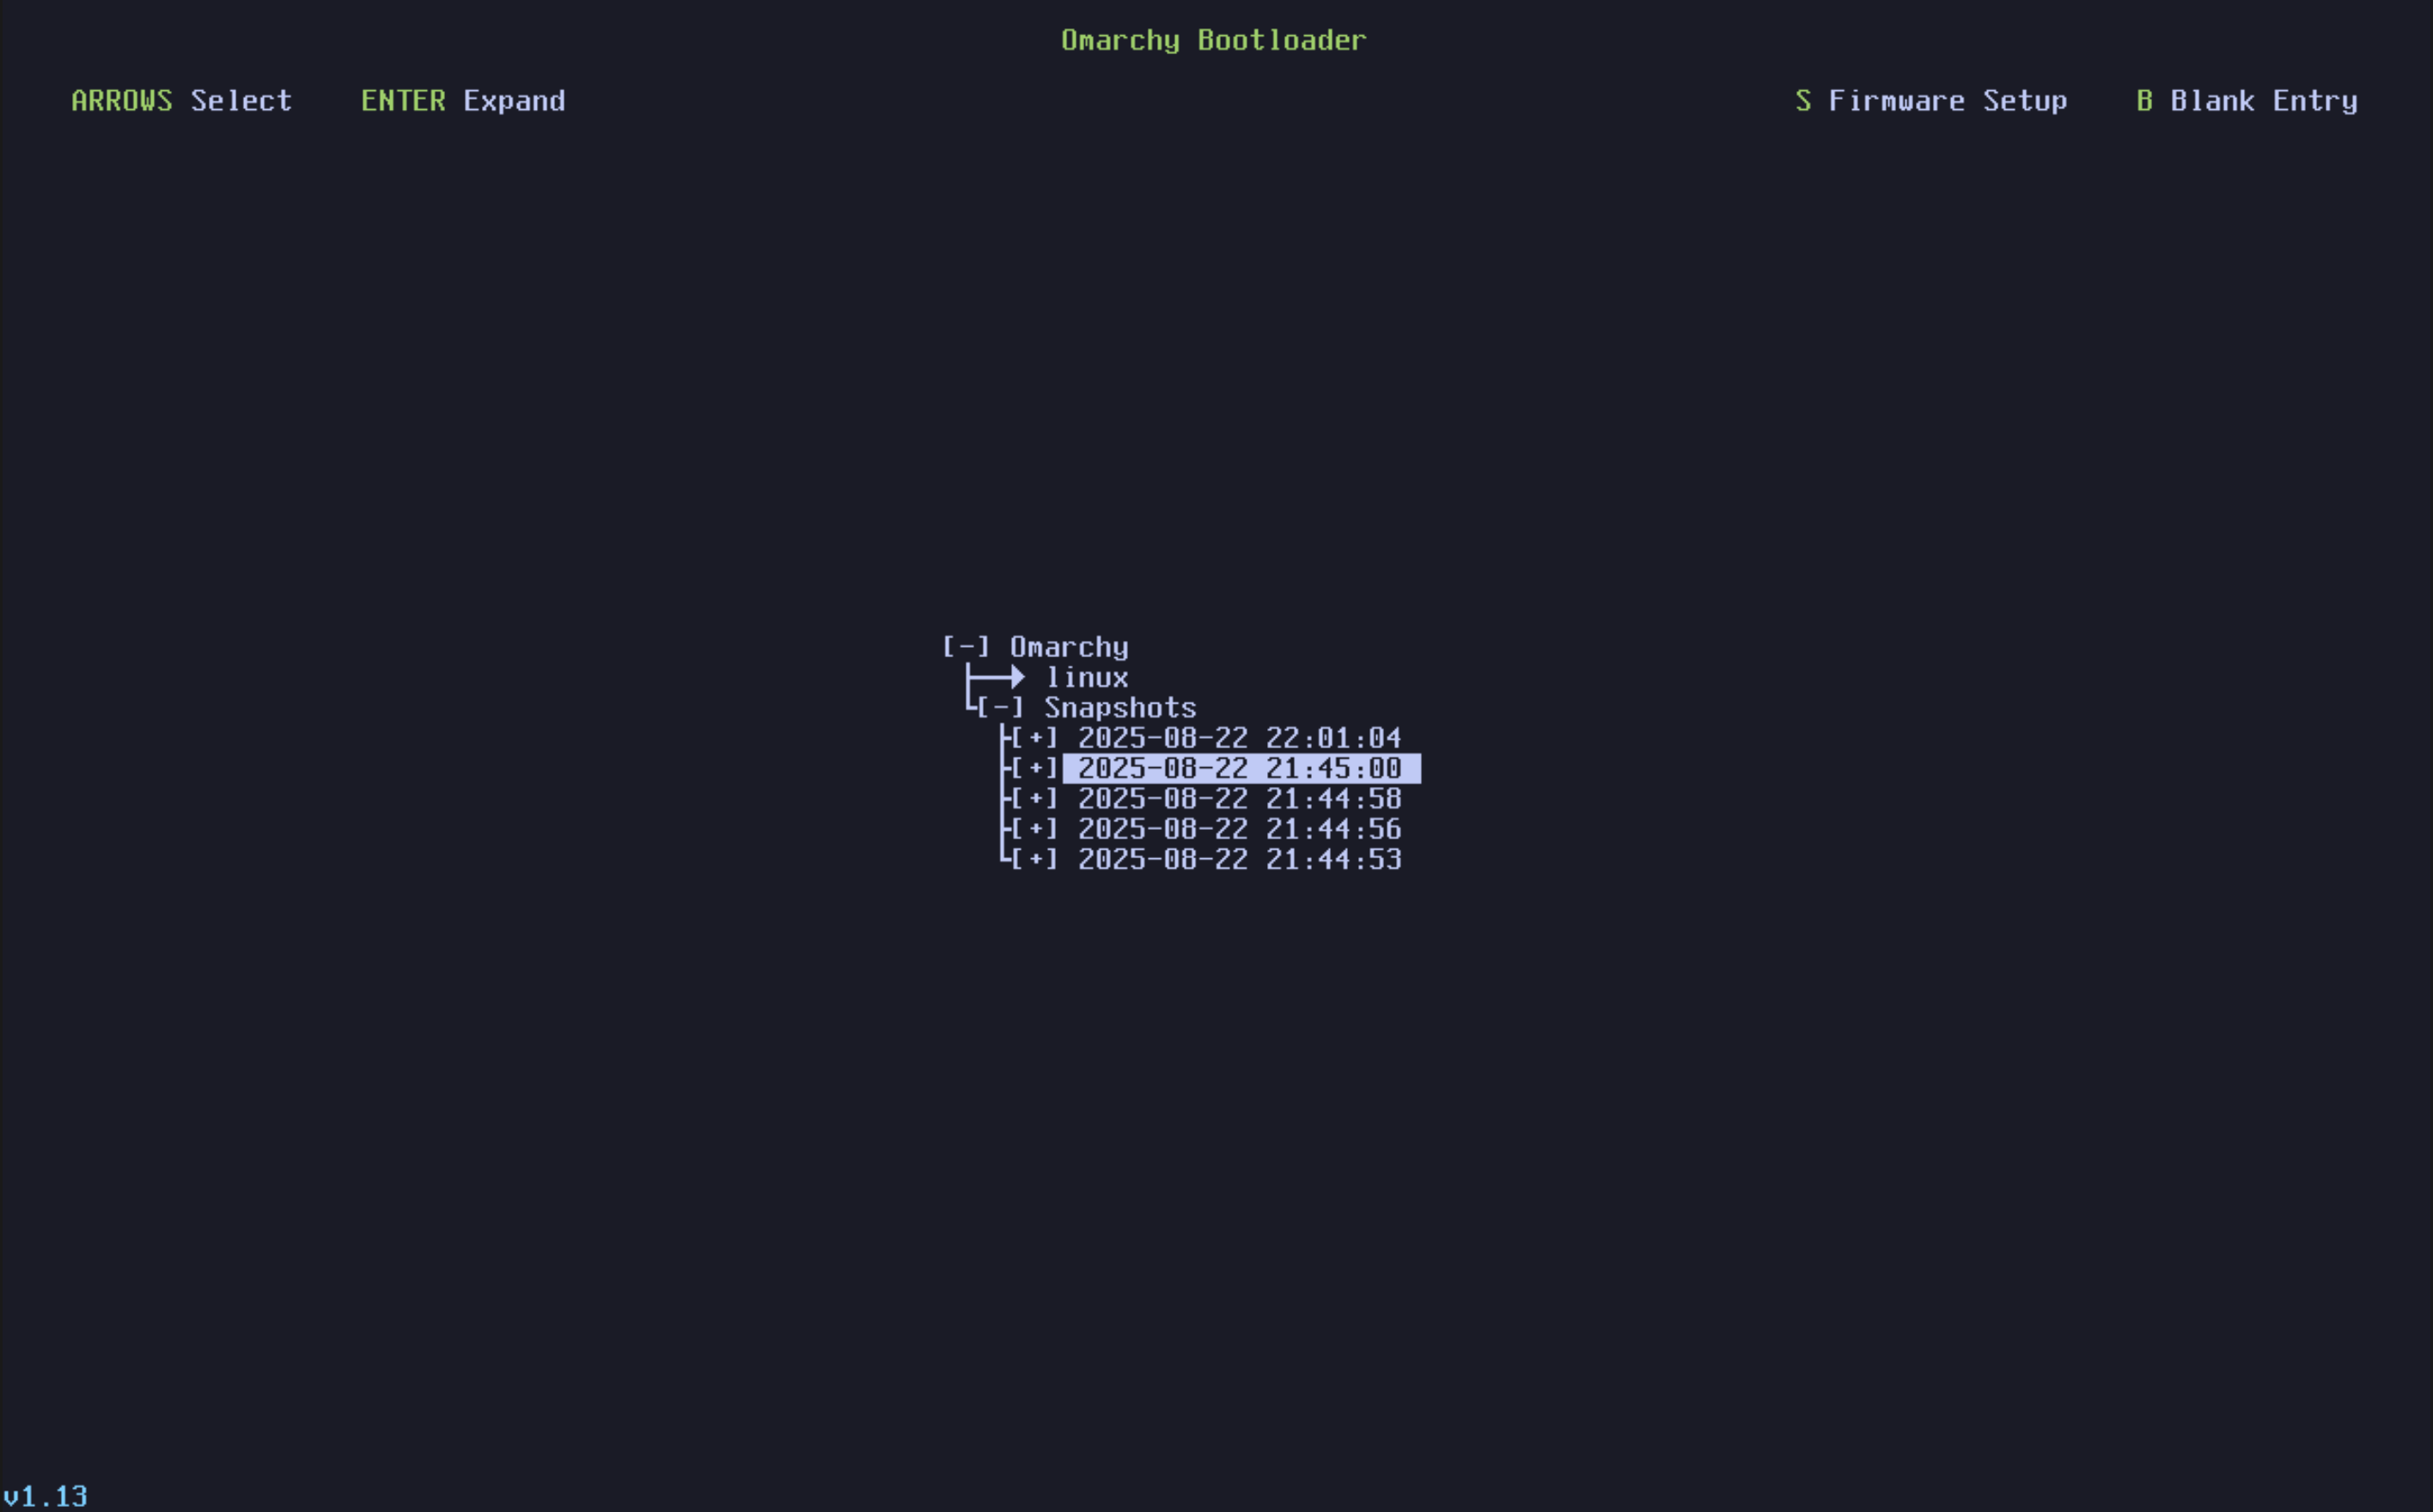
When you arrive inside, a notification will popup notifying you that you're in a bootable snapshot and if you click it, will start the restoration process. Alternatively, you can utilize omarchy-snapshot restore.
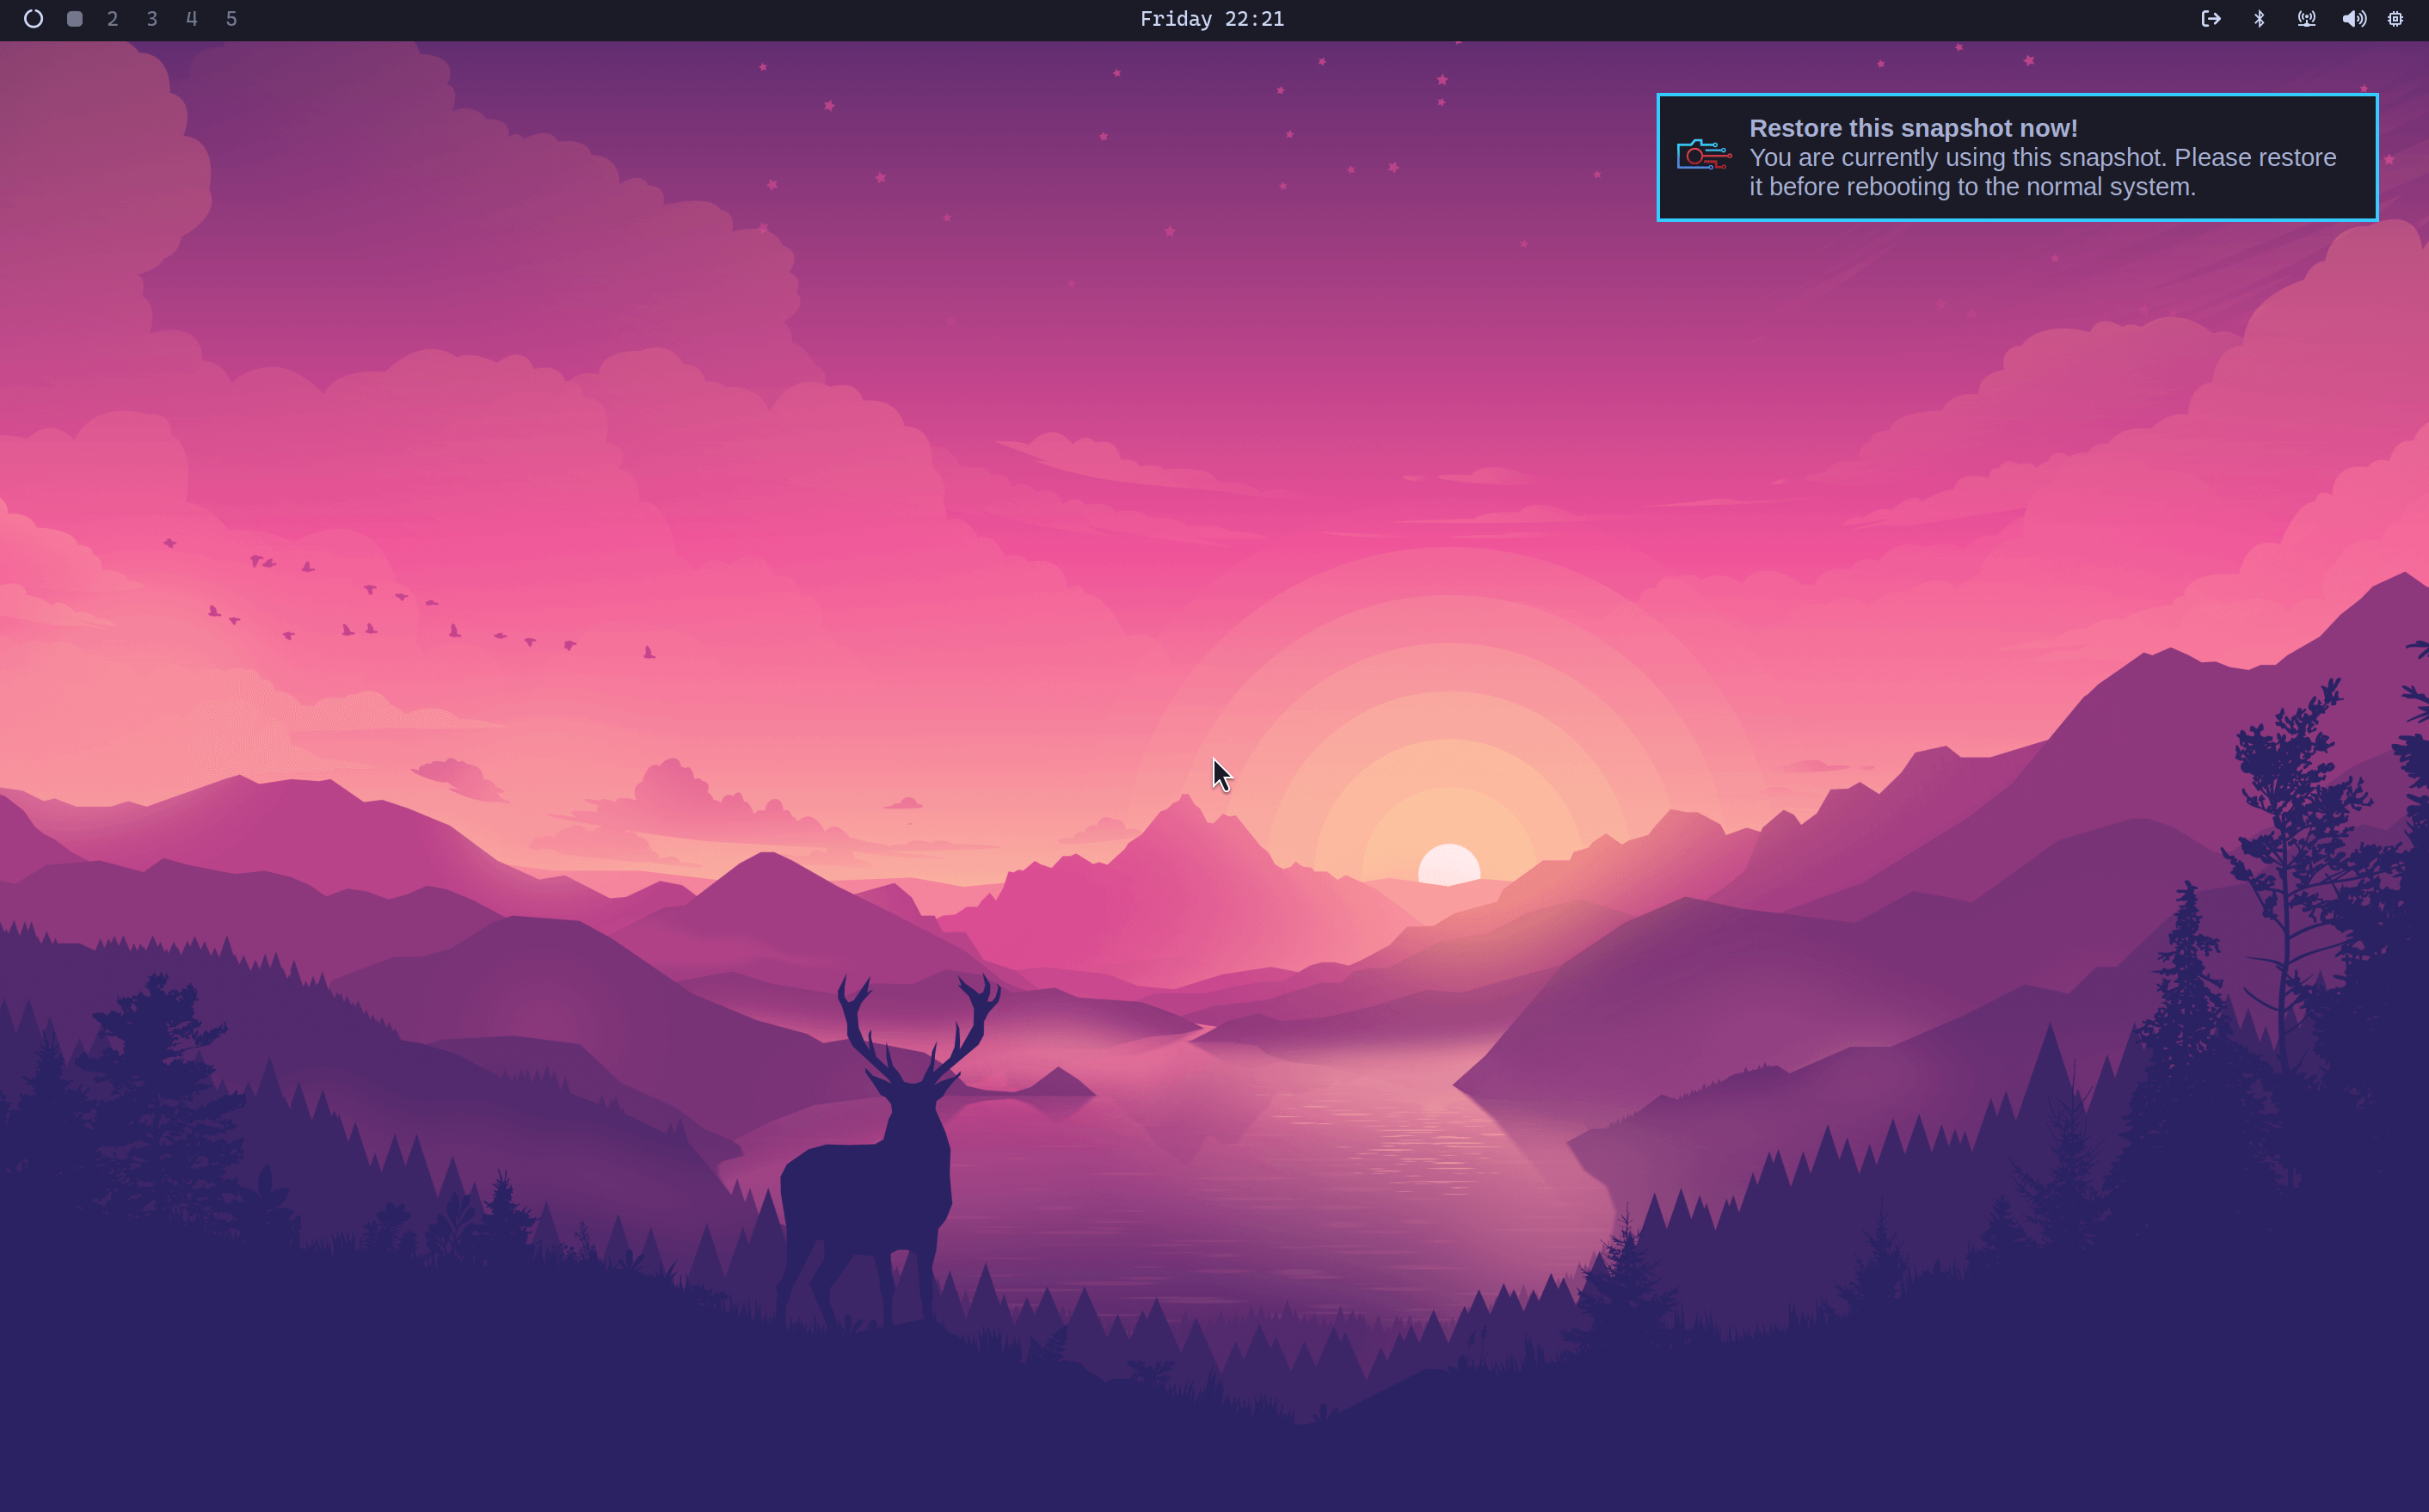
This will restore your /root, but not your /home. So it works for reverting a broken system
Security
Omarchy takes security extremely seriously. This is meant to be an operating system that you can use to do Real Work in the Real World. Where losing a laptop can't lead to a security emergency. So here's what we do:
- Full-disk encryption is mandatory: This is the most important step to securing the physical protection of your data. If your computer is lost or stolen, the data is fully encrypted using standard LUKS (Linux Unified Key Setup).
- Firewall is enabled by default: All incoming traffic by default except for port 22 for ssh and port 53317 for LocalSend. We even lock down Docker access using the ufw-docker setup to prevent that your containers are accidentally exposed to the world.
- Arch always have the latest updates: Arch, the underlying distro that Omarchy is built on, is a rolling distribution. This means that any security vulnerability that's discovered and patched in any package is immediately a
Dual Boot Install
In Omarchy Quattro, you're able to install Omarchy to a single partition alongside Windows or other installations. This differs from previous versions where full-disk was required.
This installation method still comes with LUKS encryption for the partition by default so it's effectively no different than full drive and simply requires free space to be available on the disk.
Making Space on Windows
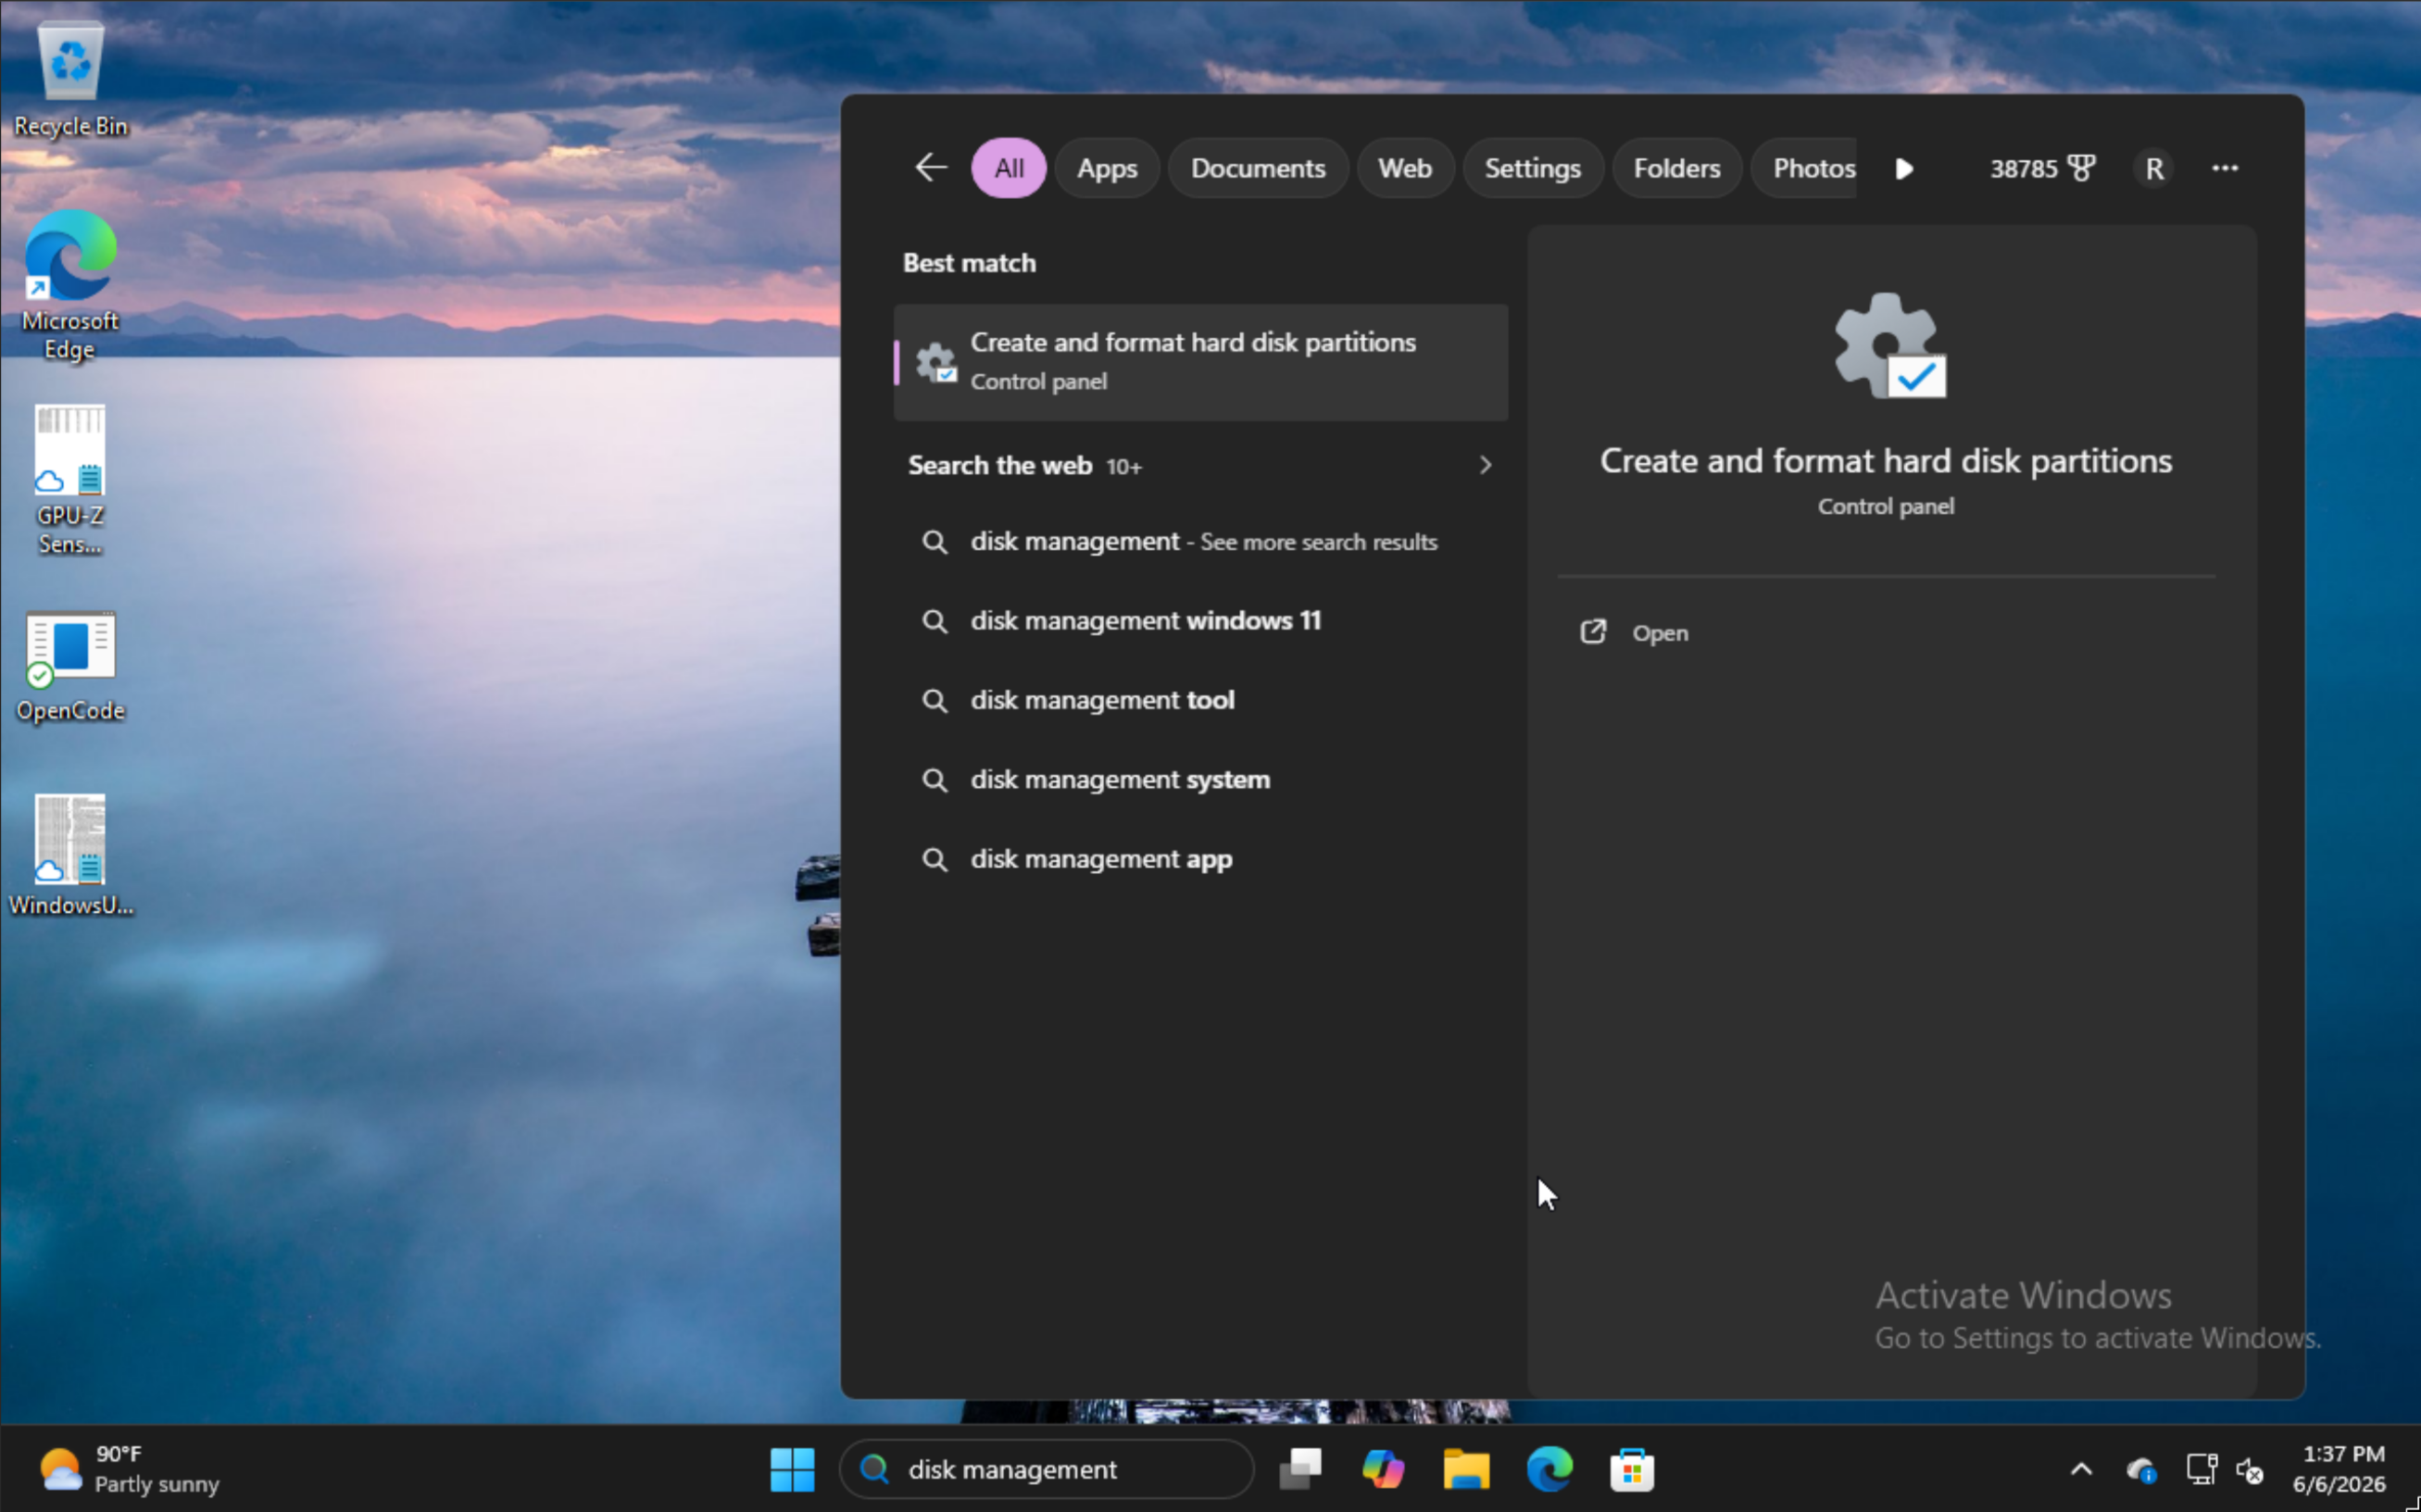
To install alongside Windows, type disk management in the start menu and select the option for Create and format hard disk partitions.
Find the appropriate partition, right click, and choose Shrink Volume.
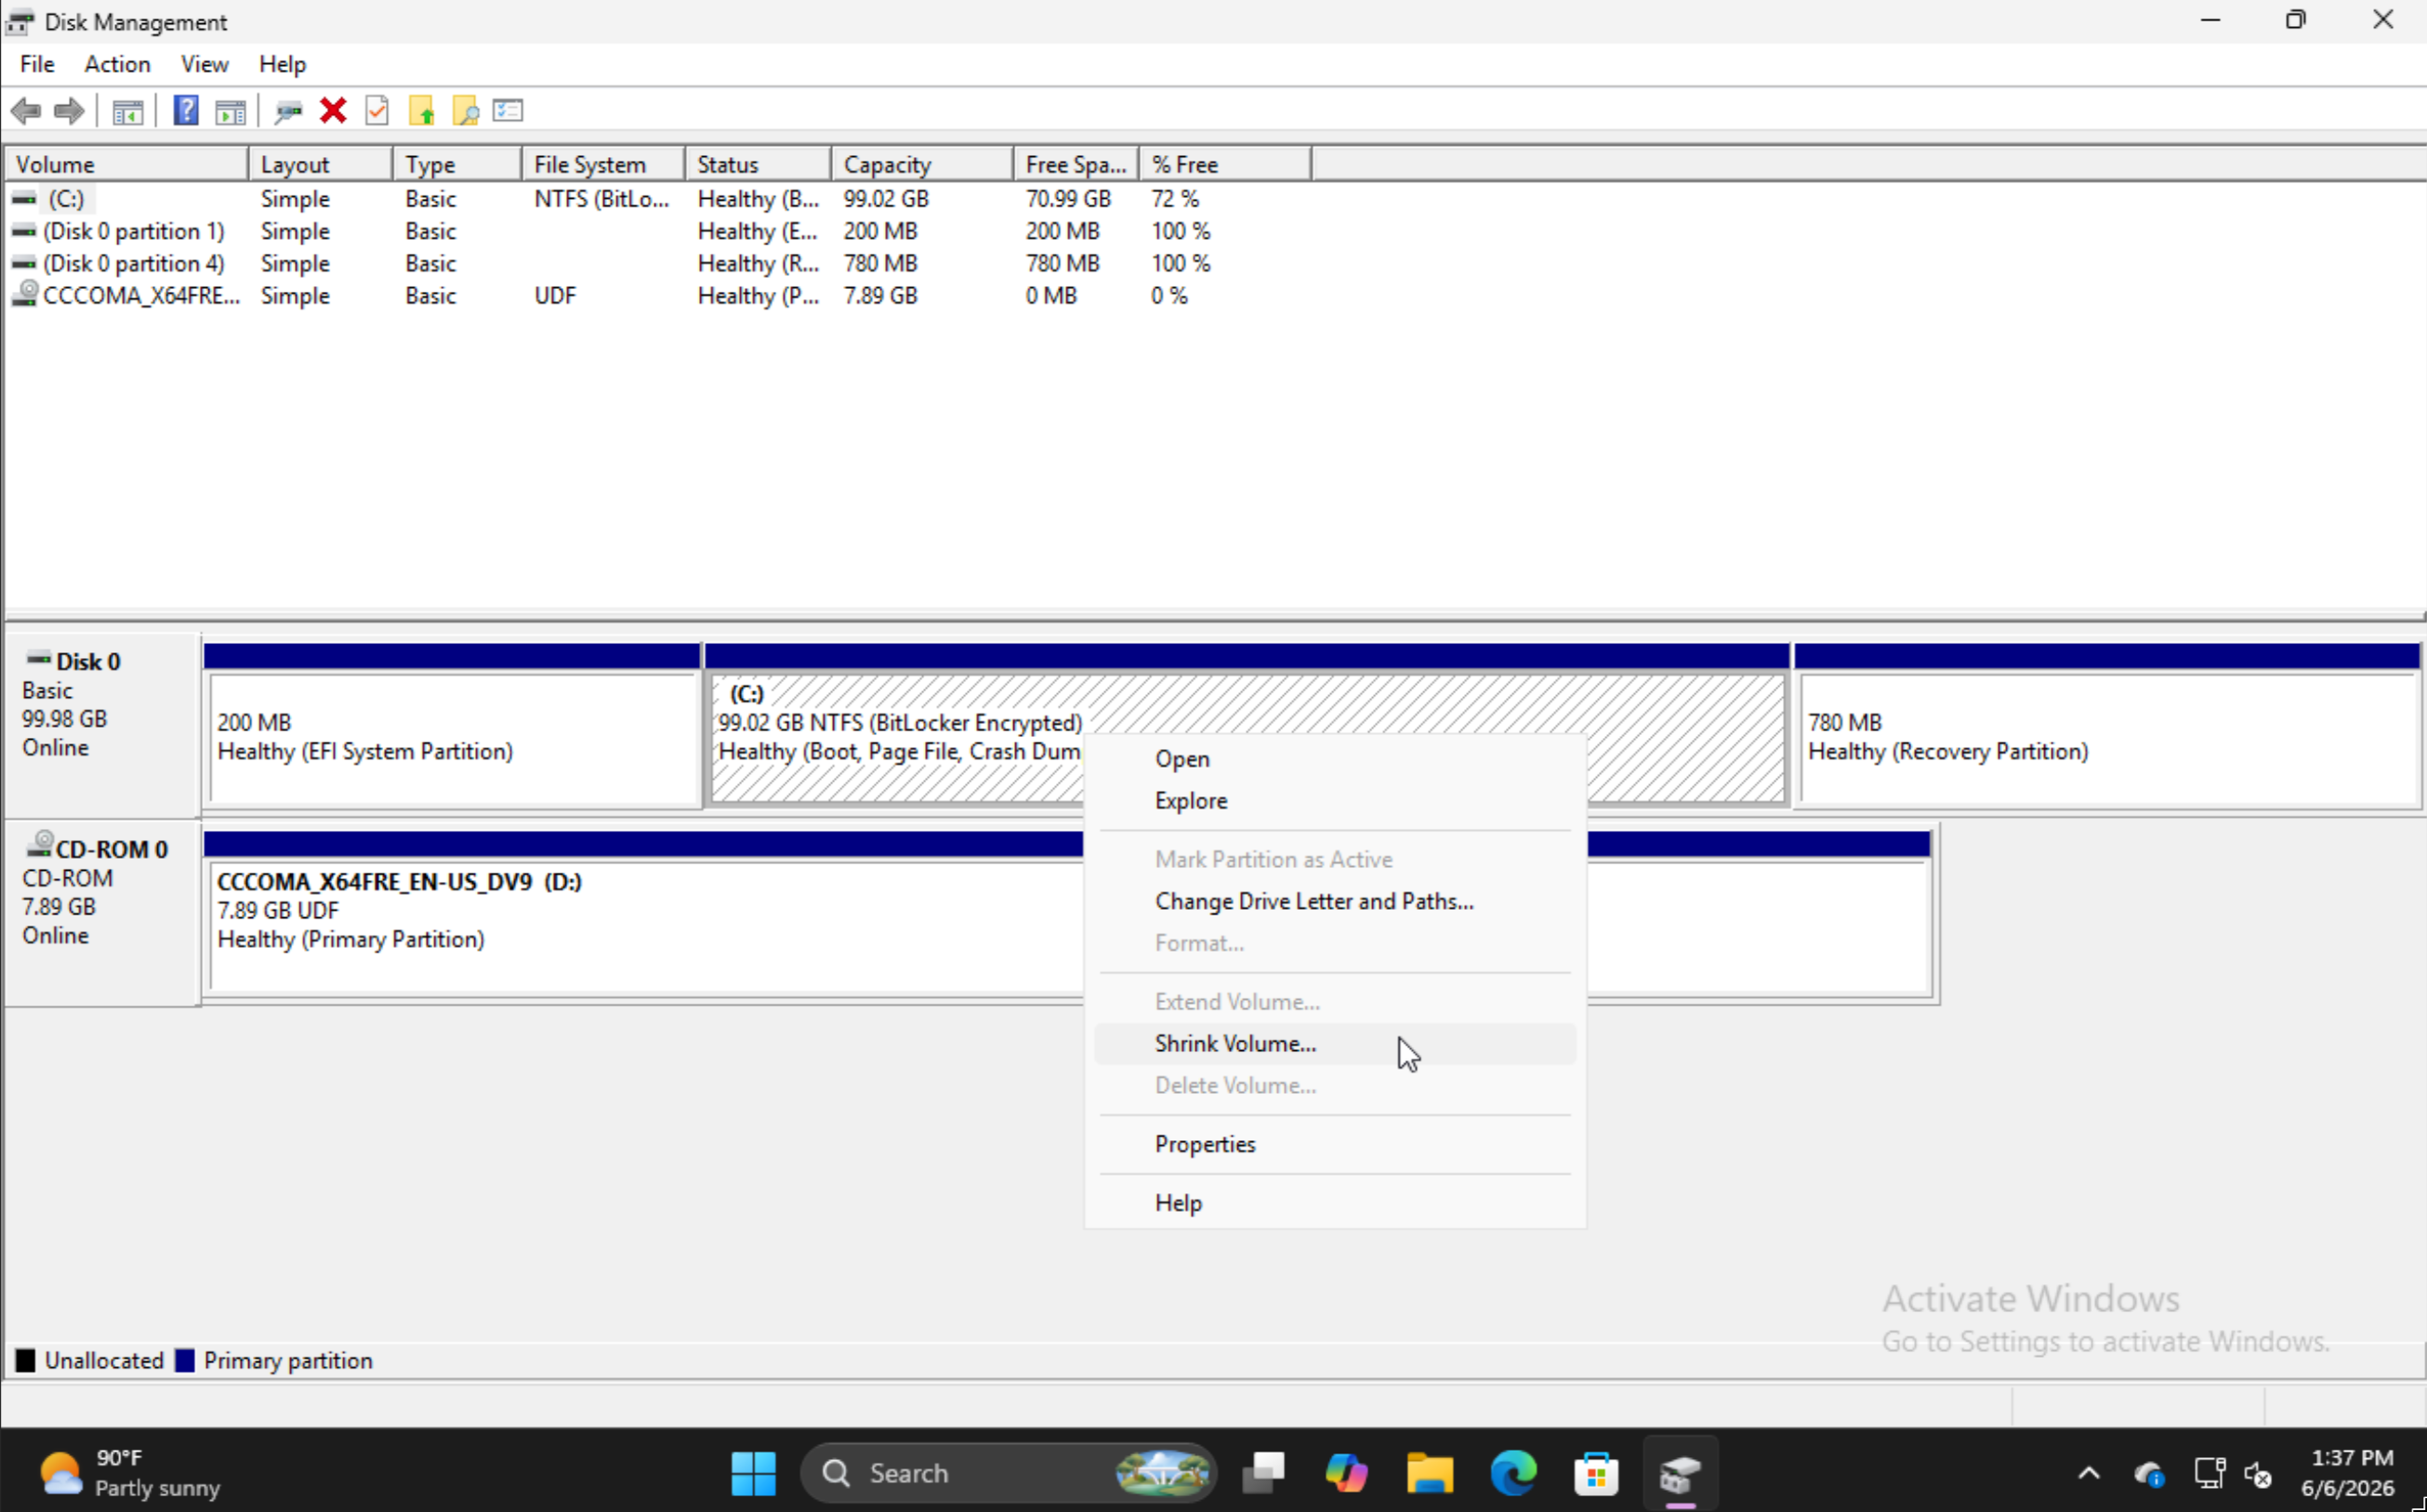
Input the amount you'd like to shrink the volume by. Note that this will be the size of your future Omarchy install inclusive of the boot partition.
![screenshot-2026-06-06_13-38-23.pn