Android Java Chat is an native Android Mobile client for ServiceStack Chat that was originally ported from C# Xamarin Android Chat into Java 8, created using Google's recommended Android Studio Development Environment. In addition to retaining the same functionality as the original C# Xamarin.Android Chat App, it also leverages the native Facebook and Twitter SDK's to enable seamless and persistent authentication via Facebook or Twitter Sign-in's.
The Java Add ServiceStack Reference support and Java Server Events Client are idiomatic ports of their C# equivalent Add ServiceStack Reference and Server Events Client enabling both projects to leverage an end-to-end Typed API that significantly reduces the effort to port from their original C# sources, rendering the porting effort down to a straight-forward 1:1 mapping exercise into Java 8 syntax.
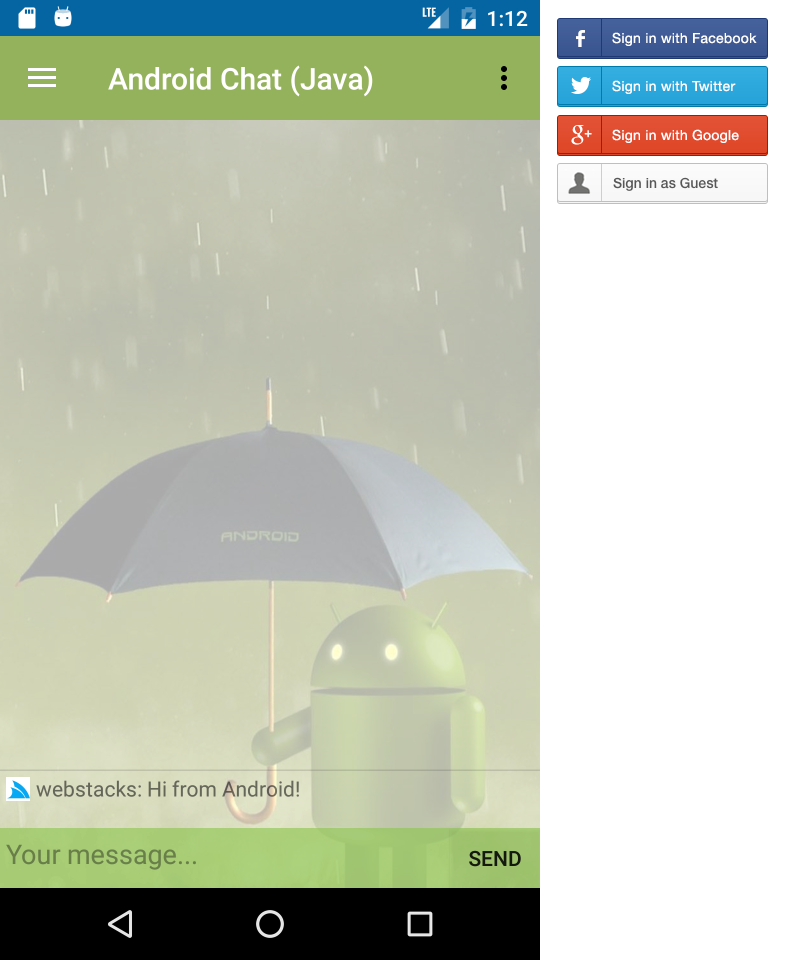
Configuring the Server Events Client
The central hub that powers the Android Chat App is the Server Events Client connection initially declared in the App.java Application so its singleton instance is easily accessible from our entire App:
public App(Context context) {
    this.context = context;
    this.prefs = context.getSharedPreferences("servicestack.net.androidchat",Context.MODE_PRIVATE);
    serverEventsClient = new AndroidServerEventsClient("http://chat.servicestack.net/", "home");
}
The Server Events connection itself is initialized in MainActivity.java when its first launched, after selecting how the User wants to Sign-in from the initial Login screen.
The complete Server Events registration below binds the Chat Server Events to our Application logic, where:
- Upon successful connection:
- Loads the Chat Message History for the channel
- Updates our User's Avatar
- When a new User Joins:
- Updates the
subscriberListwith a list of all Users in the channel - Tell our Message History to re-render because our dataset has changed
- Updates the
- When the Server Events Connection throws an Exception:
- Load an Alert dialog with the Error message
- It uses the Custom
ReceiverResolverto initialize instances of our Receiver classes - Registers
ChatReceiverto handle all messages sent withcmd.*selector - Registers
TvRecieverto handle all messages sent withtv.*selector - Registers
CssReceiverto handle all messages sent withcss.*selector
App.get().getServerEventsClient()
    .setOnConnect(connectMsg -> {
        Extensions.updateChatHistory(getClient(), cmdReceiver, () -> {
            Extensions.updateUserProfile(connectMsg, mainActivity);
        });
    })
    .setOnJoin(msg -> {
        getClient().getChannelSubscribersAsync(r -> {
            subscriberList = r;
            messageHistoryAdapter.notifyDataSetChanged();
        });
    })
    .setOnException(error -> mainActivity.runOnUiThread(() ->
        Toast.makeText(this, "Error : " + error.getMessage(), Toast.LENGTH_LONG).show()))
    .setResolver(new ReceiverResolver(cmdReceiver))
    .registerReceiver(ChatReceiver.class)
    .registerNamedReceiver("tv", TvReciever.class)
    .registerNamedReceiver("css", CssReceiver.class);
Later in onPostCreate() the ServerEventsClient starts the connection and begins listening to Server Events:
@Override
public void onPostCreate(Bundle savedInstanceState) {
    //...
    App.get().getServerEventsClient().start();
}
Custom Resolver
In order to inject our receivers their required dependencies we utilize a custom ReceiverResolver to take control over how Receiver classes are instantiated:
public class ReceiverResolver implements IResolver {
    ChatCommandHandler messageHandler;
    public ReceiverResolver(ChatCommandHandler messageHandler) {
        this.messageHandler = messageHandler;
    }
    @Override
    public Object TryResolve(Class cls){
        if (cls == ChatReceiver.class){
            return new ChatReceiver(this.messageHandler);
        } else if (cls == TvReciever.class){
            return new TvReciever(this.messageHandler);
        } else if (cls == CssReceiver.class){
            return new CssReceiver(this.messageHandler);
        }
        try {
            return cls.newInstance();
        } catch (Exception e) {
            throw new RuntimeException(e);
        }
    }
}
Server Event Receivers
The receiver classes themselves act like light-weight proxies which captures each event and forwards them to the ChatCommandHandler to perform the necessary UI updates:
public class ChatReceiver extends ServerEventReceiver {
    private ChatCommandHandler chatMessageHandler;
    public ChatReceiver(ChatCommandHandler chatMessageHandler) {
        this.chatMessageHandler = chatMessageHandler;
    }
    public void chat(ChatMessage chatMessage){
        chatMessageHandler.appendMessage(chatMessage);
    }
    public void announce(String message){
        chatMessageHandler.announce(message);
    }
}
public class CssReceiver extends ServerEventReceiver {
    private ChatCommandHandler chatMessageHandler;
    public CssReceiver(ChatCommandHandler chatMessageHandler){
        this.chatMessageHandler = chatMessageHandler;
    }
    public void backgroundImage(String message){
        chatMessageHandler.changeBackground(message);
    }
    public void background(String message){
        chatMessageHandler.changeBackgroundColor(message, super.getRequest().getCssSelector());
    }
}
public class TvReciever extends ServerEventReceiver {
    private ChatCommandHandler chatMessageHandler;
    public TvReciever(ChatCommandHandler chatMessageHandler) {
        this.chatMessageHandler = chatMessageHandler;
    }
    public void watch(String videoUrl) {
        chatMessageHandler.showVideo(videoUrl);
    }
}
Integrated Facebook, Twitter and Google Logins
As we're now using Java we get direct access to the latest 3rd Party Android components which we've taken advantage of to leverage Facebook's and Twitter's SDK's to handle the OAuth flow allowing Users to Sign-in with their Facebook or Twitter account.
Before we can make use of their SDK's we need to configure them with our project by following their respective installation guides:
Login Activities
As they offer different level of customizations we've implemented 2 Login Activities, our first Activity shows how to integrate using Facebook's and Twitter's SDK Login buttons whilst the 2nd Login Activity shows how to use the SDK classes directly letting us use custom images for login buttons.
The UI and implementation for both Login Activities are below:
Using Login SDK Buttons
Using Custom Login Images
With each Activity declared in AndroidManifest.xml:
<activity android:name=".LoginActivity">
</activity>
<activity android:name=".LoginButtonsActivity">
    <!-- Move to .LoginActivity if you prefer that login page instead -->
    <intent-filter>
        <action android:name="android.intent.action.MAIN" />
        <category android:name="android.intent.category.LAUNCHER" />
    </intent-filter>
</activity>
LoginButtonsActivity
The <intent-filter> is used to control which Activity our App loads when launched, in this case
it will load the LoginButtonsActivity:
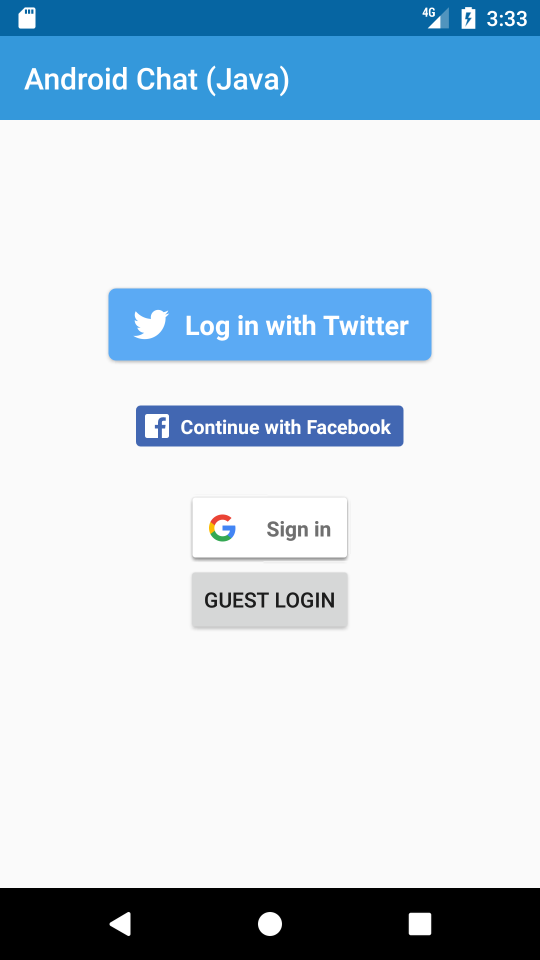
Where we just use Twitter's, Facebook's and Google's Login Button widgets to render the UI in login_buttons.xml: