Get SCIM credentials from Bytebase
- Log in to Bytebase as a Workspace Admin.
- Navigate to Settings -> General -> Network.
- Ensure External URL is configured (e.g.,
https://bytebase.example.com). - Navigate to Settings -> Members.
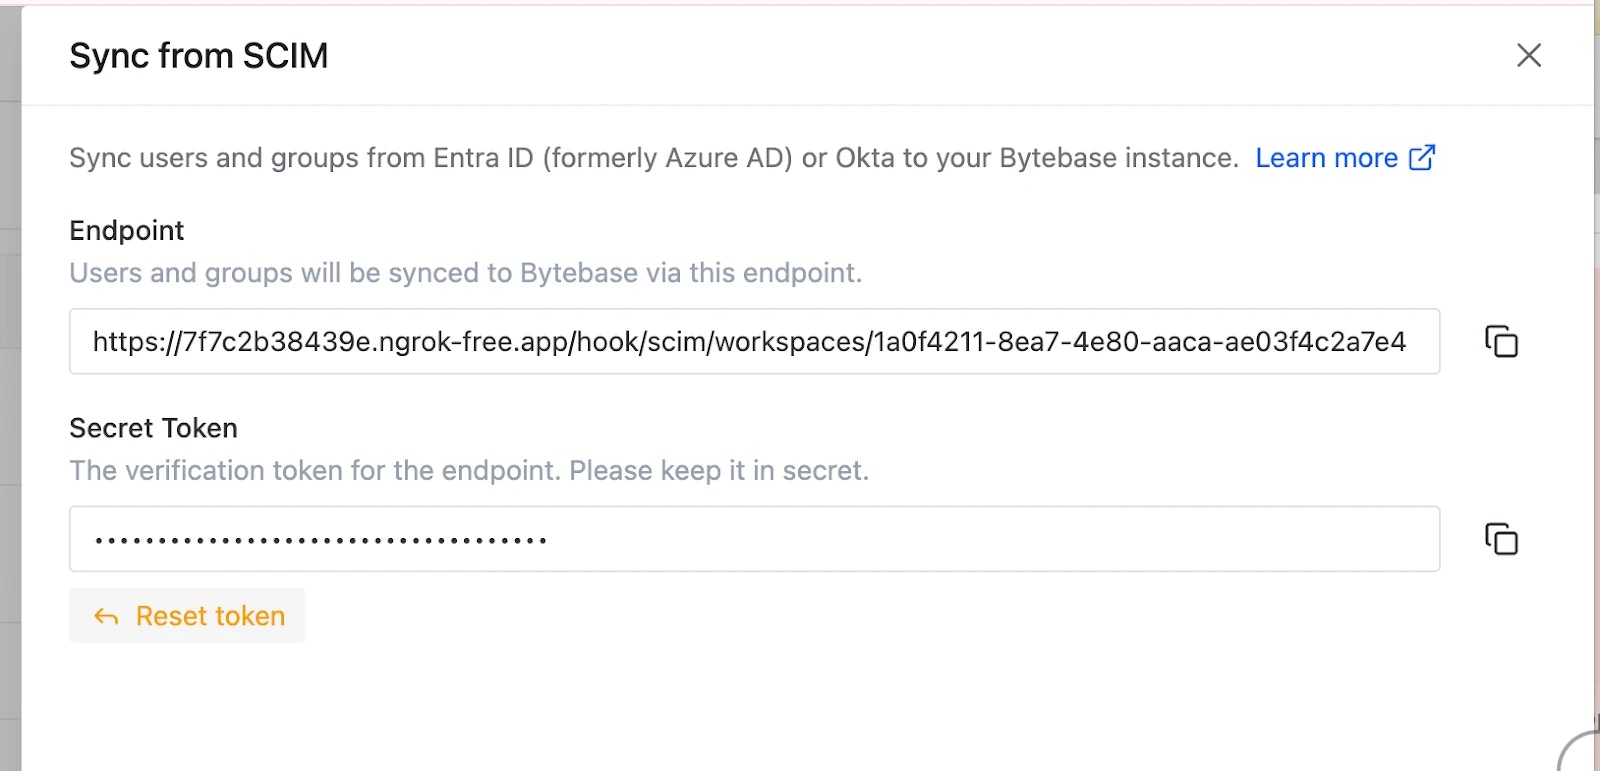
- Click the Directory Sync button (or gear icon).
- In the Directory Sync drawer, you’ll find:
- SCIM Endpoint URL:
https://<your-bytebase-url>/hook/scim/workspaces/<workspace-id> - Secret Token: Bearer token for authentication
- SCIM Endpoint URL:
- Copy both values - you’ll need them in the next steps.
Create SCIM application in Okta
- Log in to the Okta Admin Console (
https://your-domain-admin.okta.com). - In the left navigation, go to Applications -> Applications.
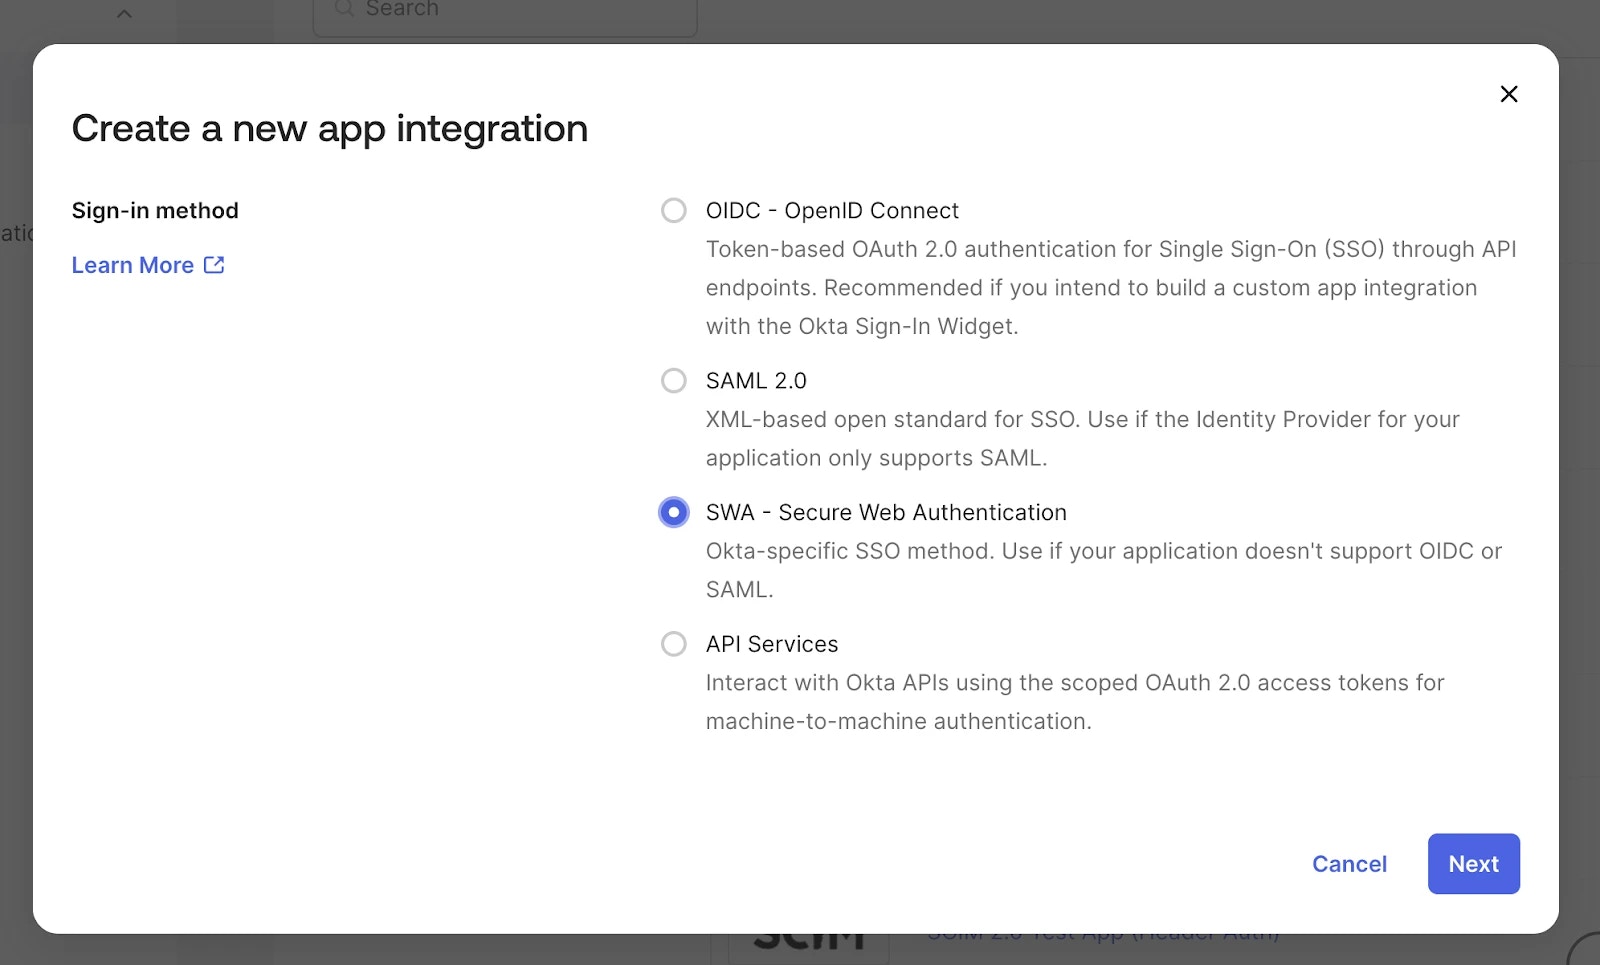
- Click Create App Integration.
- Select SWA - Secure Web Authentication and click Next.
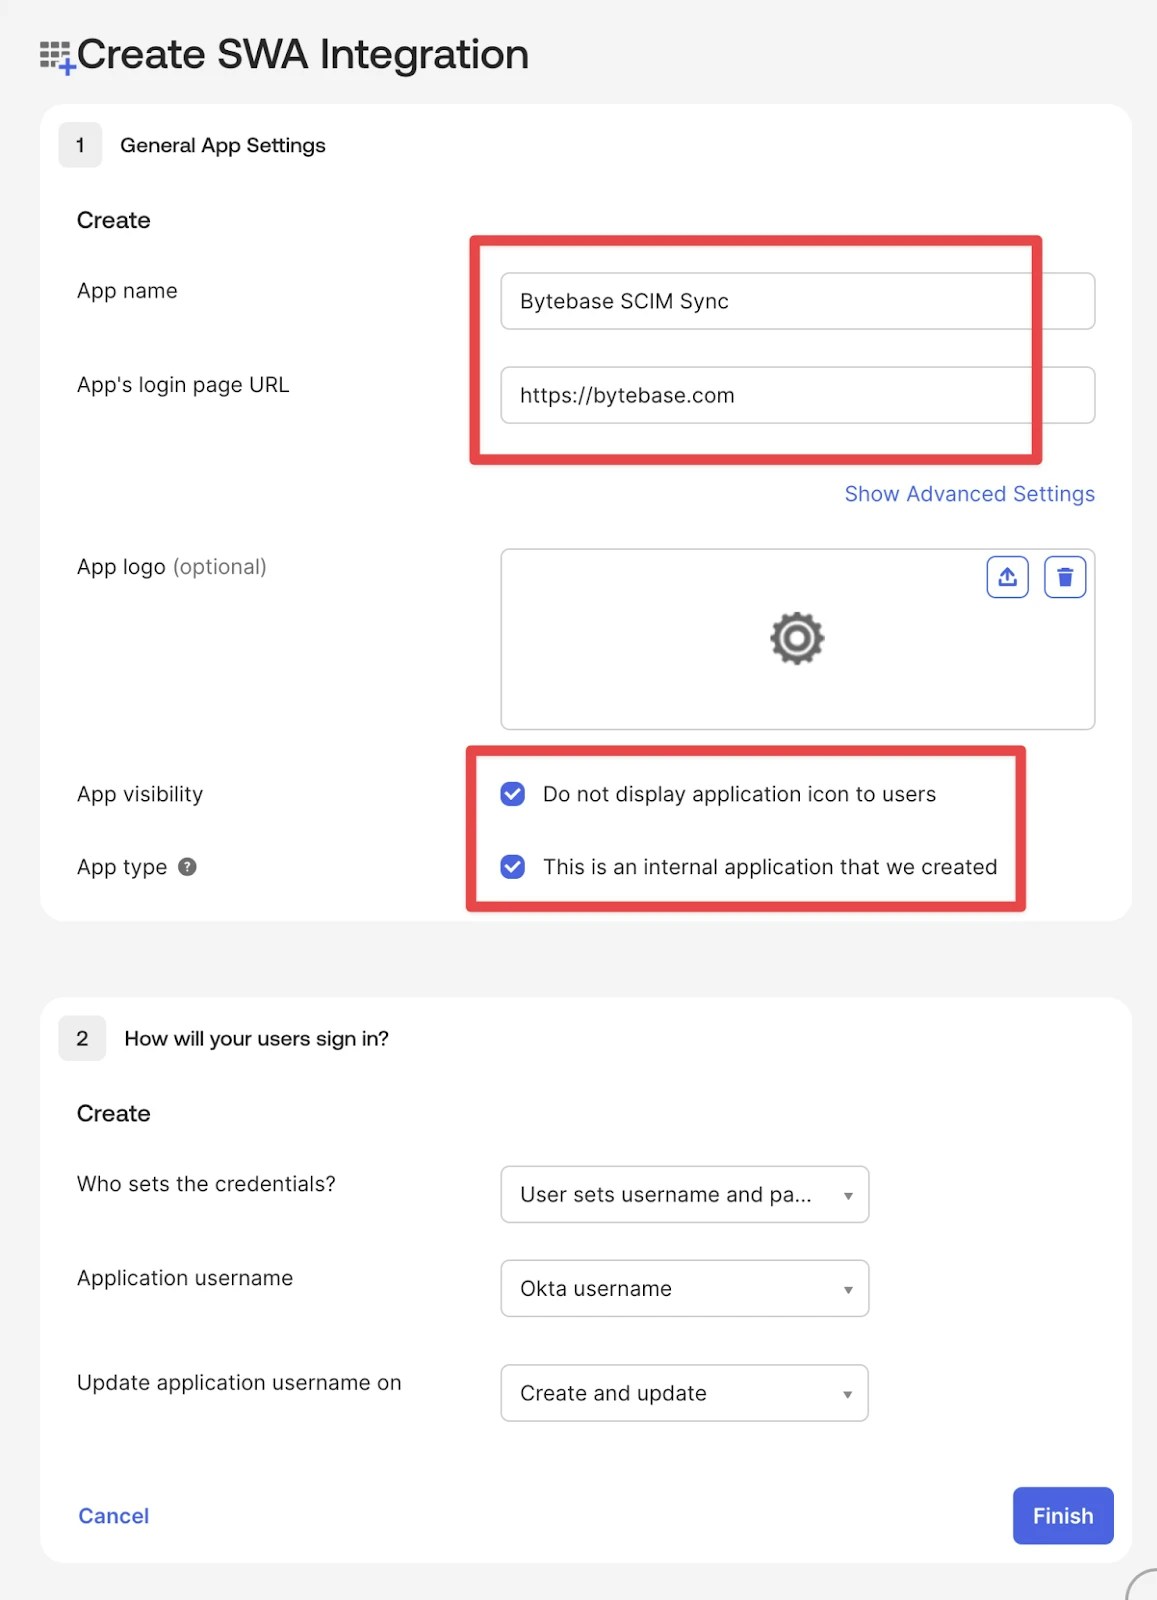
- Configure the application:
- App name:
Bytebase SCIM - App login page URL: Your Bytebase external URL
- You can also check “Do not display application icon to users” and “This is an internal application that we created” since it’s only used for data sync.
- App name:
Configure API integration
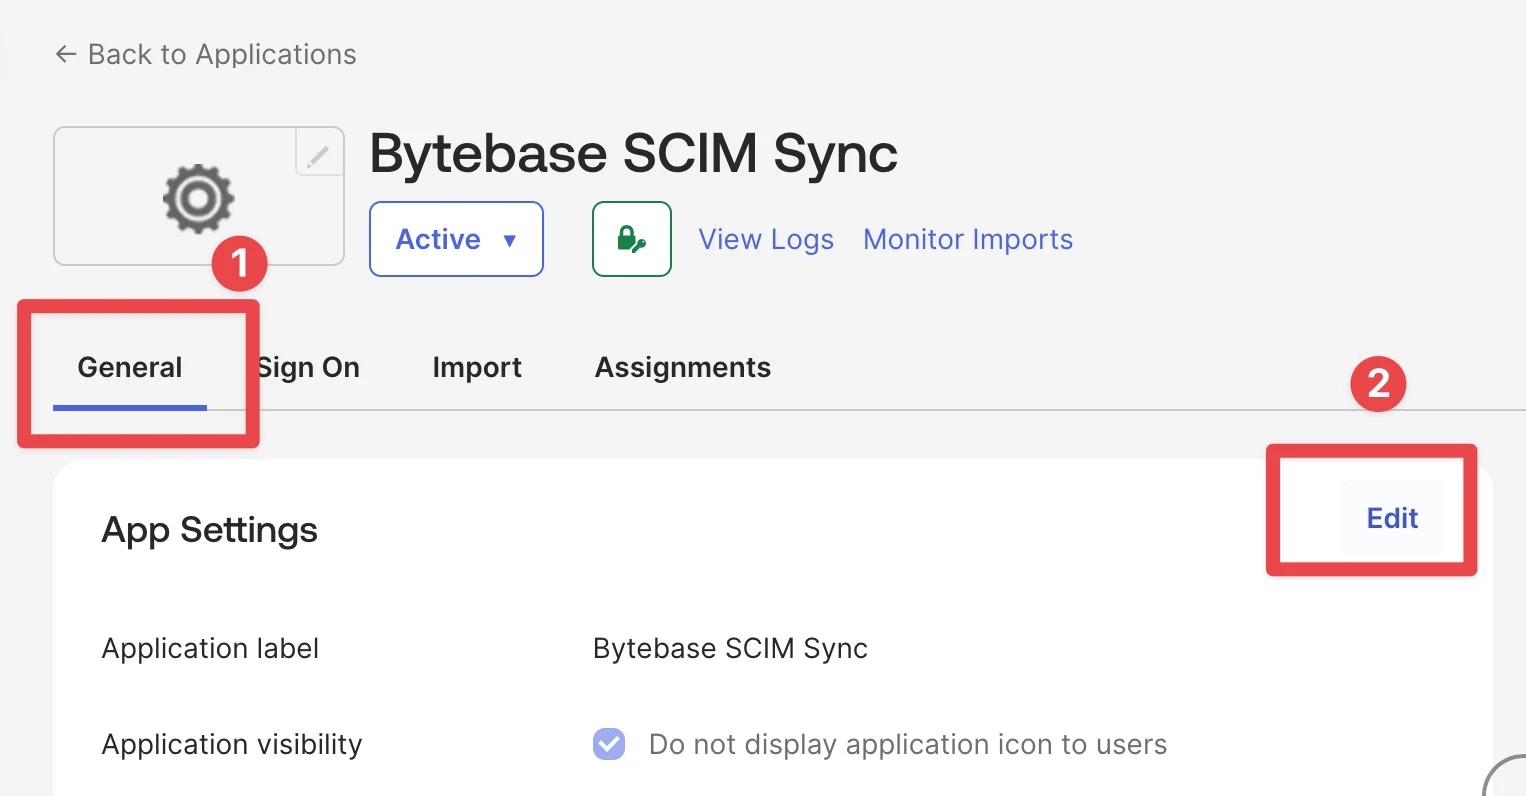
- Go to the General tab, in the App Settings section, click Edit.
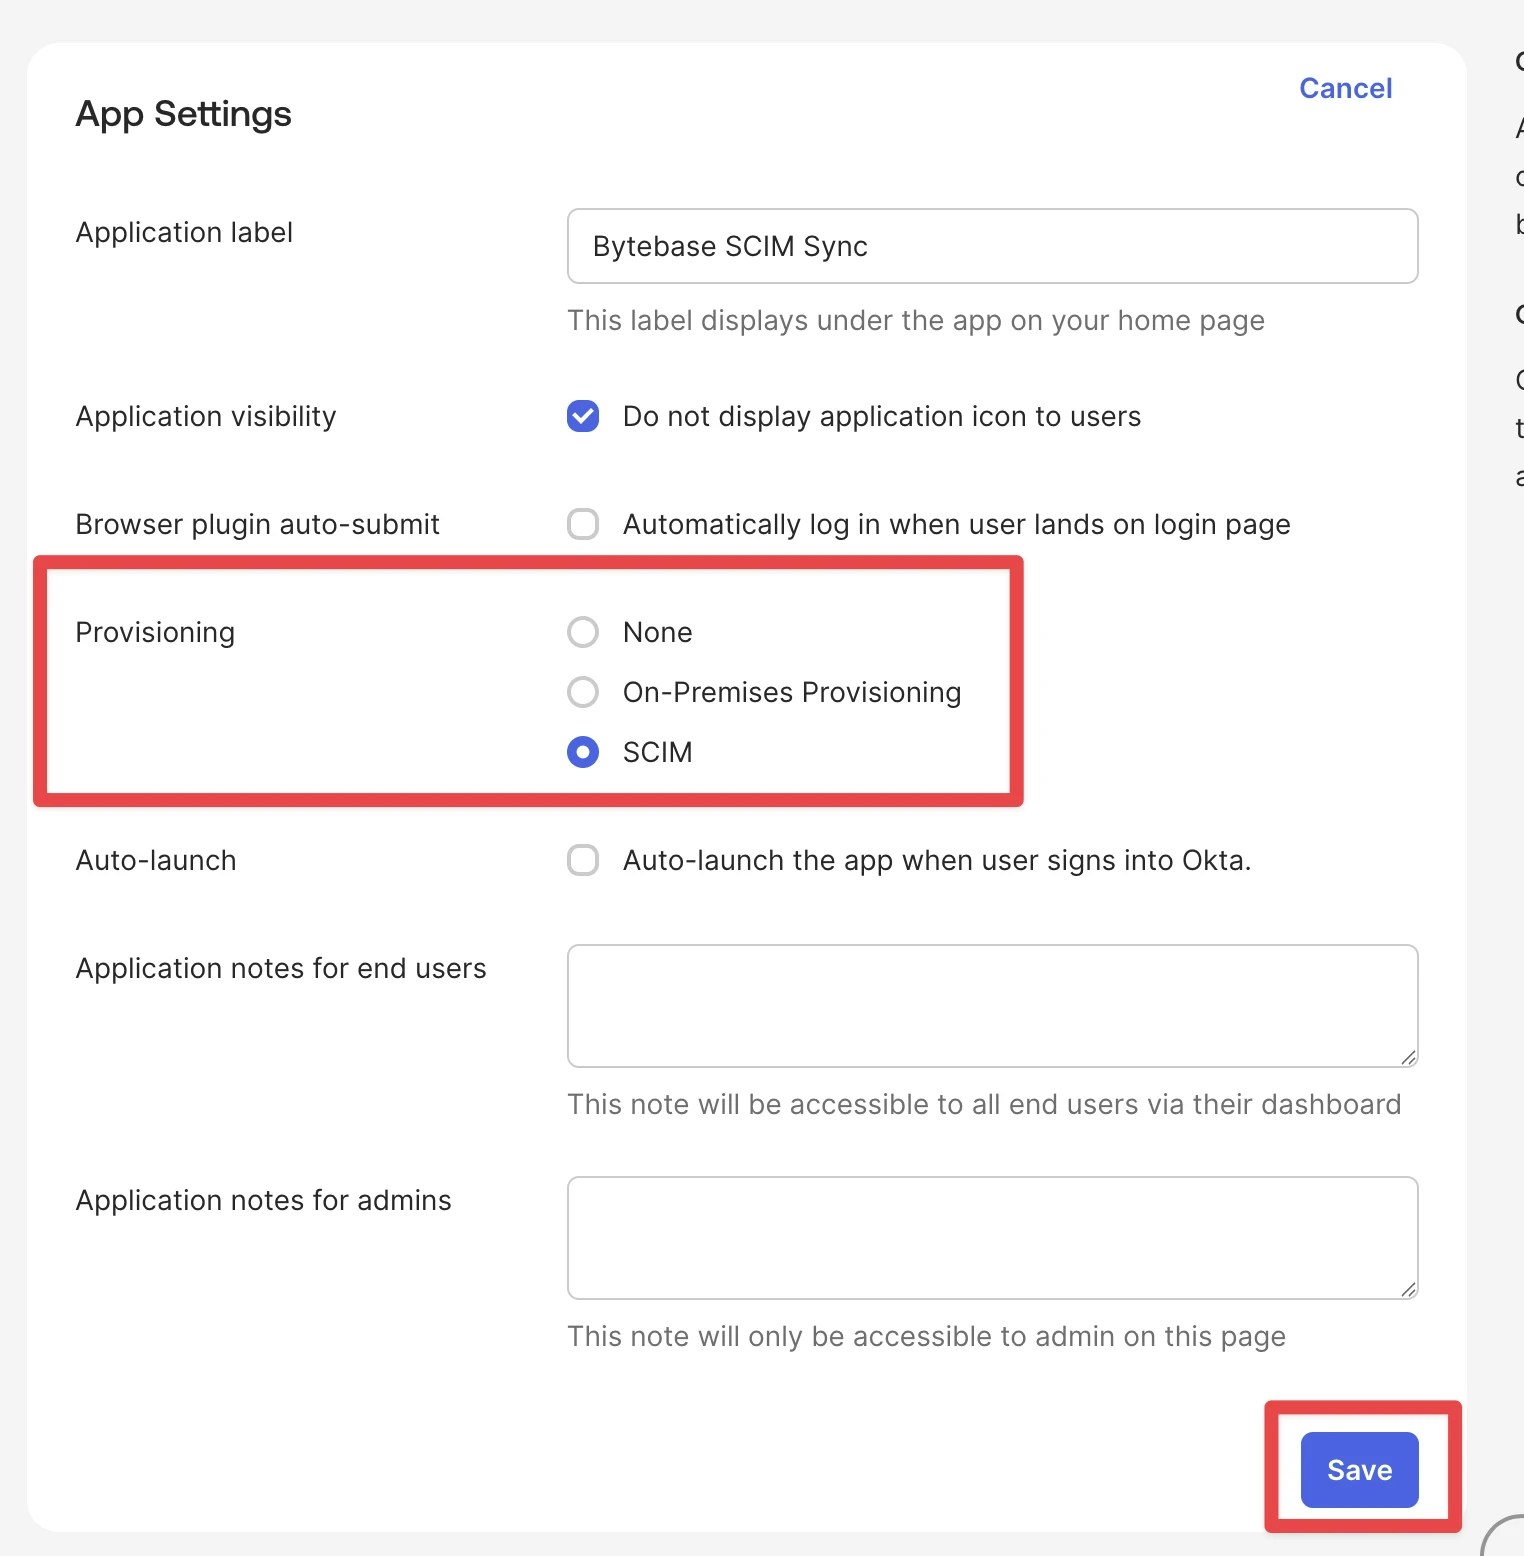
- Find the Provisioning field and select SCIM, then save the setting. After saving, the Provisioning tab will appear in the application.
- Go to the Provisioning tab, edit the integration:
- SCIM connector base URL: The SCIM Endpoint URL from Bytebase (e.g.,
https://bytebase.example.com/hook/scim/workspaces/abc123) - Unique identifier field for users:
userName - Authentication Mode: HTTP Header
- Authorization: The Secret Token from Bytebase
- SCIM connector base URL: The SCIM Endpoint URL from Bytebase (e.g.,
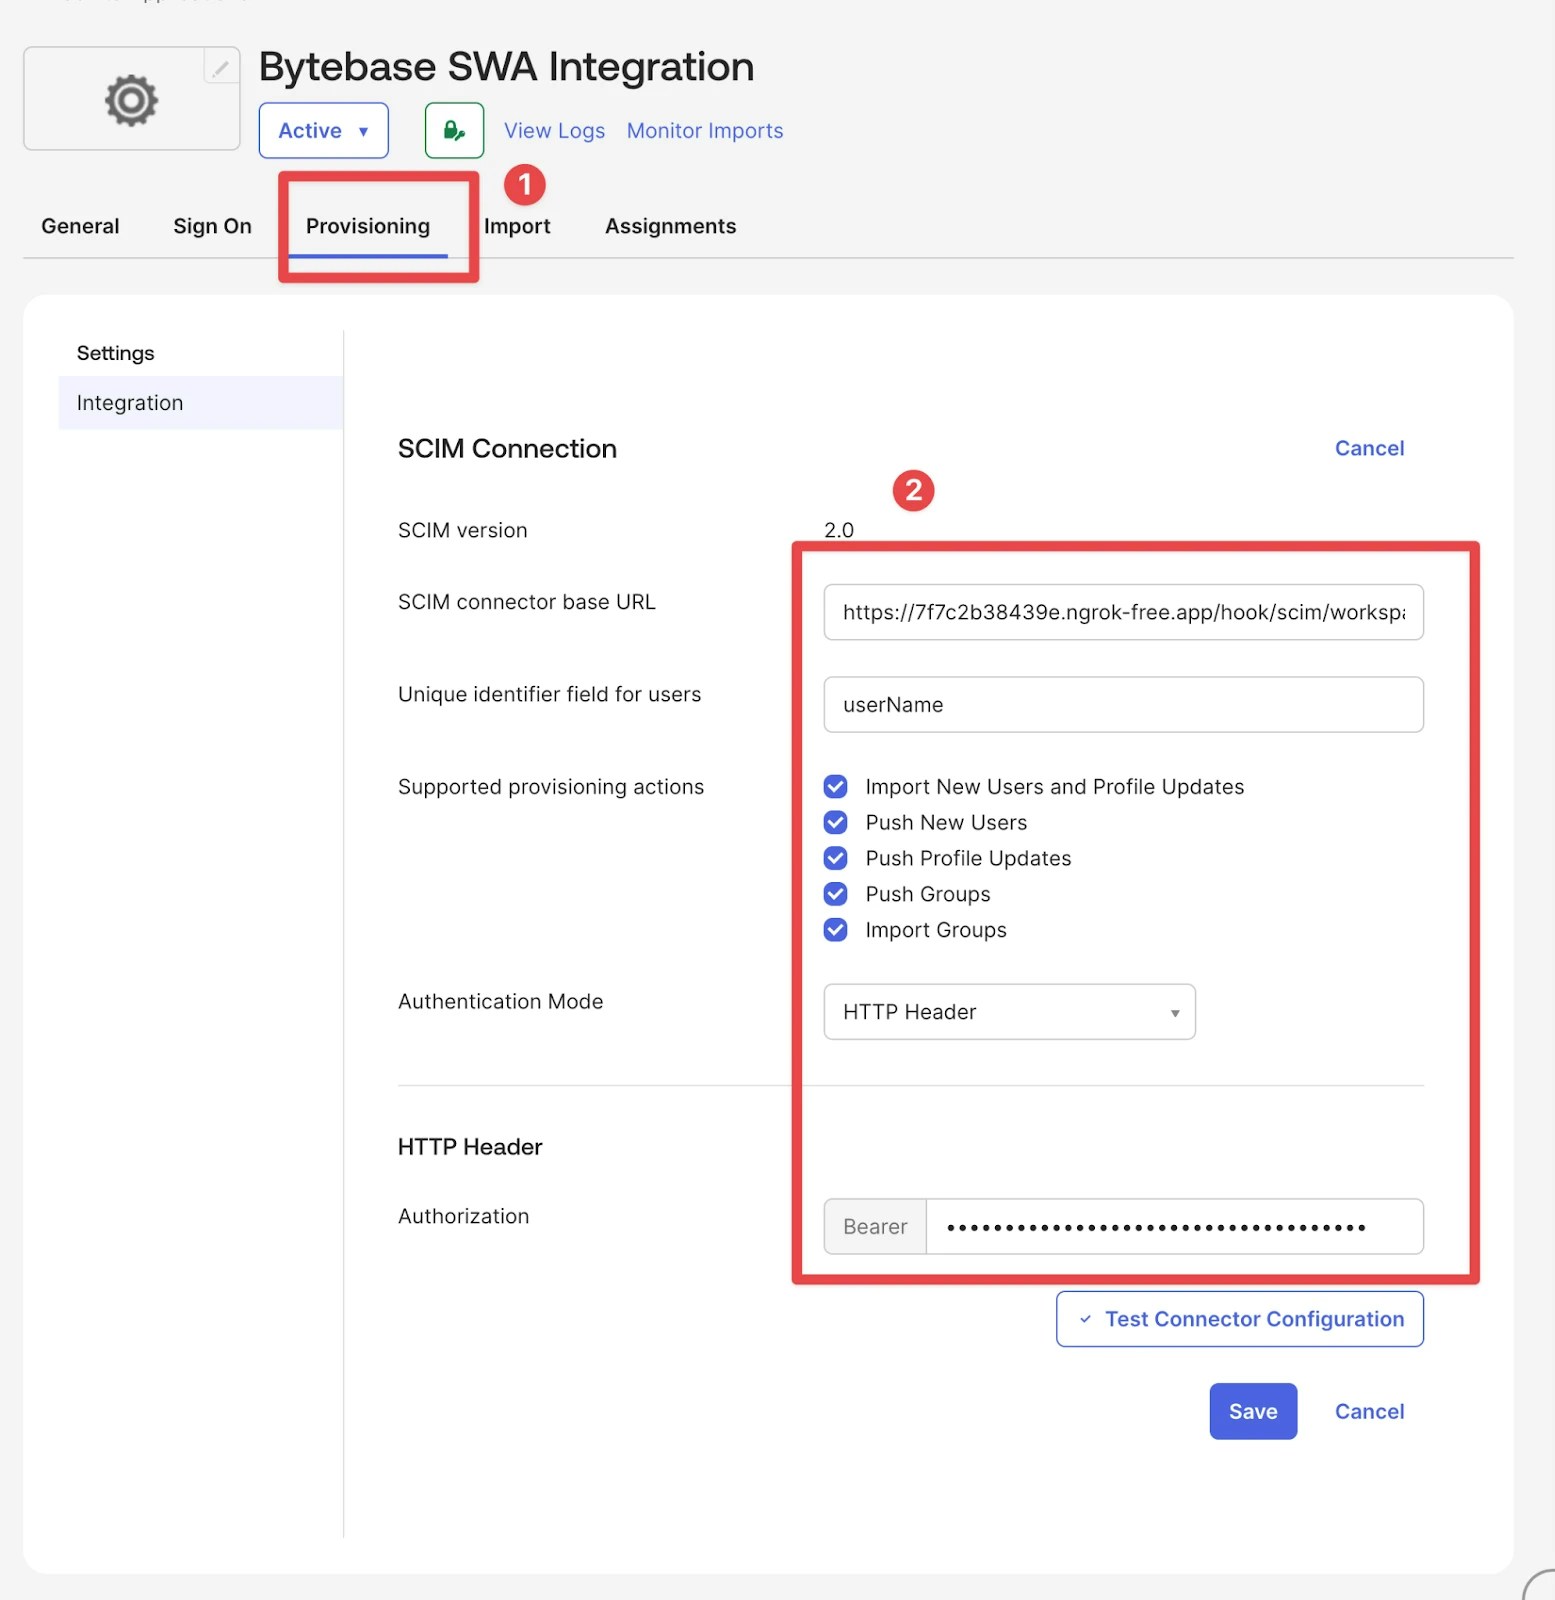
- Click Test Connector Configuration and save upon success.
Enable provisioning features
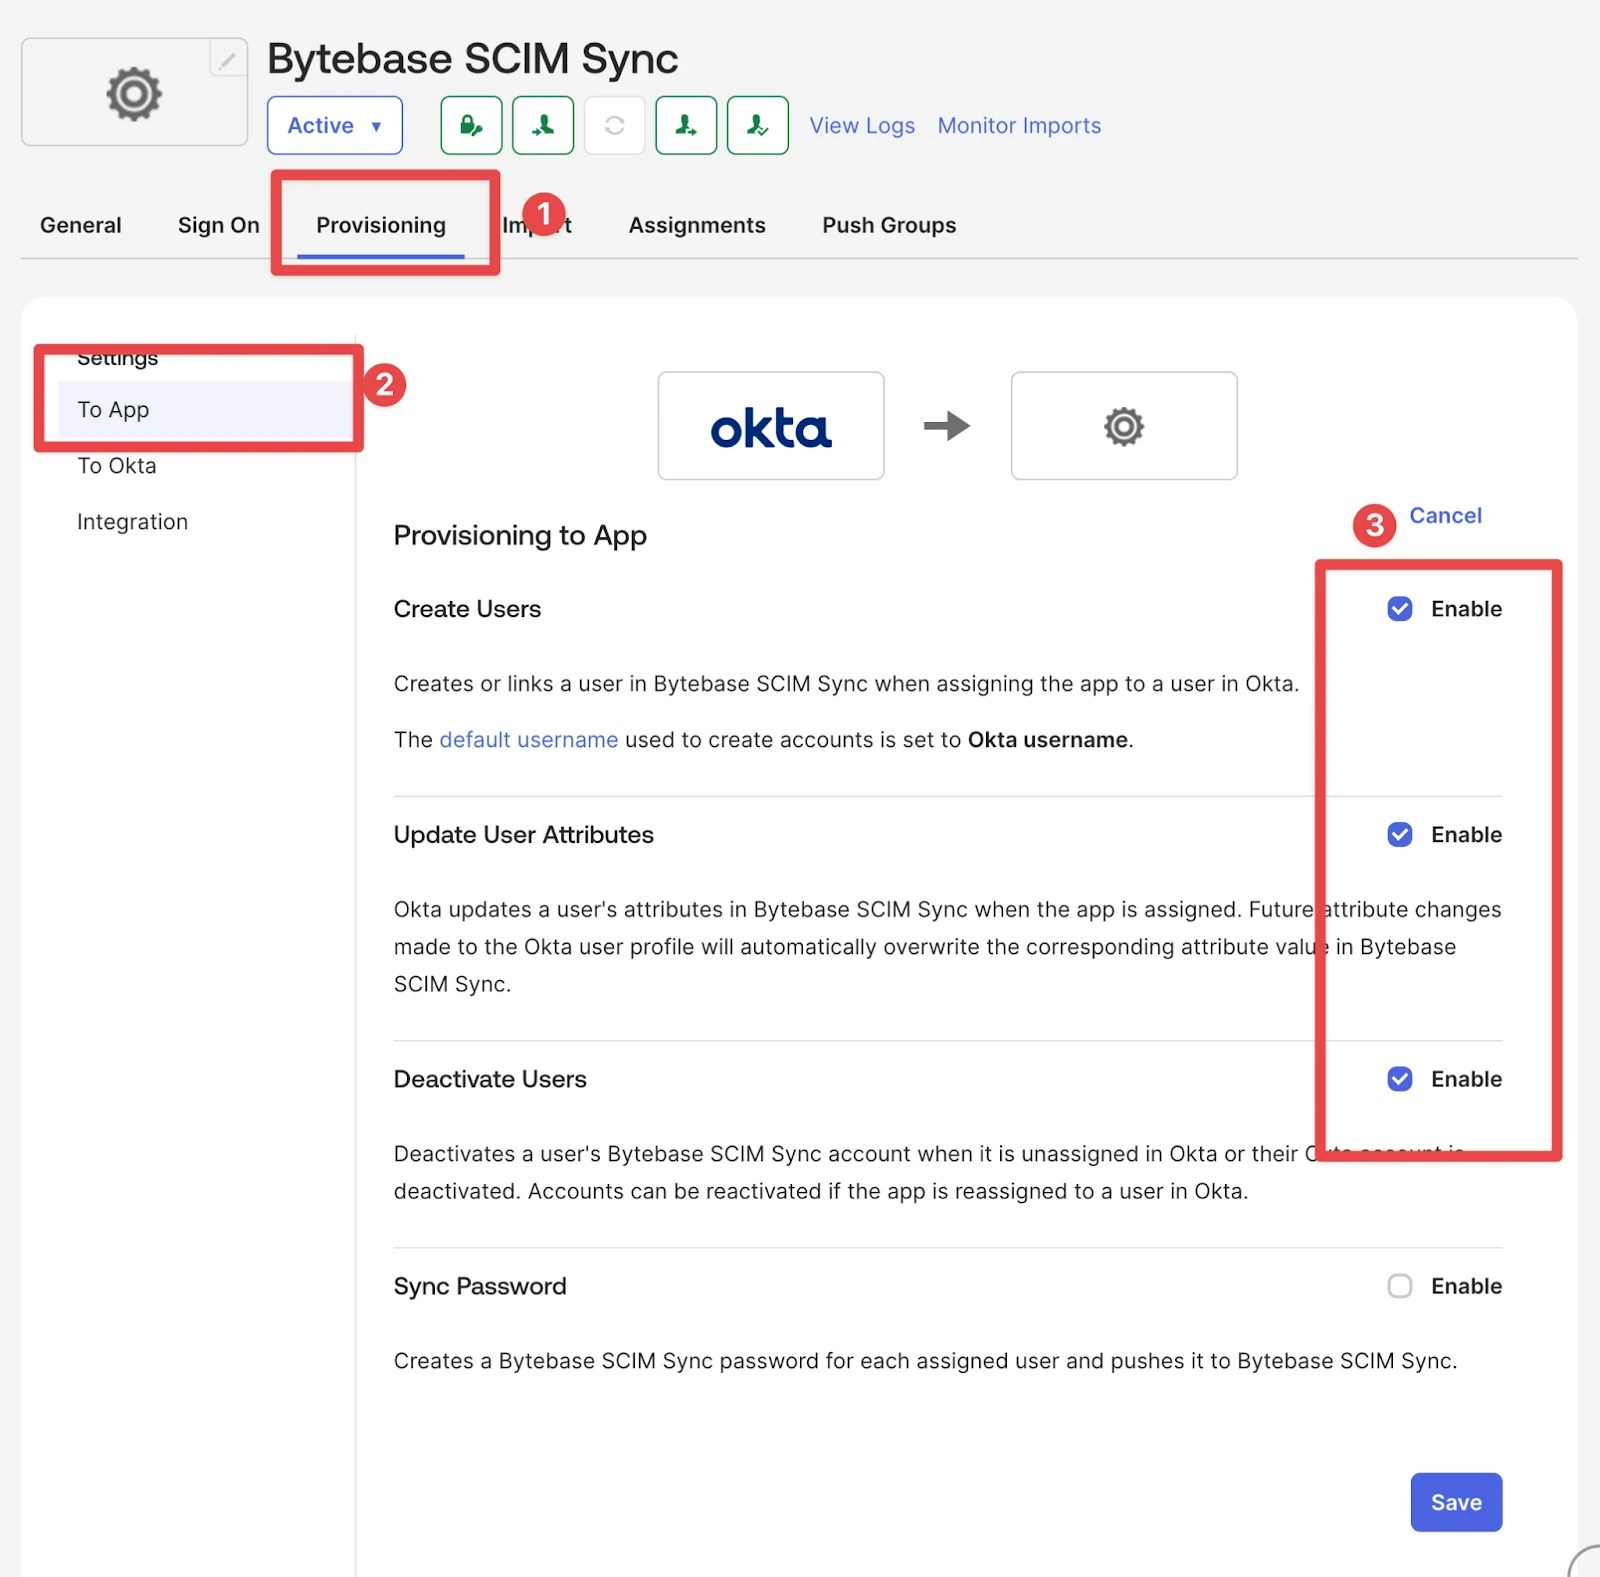
- Still on the Provisioning tab, click To App in the left sidebar.
- Click Edit in the Provisioning to App section.
- Enable the following features:
- Create Users
- Update User Attributes
- Deactivate Users
- Click Save.
Configure user attribute mappings
No changes are needed for the default attribute mapping configuration.
Assign users to the application
Assign individual users
- Go to the Assignments tab.
- Click Assign -> Assign to People.
- Find and select the users you want to provision.
- Click Assign next to each user.
- Review the user’s attribute values (you can customize per user if needed).
- Click Save and Go Back.
- Click Done when finished.
Assign groups (preferred)
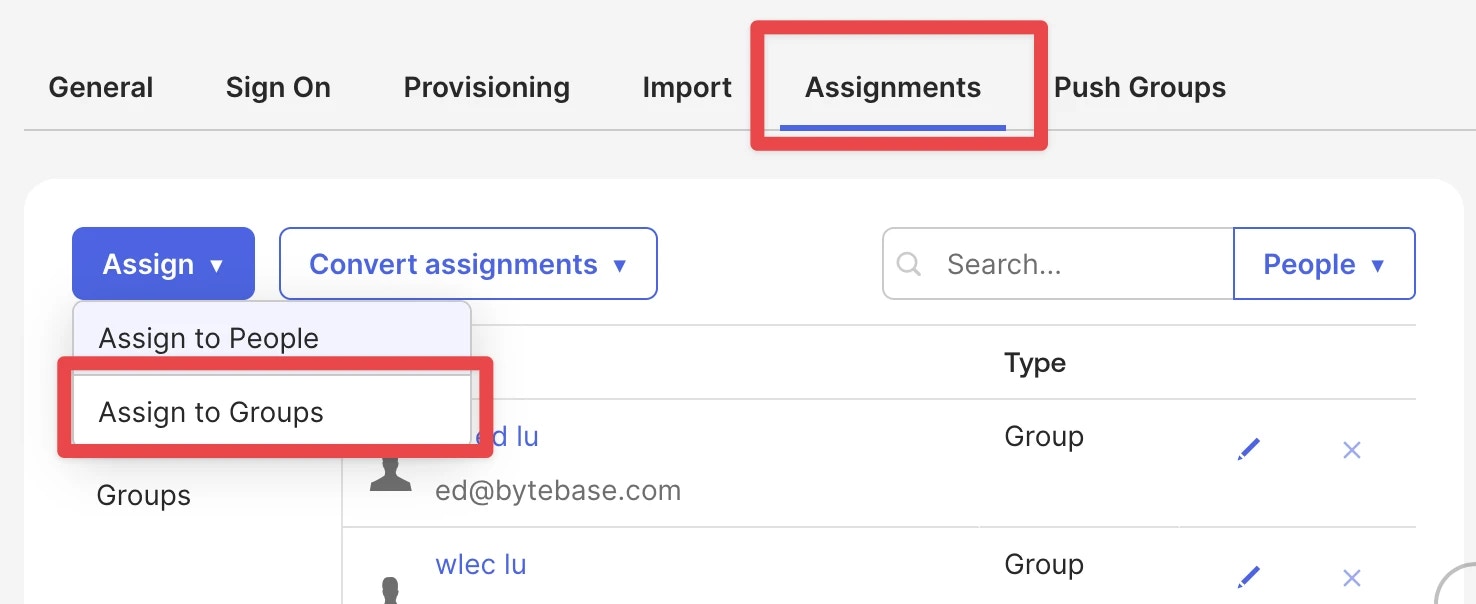
- Go to the Assignments tab.
- Click Assign -> Assign to Groups.
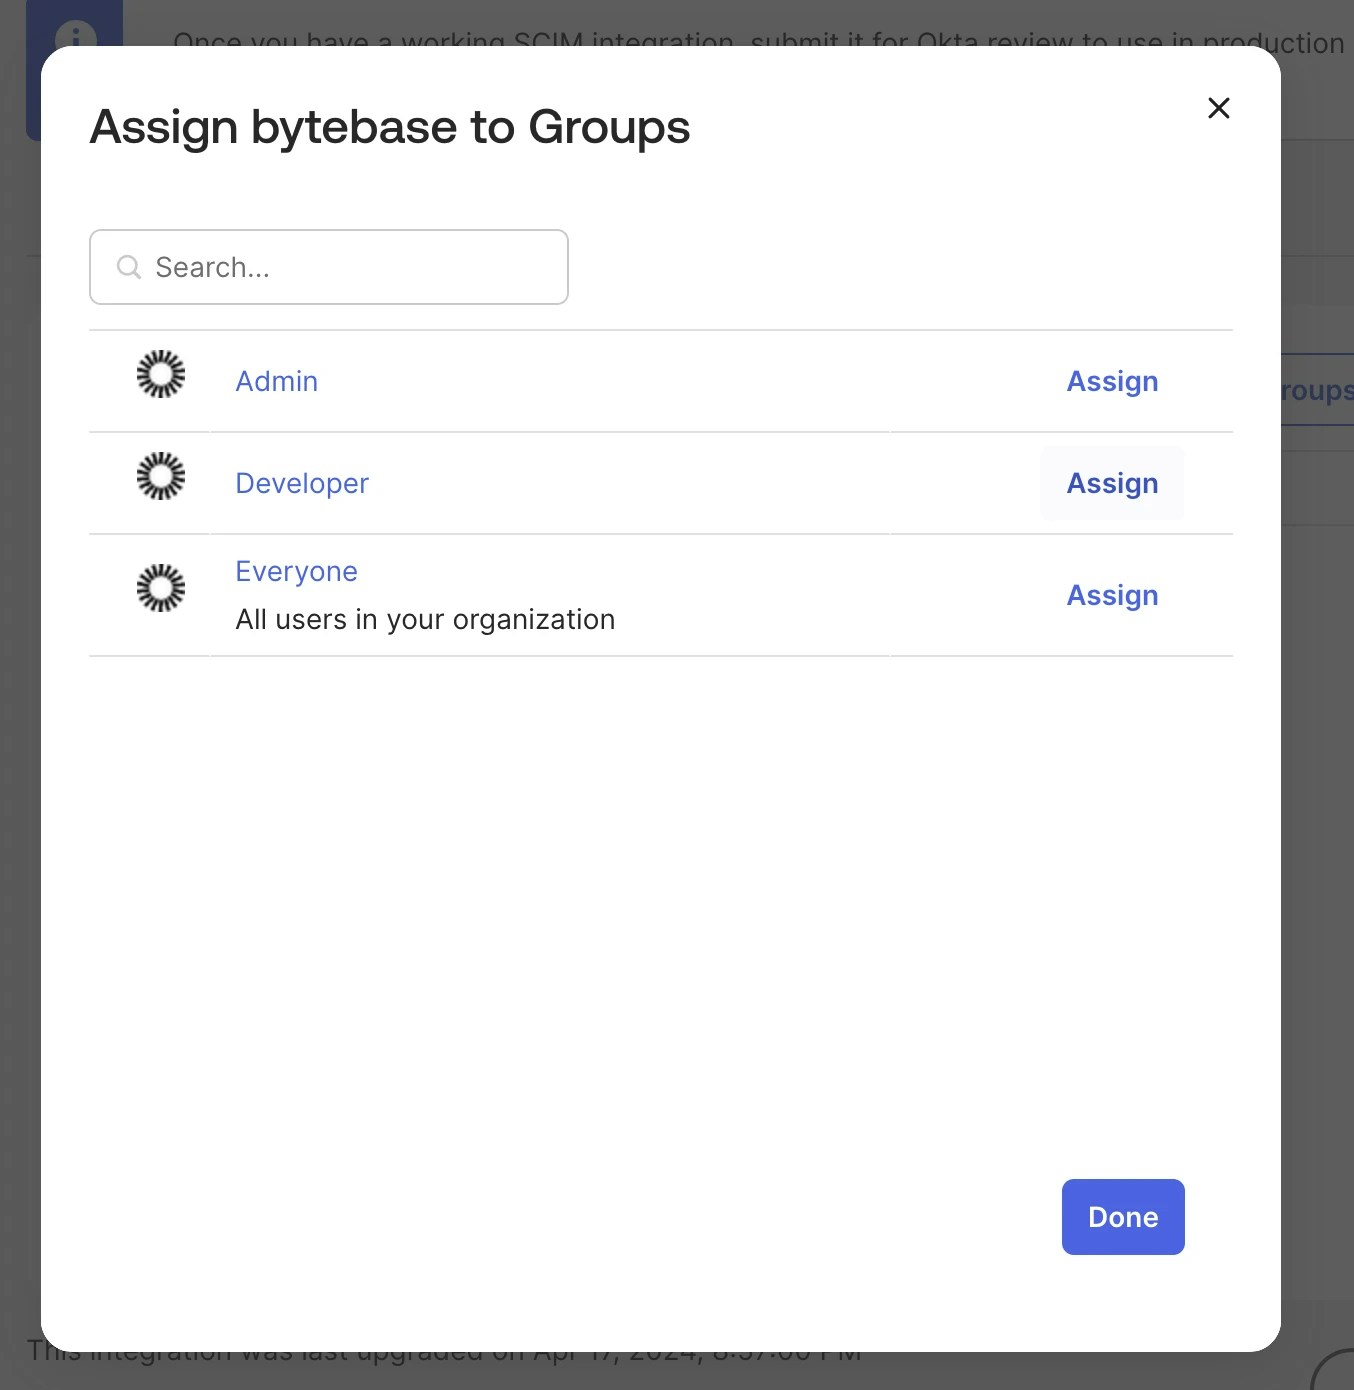
- Select the groups whose members should be provisioned.
- Click Assign, review the attribute values, and click Save and Go Back.
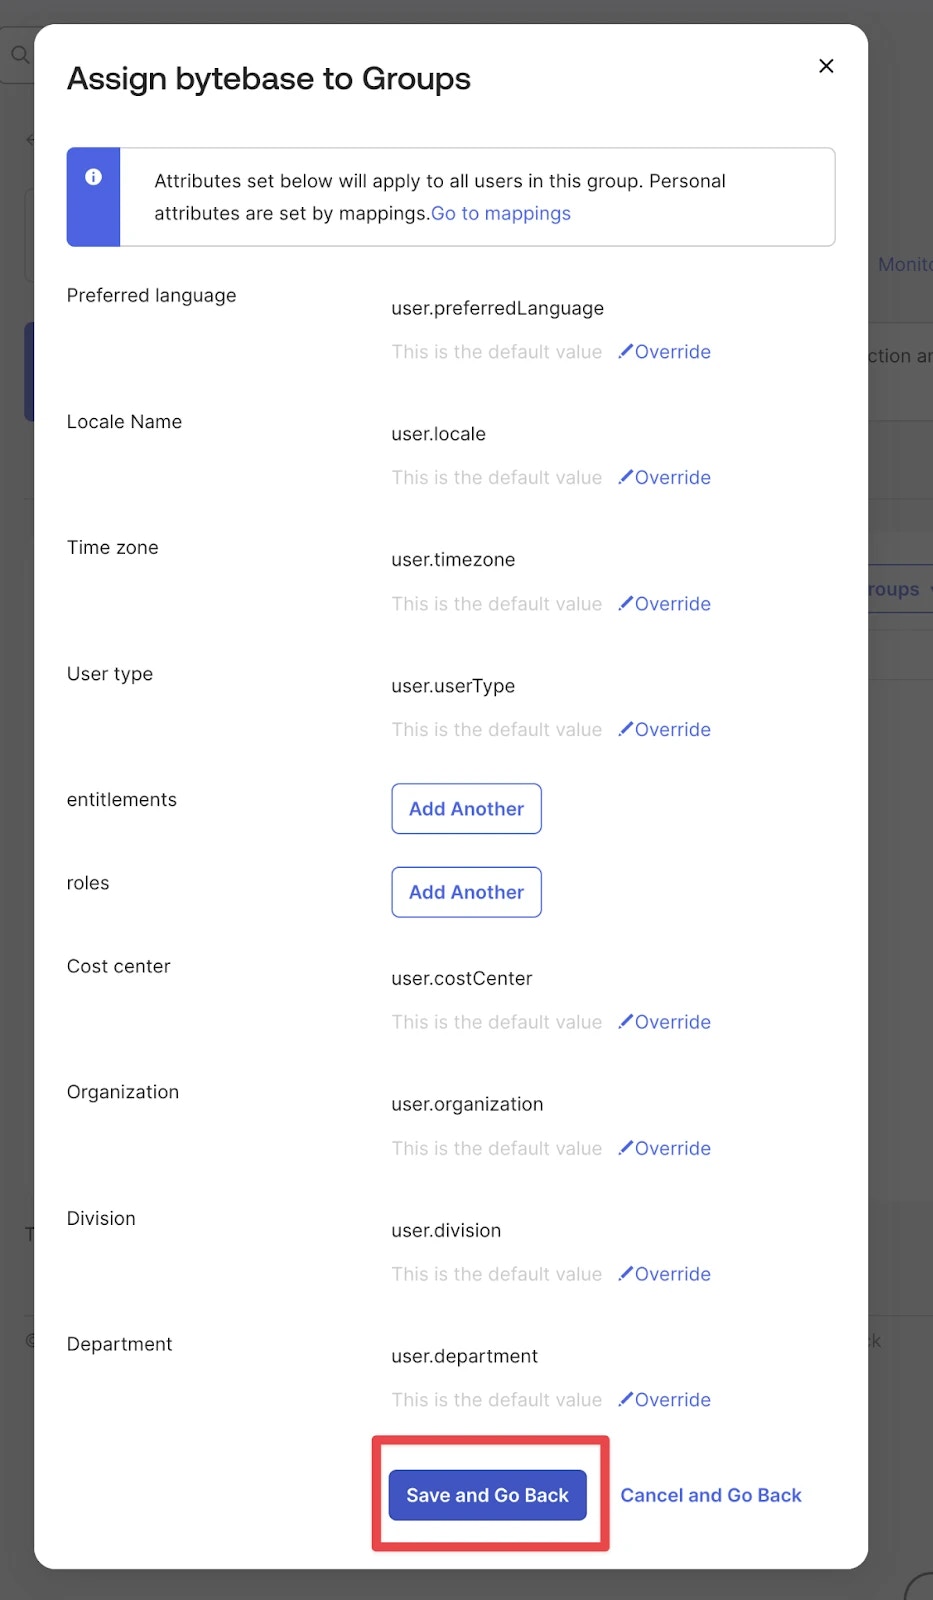
- Click Done when finished.
Configure group push
To sync Okta groups to Bytebase (not just group members as users):
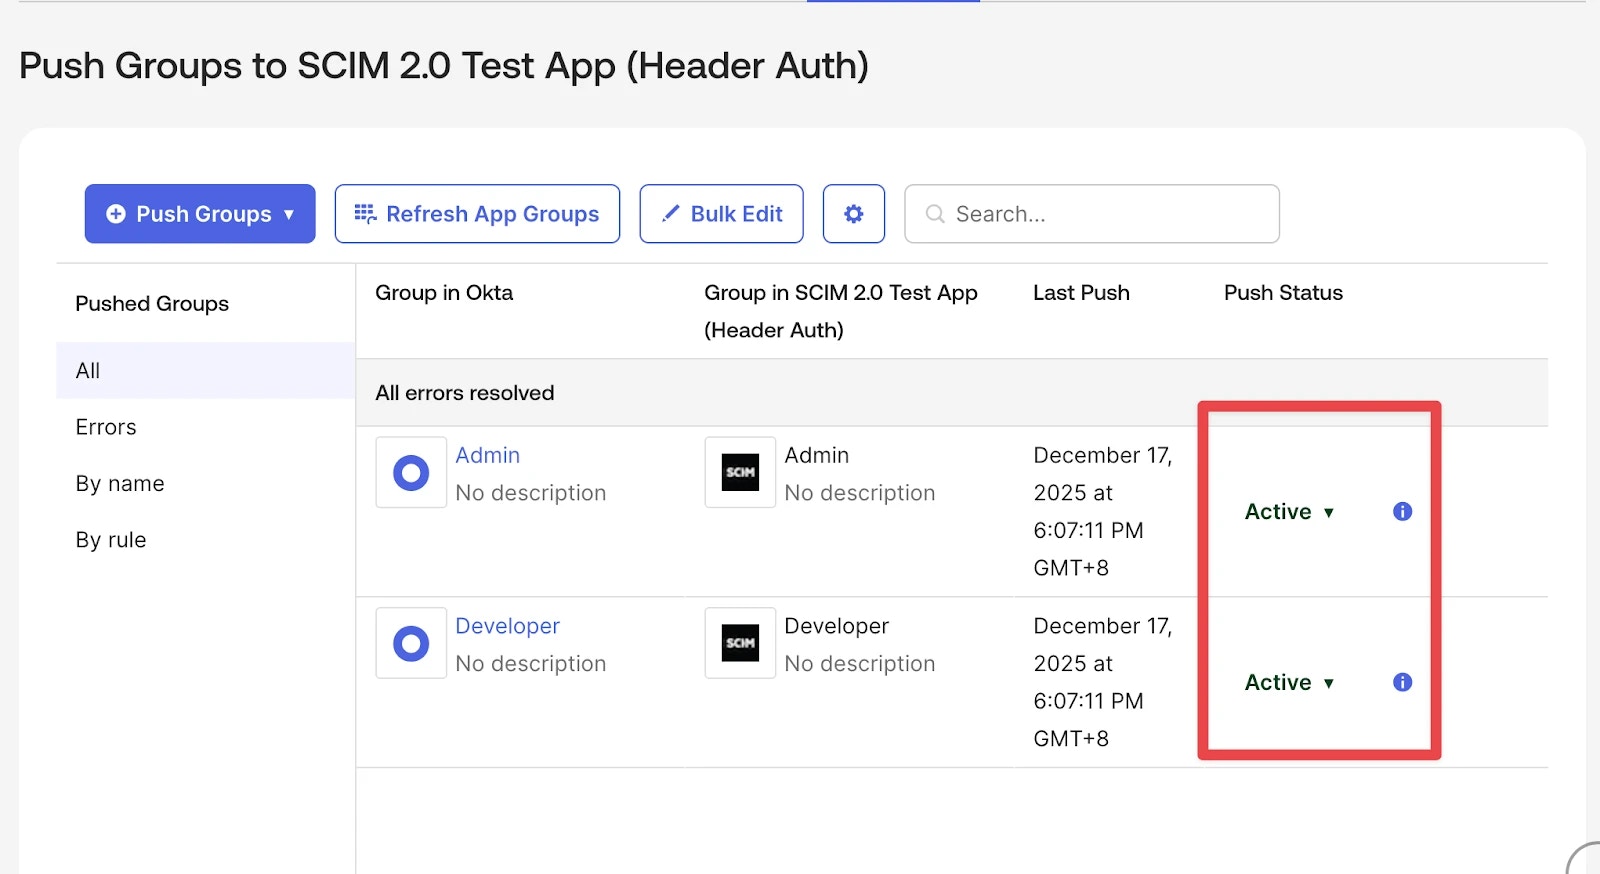
- Go to the Push Groups tab.
- Click Push Groups, search group by name or rule.
- Click Save, then wait and check the status.
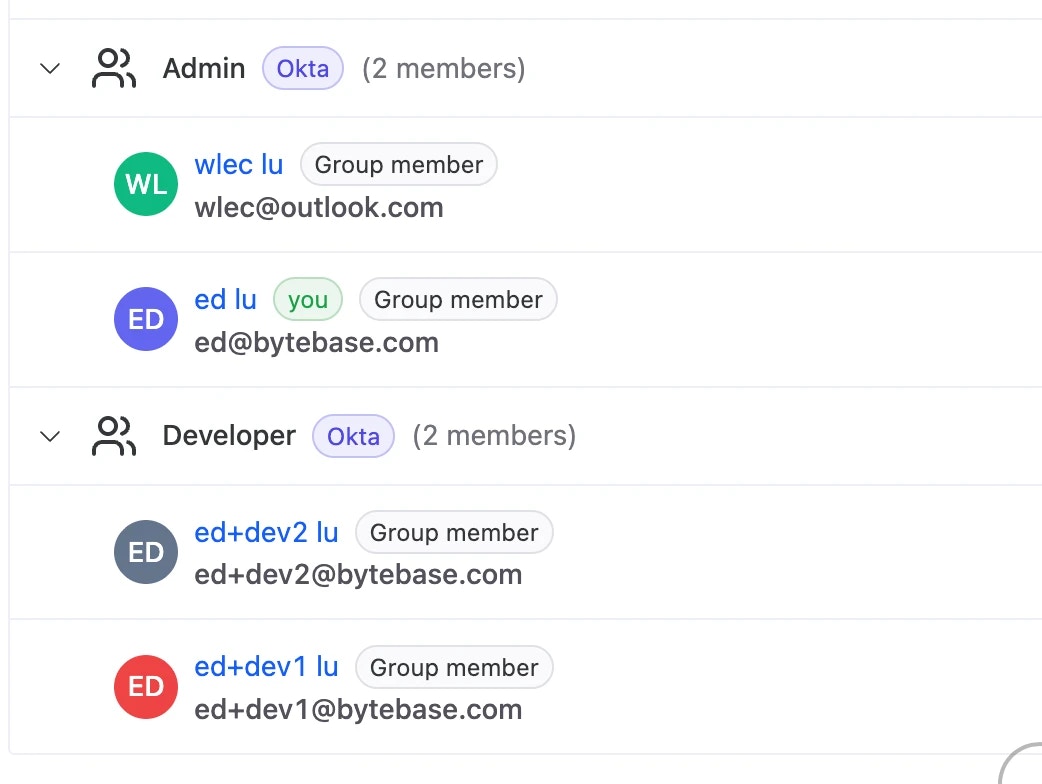
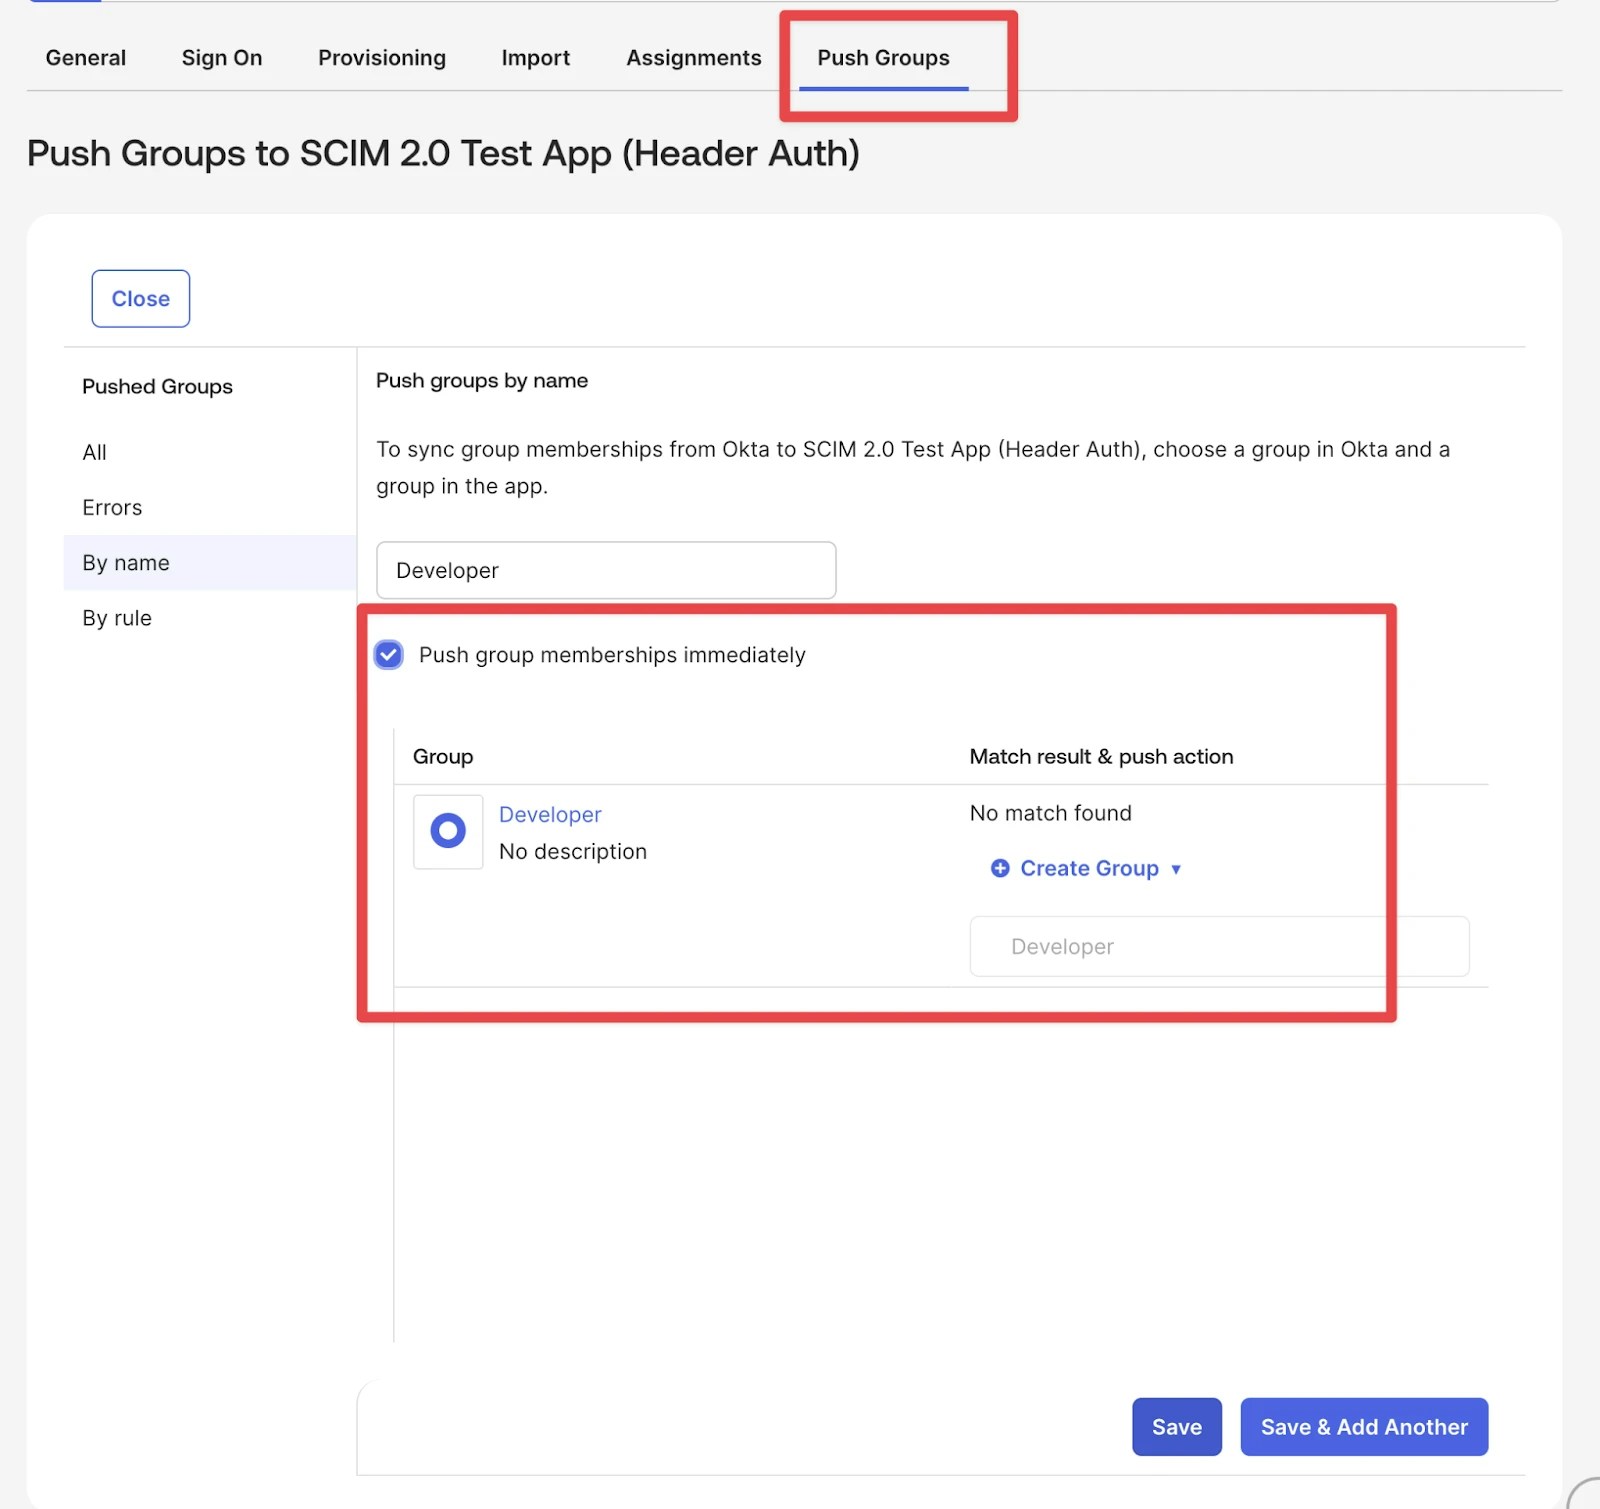 After the status changes to Active, the groups are successfully synced to Bytebase.