You can work with multiple project folders in Visual Studio Code with multi-root workspaces. This can be helpful when you are working on several related projects at one time. For example, you might have a repository with a product's documentation that you like to keep current when you update the product source code.
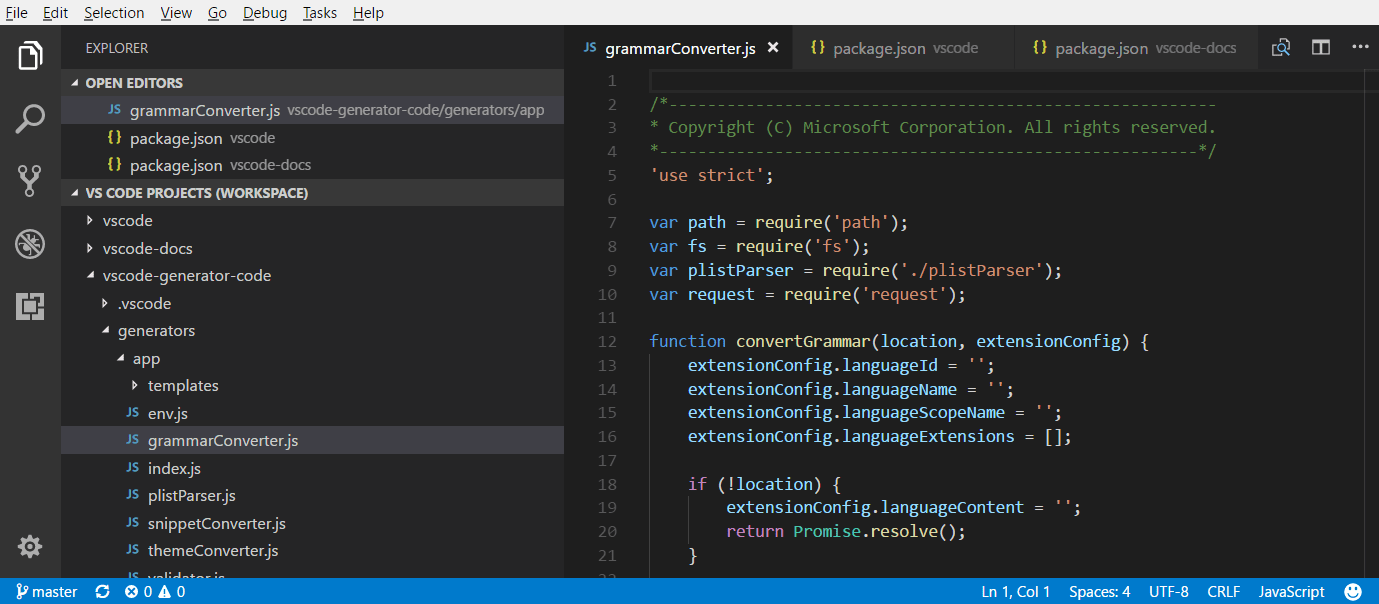
Note: If you'd like to learn more about the VS Code "workspace" concept, you can review What is a VS Code "workspace"? Unless you are explicitly creating a multi-root workspace, a "workspace" is just your project's single root folder.
Adding folders
It is easy to add another folder to your existing workspace. There are several gestures for adding folders:
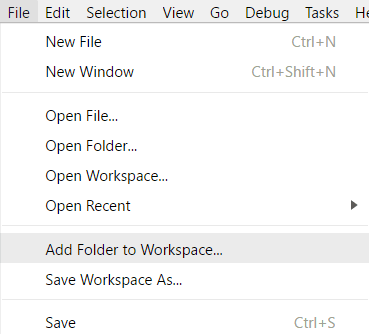
Add Folder to Workspace
The File > Add Folder to Workspace command brings up an Open Folder dialog to select the new folder.
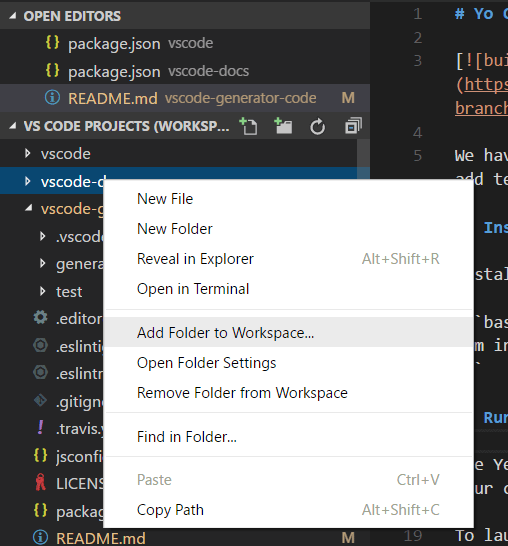
Once a root folder is added, the Explorer will show the new folder as a root in the File Explorer. You can right-click on any of the root folders and use the context menu to add or remove folders.
The File Explorer should work and behave as before. You can move files between root folders and use any of the typical file operation actions provided in the context menu and the Explorer view.
Settings like files.exclude are supported for each root folder if configured, and across all folders if configured as global user setting.
Drag and drop
You can use drag and drop to add folders to a workspace. Drag a folder to the File Explorer to add it to the current workspace. You can even select and drag multiple folders.
Note: Dropping a single folder into the editor region of VS Code will still open the folder in single folder mode. If you drag and drop multiple folders into the editor region, a new multi-root workspace will be created.
You can also use drag and drop to reorder folders in the workspace.
Multiple selection native file open dialogs
Opening multiple folders with your platform's native file open dialog will create a multi-root workspace.
command line --add
Add a folder or multiple folders to the last active VS Code instance for a multi-root workspace.
{
  "folders": [
    {
      // Source code
      "name": "Product",
      "path": "vscode"
    },
    {
      // Docs and release notes
      "name": "Documentation",
      "path": "vscode-docs"
    },
    {
      // Yeoman extension generator
      "name": "Extension generator",
      "path": "vscode-generator-code"
    }
  ]
}
which will result in the following Explorer display:
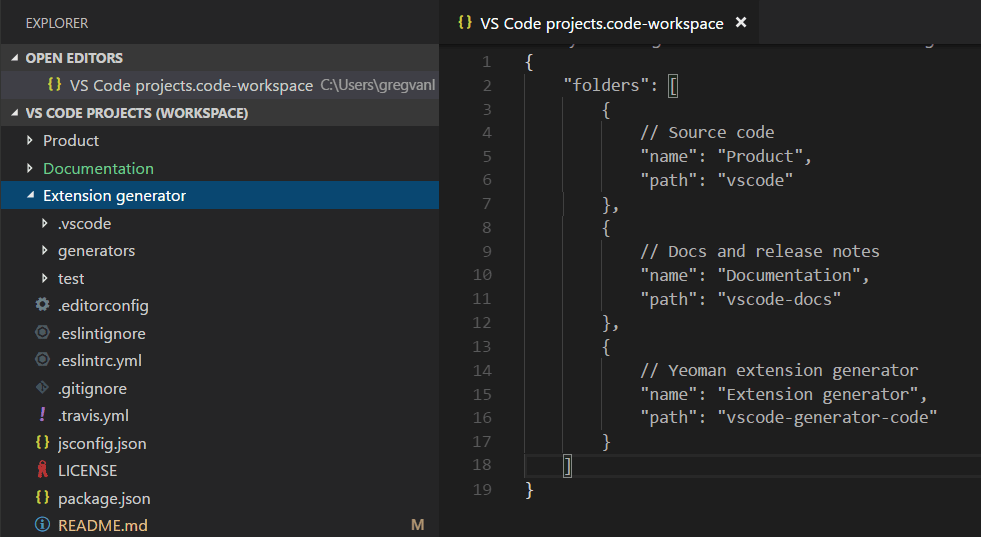
As you can see from the example above, you can add comments to your Workspace files.
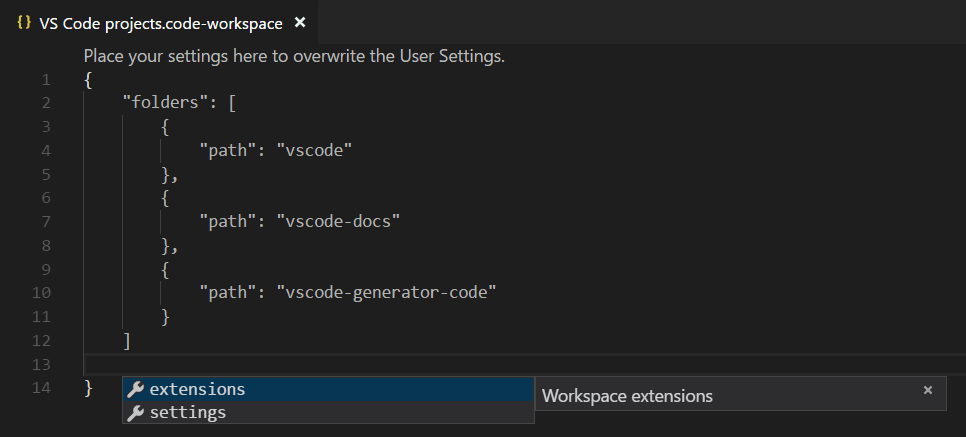
The Workspace file can also contain Workspace global settings under settings and extension recommendations under extensions, which we will discuss below.
General UI
Editor
There are only a few changes to the VS Code UI when you are using multi-root workspaces, primarily to disambiguate files between folders. For example, if there is a name collision between files in multiple folders, VS Code will include the folder name in tabbed headers.
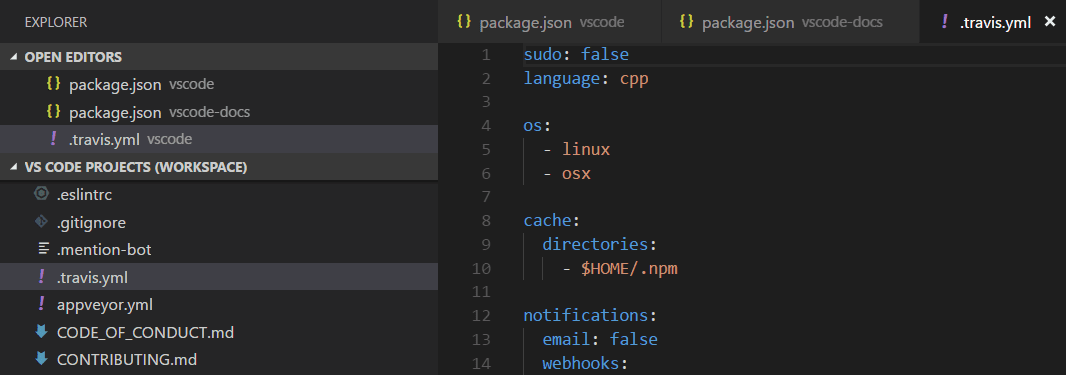
If you'd always like to see the folder displayed in the tabbed header, you can use the workbench.editor.labelFormat setting "medium" or "long" values to show the folder or full paths.
{
  "folders": [
    {
      "path": "vscode"
    },
    {
      "path": "vscode-docs"
    },
    {
      "path": "vscode-generator-code"
    }
  ],
  "settings": {
    "window.zoomLevel": 1,
    "files.autoSave": "afterDelay"
  }
}
When you go from a single folder instance to multiple folders, VS Code will add the appropriate editor-wide settings from the first folder to the new global Workspace settings.
You can easily review and modify the different settings files through the Settings editor. The Settings editor tabs let you select your User settings, global Workspace settings, and individual folder settings.
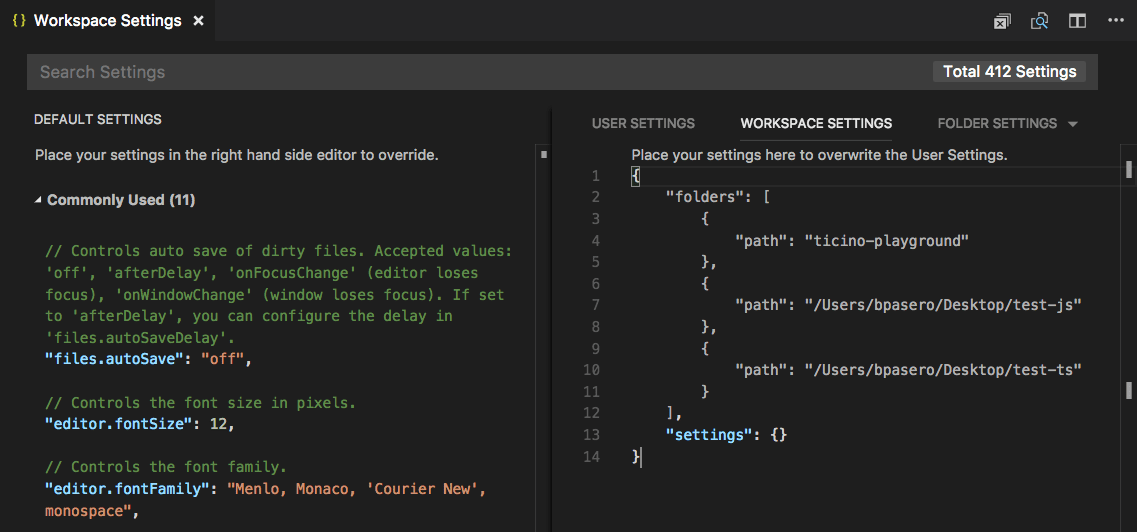
You can also open specific settings files with the commands:
- Preferences: Open User Settings - Open your global User settings
- Preferences: Open Workspace Settings - Open the settings section of your Workspace file.
- Preferences: Open Folder Settings - Open the settings for the active folder.
Global Workspace settings override User settings and folder settings can override Workspace or User settings.
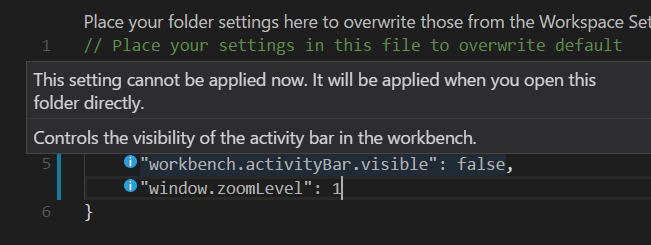
Unsupported folder settings
Unsupported editor-wide folder settings will be shown as grayed out in your folder settings and are filtered out of the DEFAULT FOLDER SETTINGS list. You will also see an information icon in front of the setting.
Debugging
With multi-root workspaces, VS Code searches across all folders for launch.json debug configuration files and displays them with the folder name as a suffix. Additionally VS Code will also display launch configurations defined in the workspace configuration file.
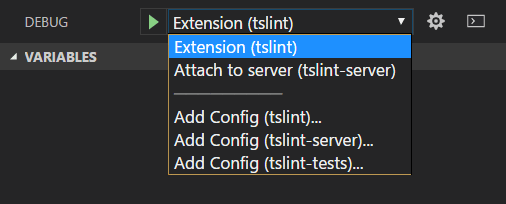
The example above shows the debugging configurations for the TSLint extension. There is a
launch
configuration from the tslint extension folder to start the extension running in the VS Code Extension Host and also an attach configuration from the tslint-server folder to attach the debugger to a running TSLint server.
You can also see the three Add Config commands for the folders, tslint, tslint-server, and tslint-tests, in the vscode-tslint Workspace. The Add Config command will either open an existing launch.json file in the folder's .vscode subfolder or create a new one and display the debugging configuration template dropdown.
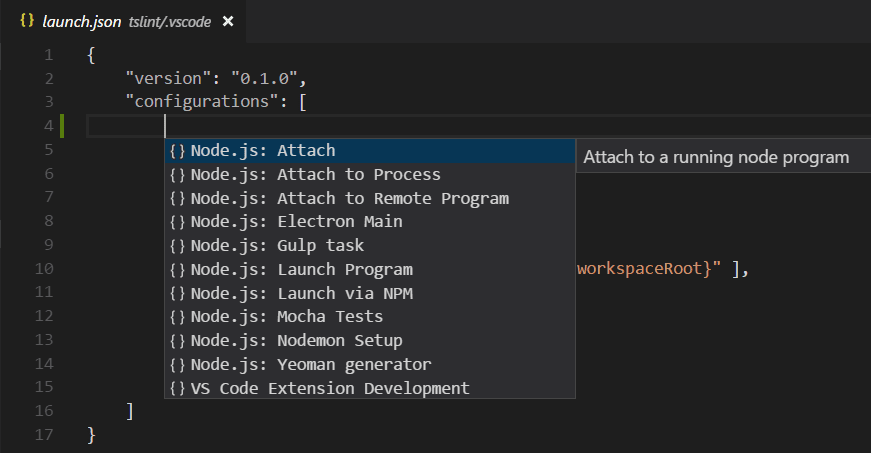
Variables used in a configuration (for example ${workspaceFolder} or the now deprecated ${workspaceRoot}) are resolved relative to the folder they belong to. It is possible to scope a variable per workspace folder by appending the root folder's name to a variable (separated by a colon).
Workspace launch configurations
Workspace scoped launch configurations live in the "launch" section of the workspace configuration file (Workspaces: Open Workspace Configuration File in the Command Palette):
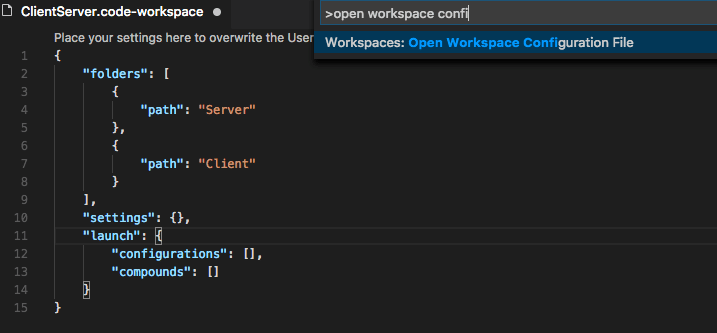
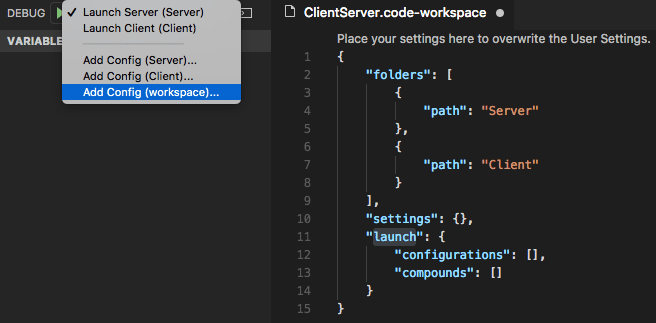
Alternatively, new launch configurations can be added via the "Add Config (workspace)" entry of the Launch Configuration dropdown menu:
A compound launch configuration can reference the individual launch configurations by name as long as the names are unique within the workspace, for example:
  "compounds": [{
      "name": "Launch Server & Client",
      "configurations": [
        "Launch Server",
        {
          "folder": "Web Client",
          "name": "Launch Client"
        },
        {
          "folder": "Desktop Client",
          "name": "Launch Client"
        }
      ]
  }]
In addition to compounds, the
launch
section of the workspace configuration file can contain regular launch configurations too. Make sure that all used variables are explicitly scoped to a specific folder because otherwise they are not valid for the workspace. You can find more details about explicitly scoped variables in the Variables Reference.
Here is an example for a launch configuration where the program lives in a folder "Program" and where all files from a folder "Library" should be skipped when stepping:
{
  "folders": [
    {
      "path": "vscode"
    },
    {
      "path": "vscode-docs"
    }
  ],
  "extensions": {
    "recommendations": ["eg2.tslint", "dbaeumer.vscode-eslint", "esbenp.prettier-vscode"]
  }
}
Next steps
- What is a VS Code "workspace"? - More about single-folder and multi-root workspaces.
- Debugging - Learn how to set up debugging for your application.
- Tasks - Tasks let you run external tools like compilers within VS Code.
Common questions
How can I go back to working with a single project folder?
You can either close the Workspace and open the folder directly or remove the folder from Workspace.
See our Adopting Multi Root Workspace APIs guide. Most extensions can easily support multi-root workspaces.
8/12/2026