The Tree View API allows extensions to show content in the sidebar in Visual Studio Code. This content is structured as a tree and conforms to the style of the built-in views of VS Code.
For example, the built-in References Search View extension shows reference search results as a separate view.
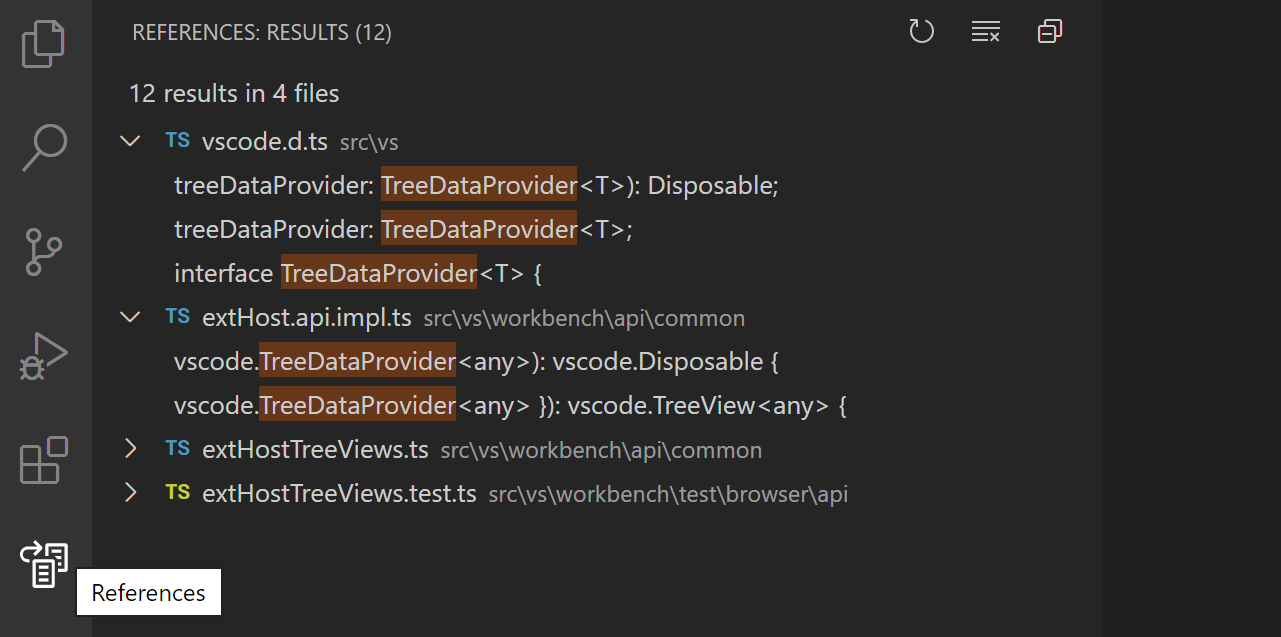
The Find All References results are displayed in a References: Results Tree View, which is in the References View Container.
This guide teaches you how to write an extension that contributes Tree Views and View Containers to Visual Studio Code.
Tree View API Basics
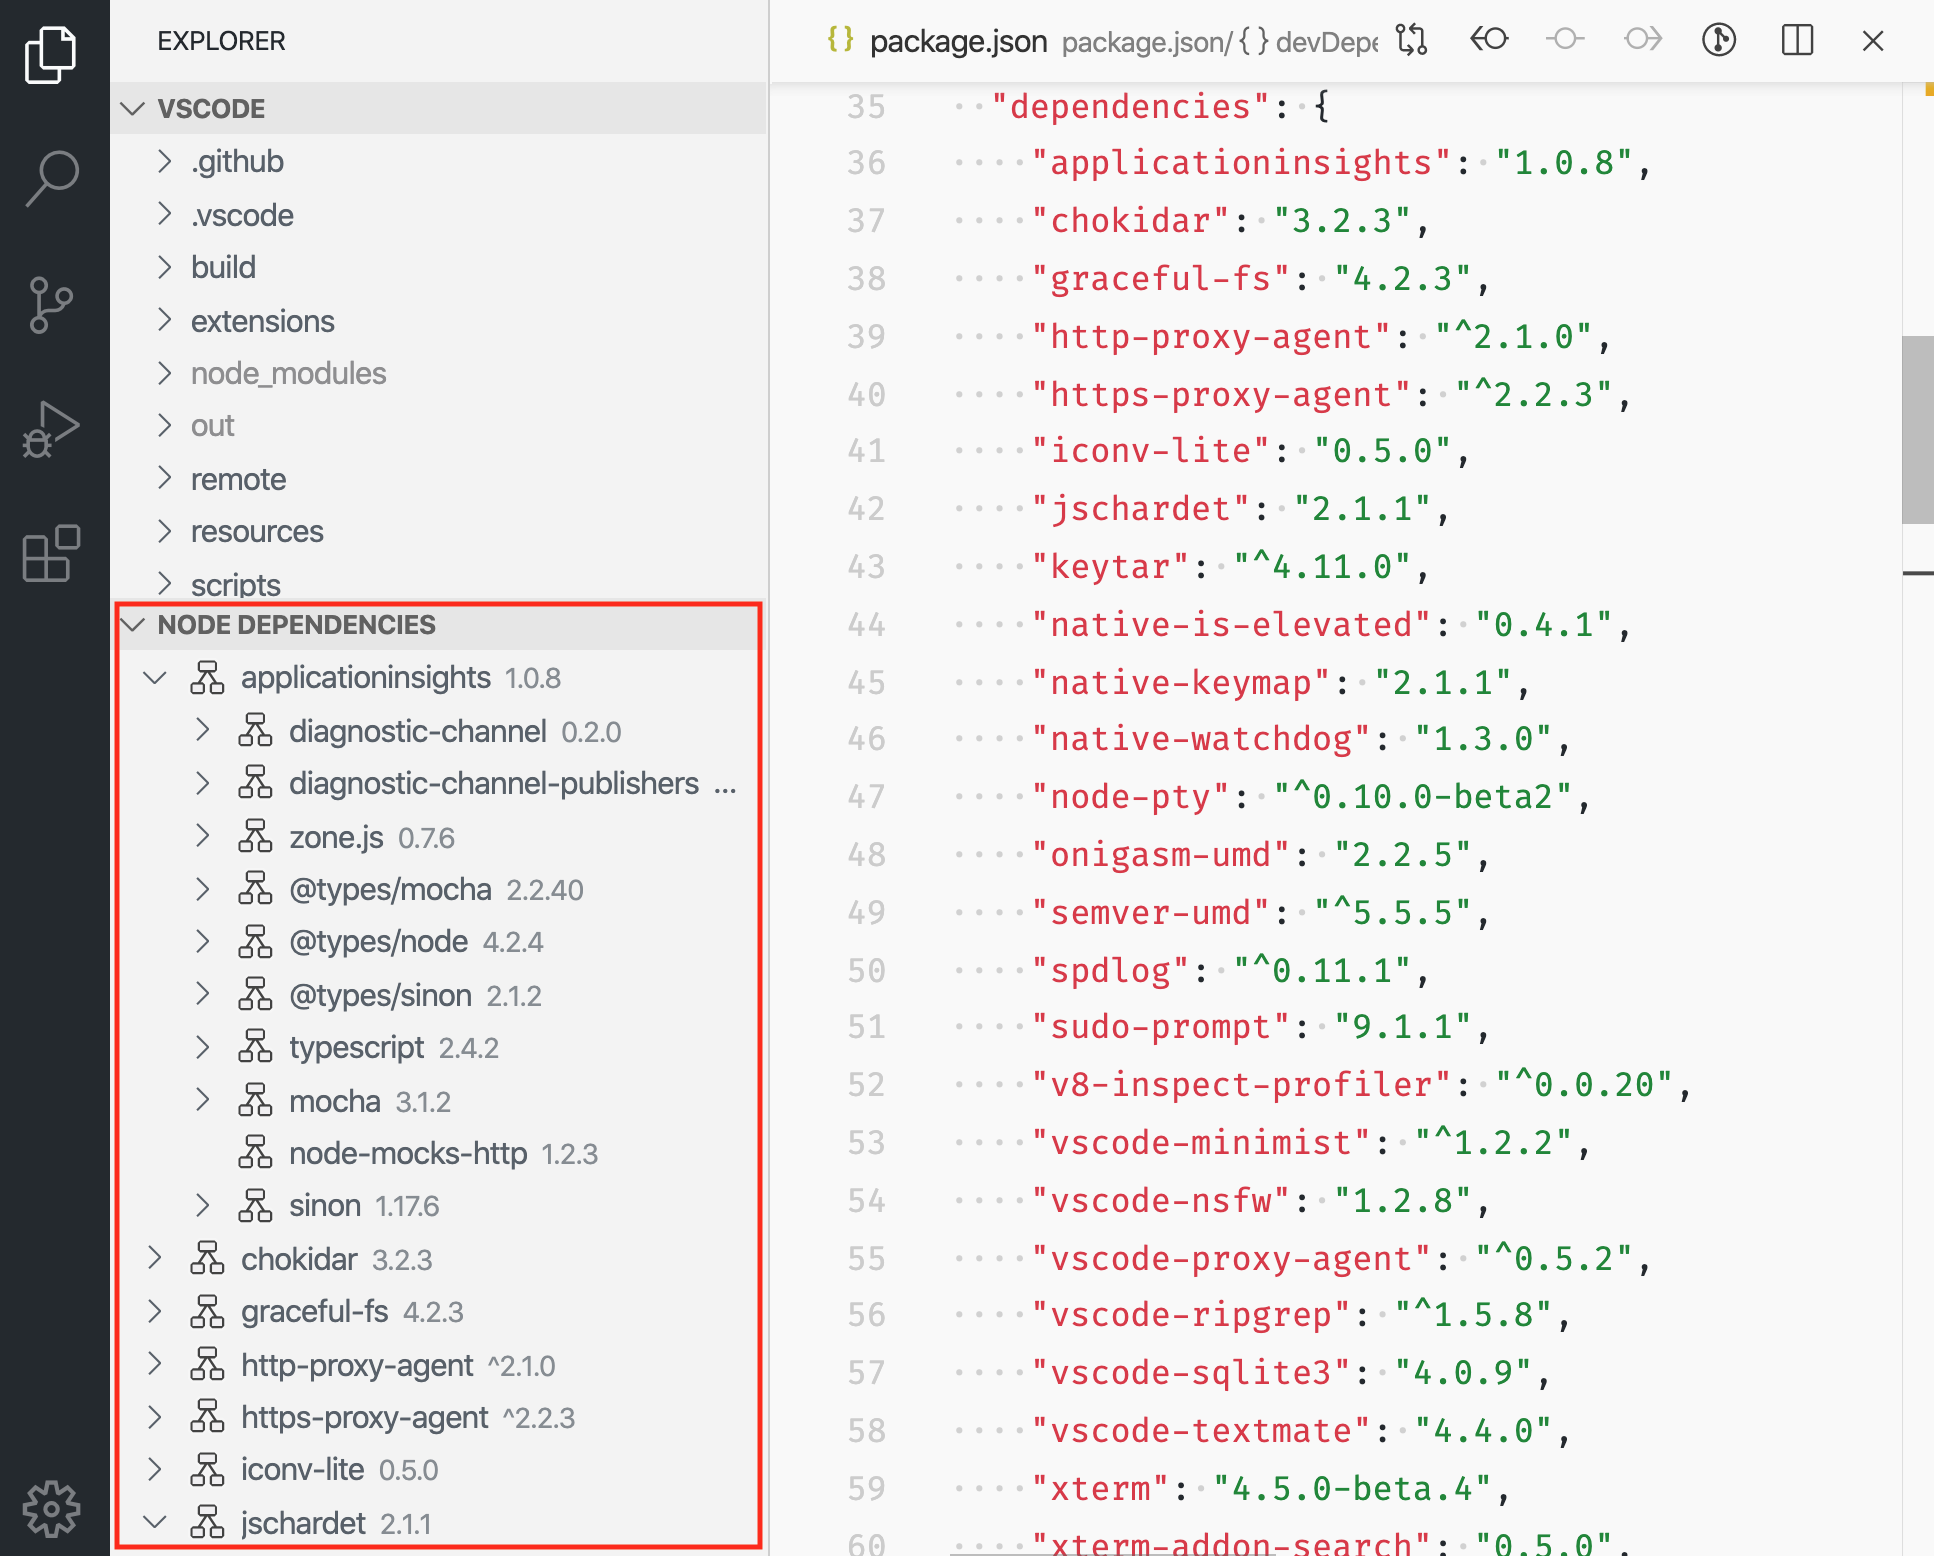
To explain the Tree View API, we are going to build a sample extension called Node Dependencies. This extension will use a treeview to display all Node.js dependencies in the current folder. The steps for adding a treeview are to contribute the treeview in your package.json, create a TreeDataProvider, and register the TreeDataProvider. You can find the complete source code of this sample extension in the tree-view-sample in the vscode-extension-samples GitHub repository.
package.json Contribution
First you have to let VS Code know that you are contributing a view, using the contributes.views Contribution Point in package.json.
Here's the package.json for the first version of our extension:
Updating Tree View content
Our node dependencies view is simple, and once the data is shown, it isn't updated. However, it would be useful to have a refresh button in the view and update the node dependencies view with the current contents of the
package.json. To do this, we can use theonDidChangeTreeDataevent.
onDidChangeTreeData?: Event<T | undefined | null | void>- Implement this if your tree data can change and you want to update the treeview.
Add the following to your NodeDependenciesProvider.
    "commands": [
            {
                "command": "nodeDependencies.refreshEntry",
                "title": "Refresh",
                "icon": {
                    "light": "resources/light/refresh.svg",
                    "dark": "resources/dark/refresh.svg"
                }
            },
    ]
And register the command in your extension activation:
"menus": {
    "view/title": [
        {
            "command": "nodeDependencies.refreshEntry",
            "when": "view == nodeDependencies",
            "group": "navigation"
        },
    ]
}
Activation
It is important that your extension is activated only when user needs the functionality that your extension provides. In this case, you should consider activating your extension only when the user starts using the view. VS Code automatically does this for you when your extension declares a view contribution. VS Code emits an activationEvent onView:${viewId} (onView:nodeDependencies for the example above) when the user opens the view.
Note: For VS Code versions prior to 1.74.0, you must explicitly register this activation event in
package.jsonfor VS Code to activate your extension on this view:"contributes": { "viewsContainers": { "activitybar": [ { "id": "package-explorer", "title": "Package Explorer", "icon": "media/dep.svg" } ] } }Alternatively, you could contribute this view to the panel by placing it under the
panelnode."contributes": { "views": { "package-explorer": [ { "id": "nodeDependencies", "name": "Node Dependencies", "icon": "media/dep.svg", "contextualTitle": "Package Explorer" } ] } }A view can also have an optional
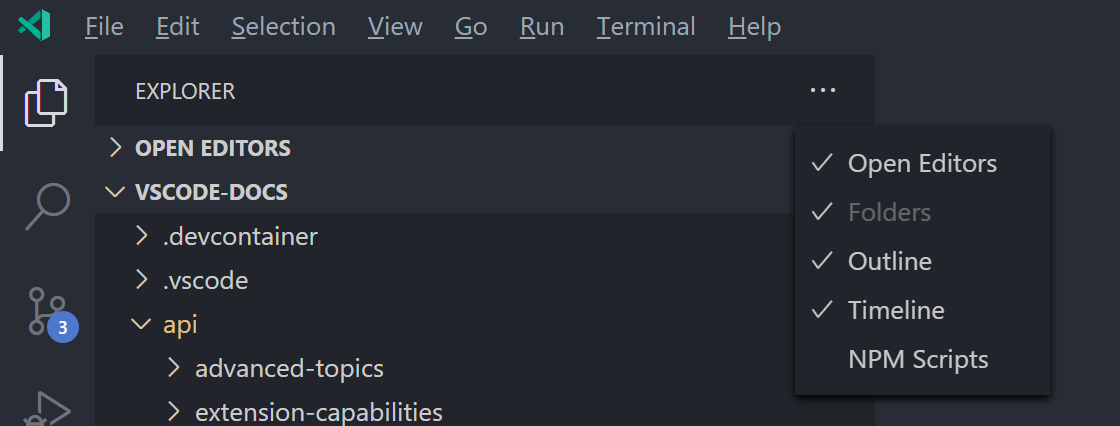
visibilityproperty which can be set tovisible,collapsed, orhidden. This property is only respected by VS Code the first time a workspace is opened with this view. After that, the visibility is set to whatever the user has chosen. If you have a view container with many views, or if your view will not be useful to every user of your extension, consider setting the view thecollapsedorhidden. Ahiddenview will appear in the view containers "Views" menu:
View Actions
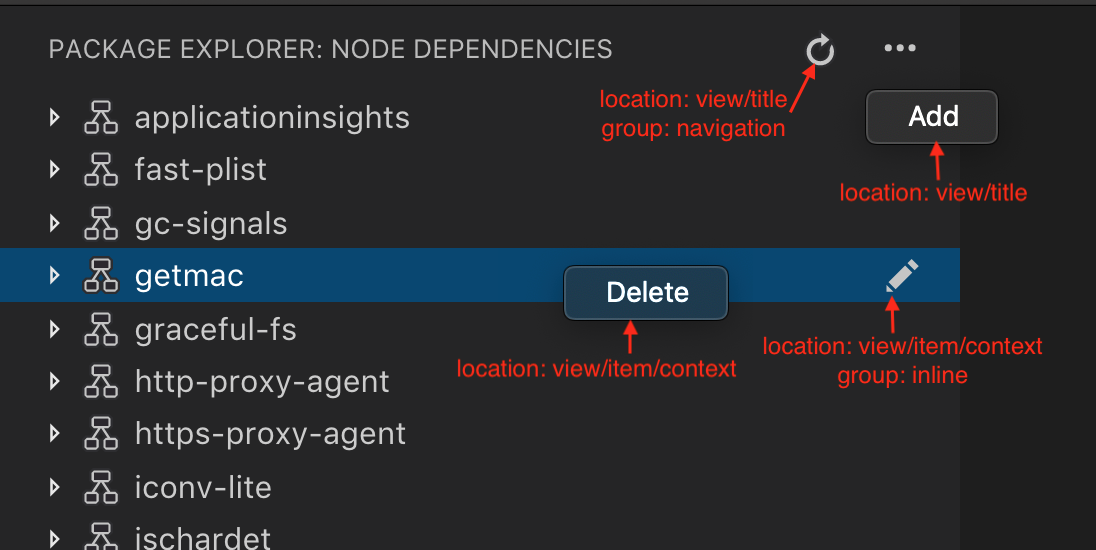
Actions are available as inline icons on your individual tree items, in tree item context menus, and at the top of your view in the view title. Actions are commands that you set to show up in these locations by adding contributions to your
package.json.To contribute to these three places, you can use the following menu contribution points in your package.json:
view/title- Location to show actions in the view title. Primary or inline actions use"group": "navigation"and rest are secondary actions, which are in...menu.view/item/context- Location to show actions for the tree item. Inline actions use"group": "inline"and rest are secondary actions, which are in...menu.You can control the visibility of these actions using a when clause.
Examples:
"contributes": {
  "menus": {
    "view/item/context": [
      {
        "command": "nodeDependencies.deleteEntry",
        "when": "view == nodeDependencies && viewItem == dependency"
      }
    ]
  }
}
Welcome content
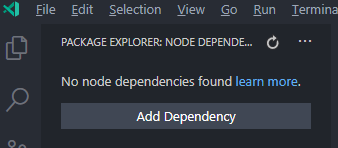
If your view can be empty, or if you want to add Welcome content to another extension's empty view, you can contribute
viewsWelcomecontent. An empty view is a view that has noTreeView.messageand an empty tree.\n[Add Dependency](command:nodeDependencies.addEntry)" } ] }
Links are supported in Welcome content. By convention, a link on a line by itself is a button. Each Welcome content can also contain a
whenclause. For more examples, see the built-in Git extension.TreeDataProvider
Extension writers should register a TreeDataProvider programmatically to populate data in the view.
vscode.window.createTreeView('ftpExplorer', {
  treeDataProvider: new FtpTreeDataProvider()
});
See ftpExplorer.ts in the
tree-view-samplefor the implementation.8/12/2026