In this section, you create a new module named MavenWordEngine. You then modify the module to add a window component and a button and text area.
Creating the Module
In this exercise, you create a new module project in the same directory that contains the branding module and application module.
-
Choose File > New Project from the main menu. Select NetBeans Module from the Maven category:
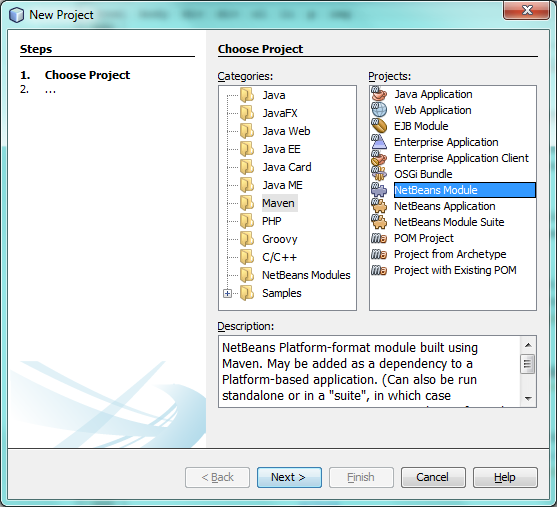
Figure 5. Screenshot of New Project wizard
Click Next.
-
Type MavenWordEngine as the Project Name. Click Browse and locate the MavenPlatformWordApp directory as the Project Location:
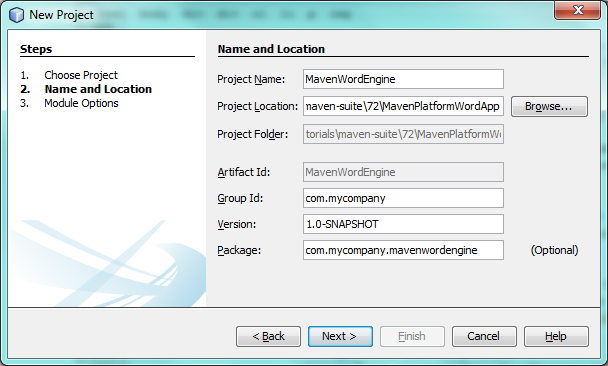
Figure 6. Screenshot of New Project wizard
-
Click Next and select the NetBeans APIs you want to use:
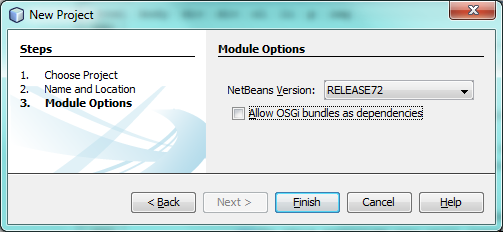
Figure 7. Screenshot of New Project wizard
Click Finish.
If you look at the POM for the new MavenWordEngine module you see that the artifactId of the project is MavenWordEngine:
<modelVersion>4.0.0</modelVersion>
<parent>
    <artifactId>MavenPlatformWordApp-parent</artifactId>
    <groupId>com.mycompany</groupId>
    <version>1.0-SNAPSHOT</version>
</parent>
<groupId>com.mycompany</groupId>
<artifactId>*MavenWordEngine*</artifactId>
<version>1.0-SNAPSHOT</version>
<packaging>nbm</packaging>
<name>MavenWordEngine</name>
To build a NetBeans module you need to use the nbm-maven-plugin . If you look at the POM for the module, you can see that the IDE automatically specified nbm for the packaging and that the nbm-maven-plugin is specified as a build plugin:
<plugin>
   <groupId>org.codehaus.mojo</groupId>
   <artifactId>*nbm-maven-plugin*</artifactId>
   <version>3.7</version>
   <extensions>true</extensions>
</plugin>
If you look at the POM for the parent project, you can see that MavenWordEngine was added to the list of modules:
<modules>
   <module>branding</module>
   <module>application</module>
   <module>*MavenWordEngine*</module>
</modules>
Making the Module a Dependency of NetBeans Platform Application
In this exercise, you declare the MavenWordEngine module as a dependency of the app project by adding the dependency in the POM. If you expand the Libraries node for the app you can see that there is a dependency on the branding module and on some other libraries that are dependencies of the cluster required to build the application. You can expand the list of non-classpath dependencies to see the full list of dependencies.
To add the dependency to the app project’s POM, you can edit the POM directly in the editor or, as done below, use the Add Dependency dialog from the Projects window.
-
Expand the app in the Projects window, right-click the Dependencies node, and choose Add Dependency:
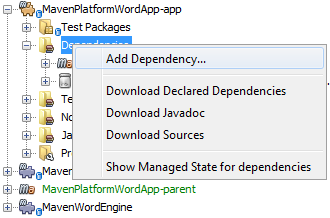
Figure 8. Screenshot of Add Dependency dialog
1. Click the Open Projects tab and select MavenWordEngine:
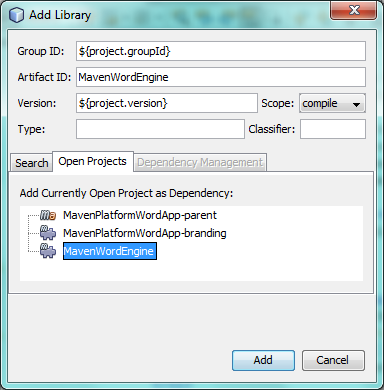
Figure 9. Screenshot of Add Dependency dialog
Click OK.
-
If you expand the app in the Projects window, you can see that MavenWordEngine is now listed as a dependency:
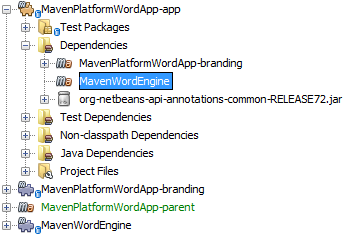
Figure 10. Screenshot of Add Dependency dialog
Adding a Window Component to the Module
In this exercise, you use a wizard to add a Window Component to the MavenWordEngine module.
-
Right-click MavenWordEngine in the Projects window and choose New > Window. Select output in Window Position:
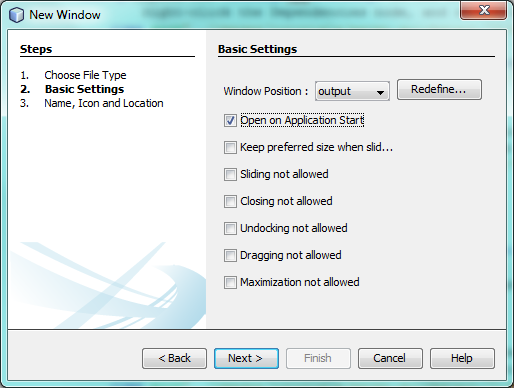
Figure 11. Screenshot of window component page in New File wizard
-
Type Text in the Class Name Prefix:
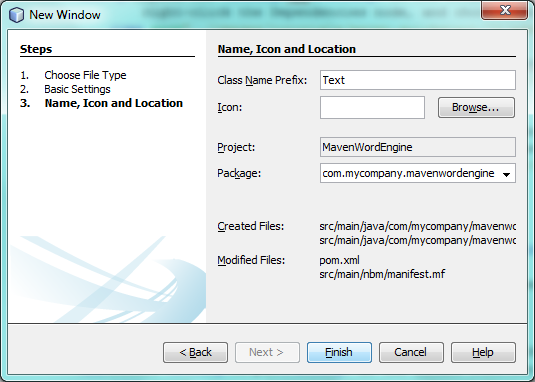
Figure 12. Screenshot of window component page in New File wizard
Click Finish.
-
When you click Finish, in the Projects window you can see that the IDE generated the class
TextTopComponent.javaincom.mycompany.mavenwordengineunder Source Packages:
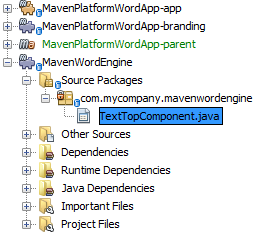
Figure 13. Screenshot of window component page in New File wizard
Modifying the Window Component
In this exercise, you add a text area and a button to the window component. You then modify the method invoked by the button to change the letters in the text area to upper case letters.
-
Click the Design tab of
TextTopComponent.javain the editor. Drag and drop a button and a text area from the Palette (Ctrl-Shift-8) onto the window. Right-click the text area and choose Change Variable Name, and then type text as the name. You use the name when accessing the component from your code. Set the text of the button to "Filter!". You should now see the following:
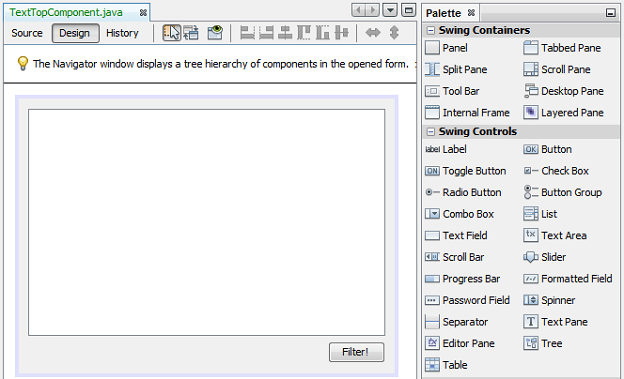
Figure 14. Screenshot of window component page in New File wizard
-
Double-click the Filter! button in the Design view to open the event handler method for the button in the source code editor. The method is created automatically when you double-click the button element and the Source view opens. Modify the body of the method to add the following code.
private void jButton1ActionPerformed(java.awt.event.ActionEvent evt) {
   *String s = text.getText();
   s = s.toUpperCase();
   text.setText(s);*
}
Save your changes.
Trying Out the Application
To try out the application, to make sure that everything is working correctly, right-click the project node of the application and choose Build with Dependencies:
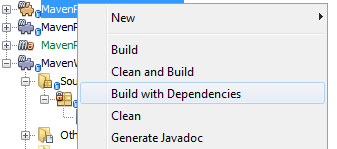
Figure 15. Screenshot of Reactor build order in Output window
The action mapped to "Build with Dependencies" builds the project using the Reactor plugin. When you build a project using the Reactor plugin, the dependencies of the sub-projects are built before the containing project is built. The Output window displays the build order:
Reactor Build Order:
MavenPlatformWordApp-parent
MavenPlatformWordApp-branding
MavenWordEngine
MavenPlatformWordApp-app
The results of the build are also displayed in the Output window.
Reactor Summary:
MavenPlatformWordApp-parent ....................... SUCCESS [0.720s]
MavenPlatformWordApp-branding ..................... SUCCESS [4.427s]
MavenWordEngine ................................... SUCCESS [5.845s]
MavenPlatformWordApp-app .......................... SUCCESS [22.644s]
------------------------------------------------------------------------
BUILD SUCCESS
------------------------------------------------------------------------
Total time: 34.679s
Finished at: Tue Sep 18 11:29:33 CEST 2012
Final Memory: 15M/134M
------------------------------------------------------------------------
To run the project, in the Projects window, right-click the project node of the application, and choose Run.
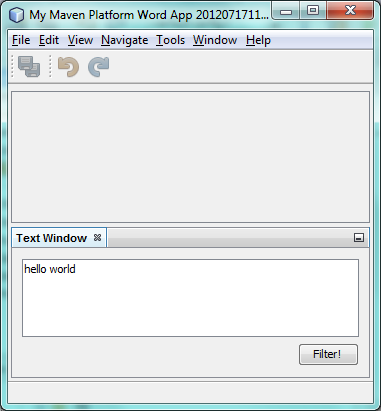
Figure 16. Screenshot of Reactor build order in Output window
After the application launches, you can try out the application by performing the following steps.
-
Choose Window > Text from the main menu of the platform application to open the Text window.
-
Type some lower case letters in the text area and click Filter! When you click Filter!, the letters that you typed are changed to upper case and displayed in the text area.
In the next sections, you decouple the user interface from the business logic in your application. You start by creating a module that provides an API. Then you create a module that implements the API. Finally, you change the window defined above so that implementations of the API are loaded at runtime into the application. In that way, the GUI is able to load multiple filters without needing to care about any of the implementation details.