
Hey, AI Ready Seeker! 👋🙂
In the previous article, we discussed Botpress, an AI chatbot builder you can use to create AI assistants for your website, Instagram, Facebook Messenger or Slack. In case you missed it, here it is.
Today, we’ll create and launch our first AI assistant in less than 10 minutes!
No technical skills required.
💬 Step 1: Create Your Botpress Account
⚙️ Step 2: Create Your Bot
📚 Step 3: Add Knowledge
🧪 Step 4: Test Your Bot
🌐 Step 5: Publish Your Bot to Your Website
🎉 Step 6: Open Your Website and Try the Bot
A website
If you don’t have a website yet, here’s a guide you can follow to create one:
Let’s begin.
Before we go on to the steps, let's quickly review what Botpress is.
Botpress is a beginner-friendly chatbot builder that lets you create smart, automated conversations for your website. It’s like your digital assistant for your business. You provide the questions, answers, and knowledge base. Botpress handles the logic.
It also works with AI models so your bot can talk naturally and help your website visitors 24/7.
Here’s why I like Botpress:
📄 It has templates that speed up your build.
🤖 Their bots use AI for responses.
🧩 It has a simple drag-and-drop builder.
🆓 It’s free to start.
⚡ Fast publishing.
🔗 It’s easy to connect to your site.
Now let’s create our first AI assistant.
🎯 Goal: Sign into Botpress so you can start building your assistant.
Go to Botpress
Click Sign Up
Enter your email
Enter your password
Create your account
Verify your email
Log in to your dashboard
🎯 Goal: Set up a new bot.
Go to your Botpress dashboard, click Create Bot
(Skip this step, if you're already on the onboarding setup page)
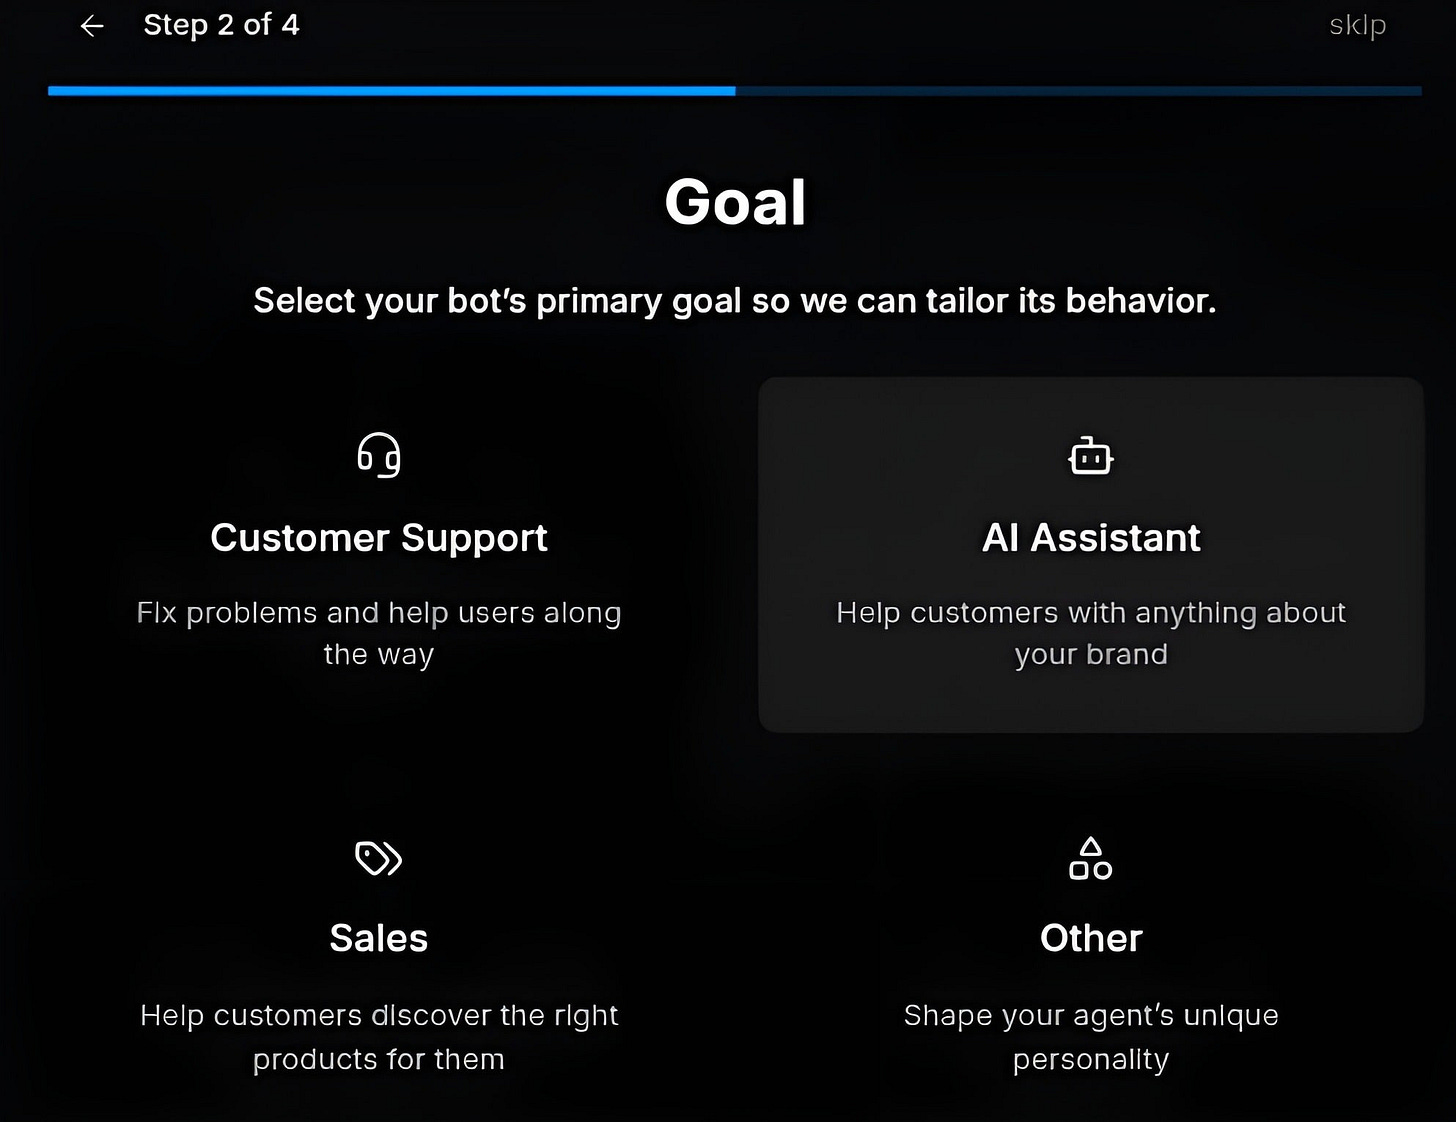
Give your bot a name
Choose a template (optional)
AI Assistant is the easiest if you’re just getting started
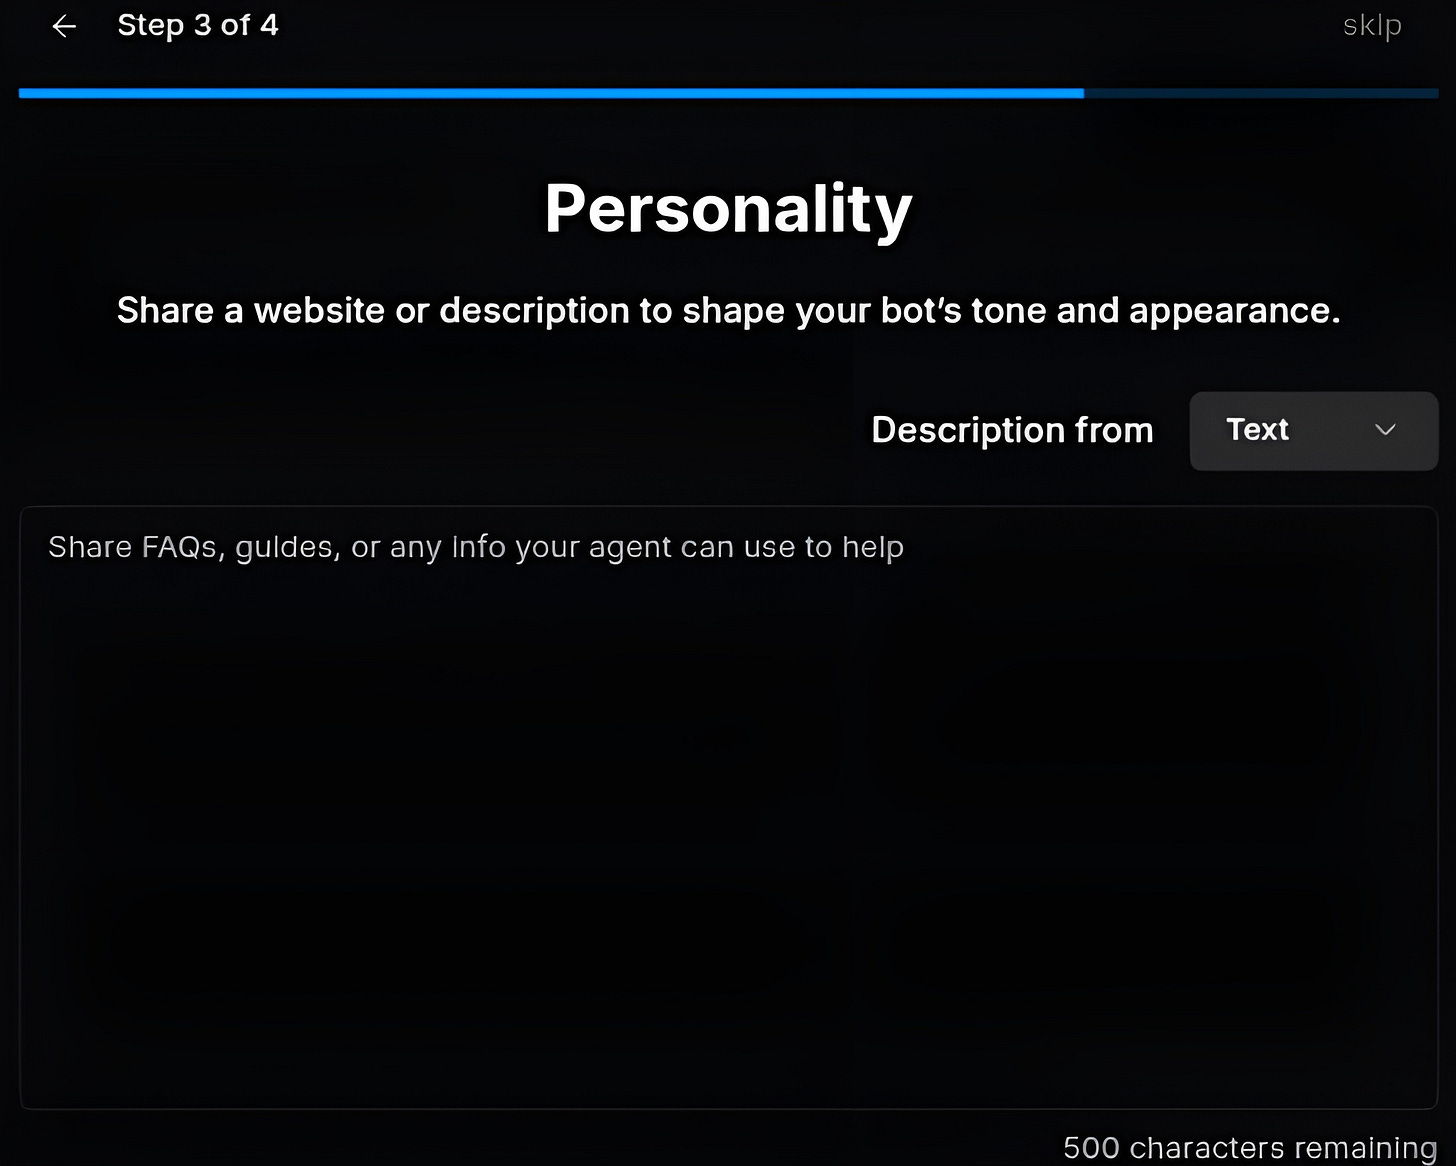
Give your bot a personality. You can either create your own or select ‘Website’ from the drop-down menu
🎯 Goal: Teach your bot what it should know and how it should guide visitors.
Botpress lets you upload content your bot can learn from:
Your website link
Text you paste in
FAQs
Docs or PDFs
Let's continue…
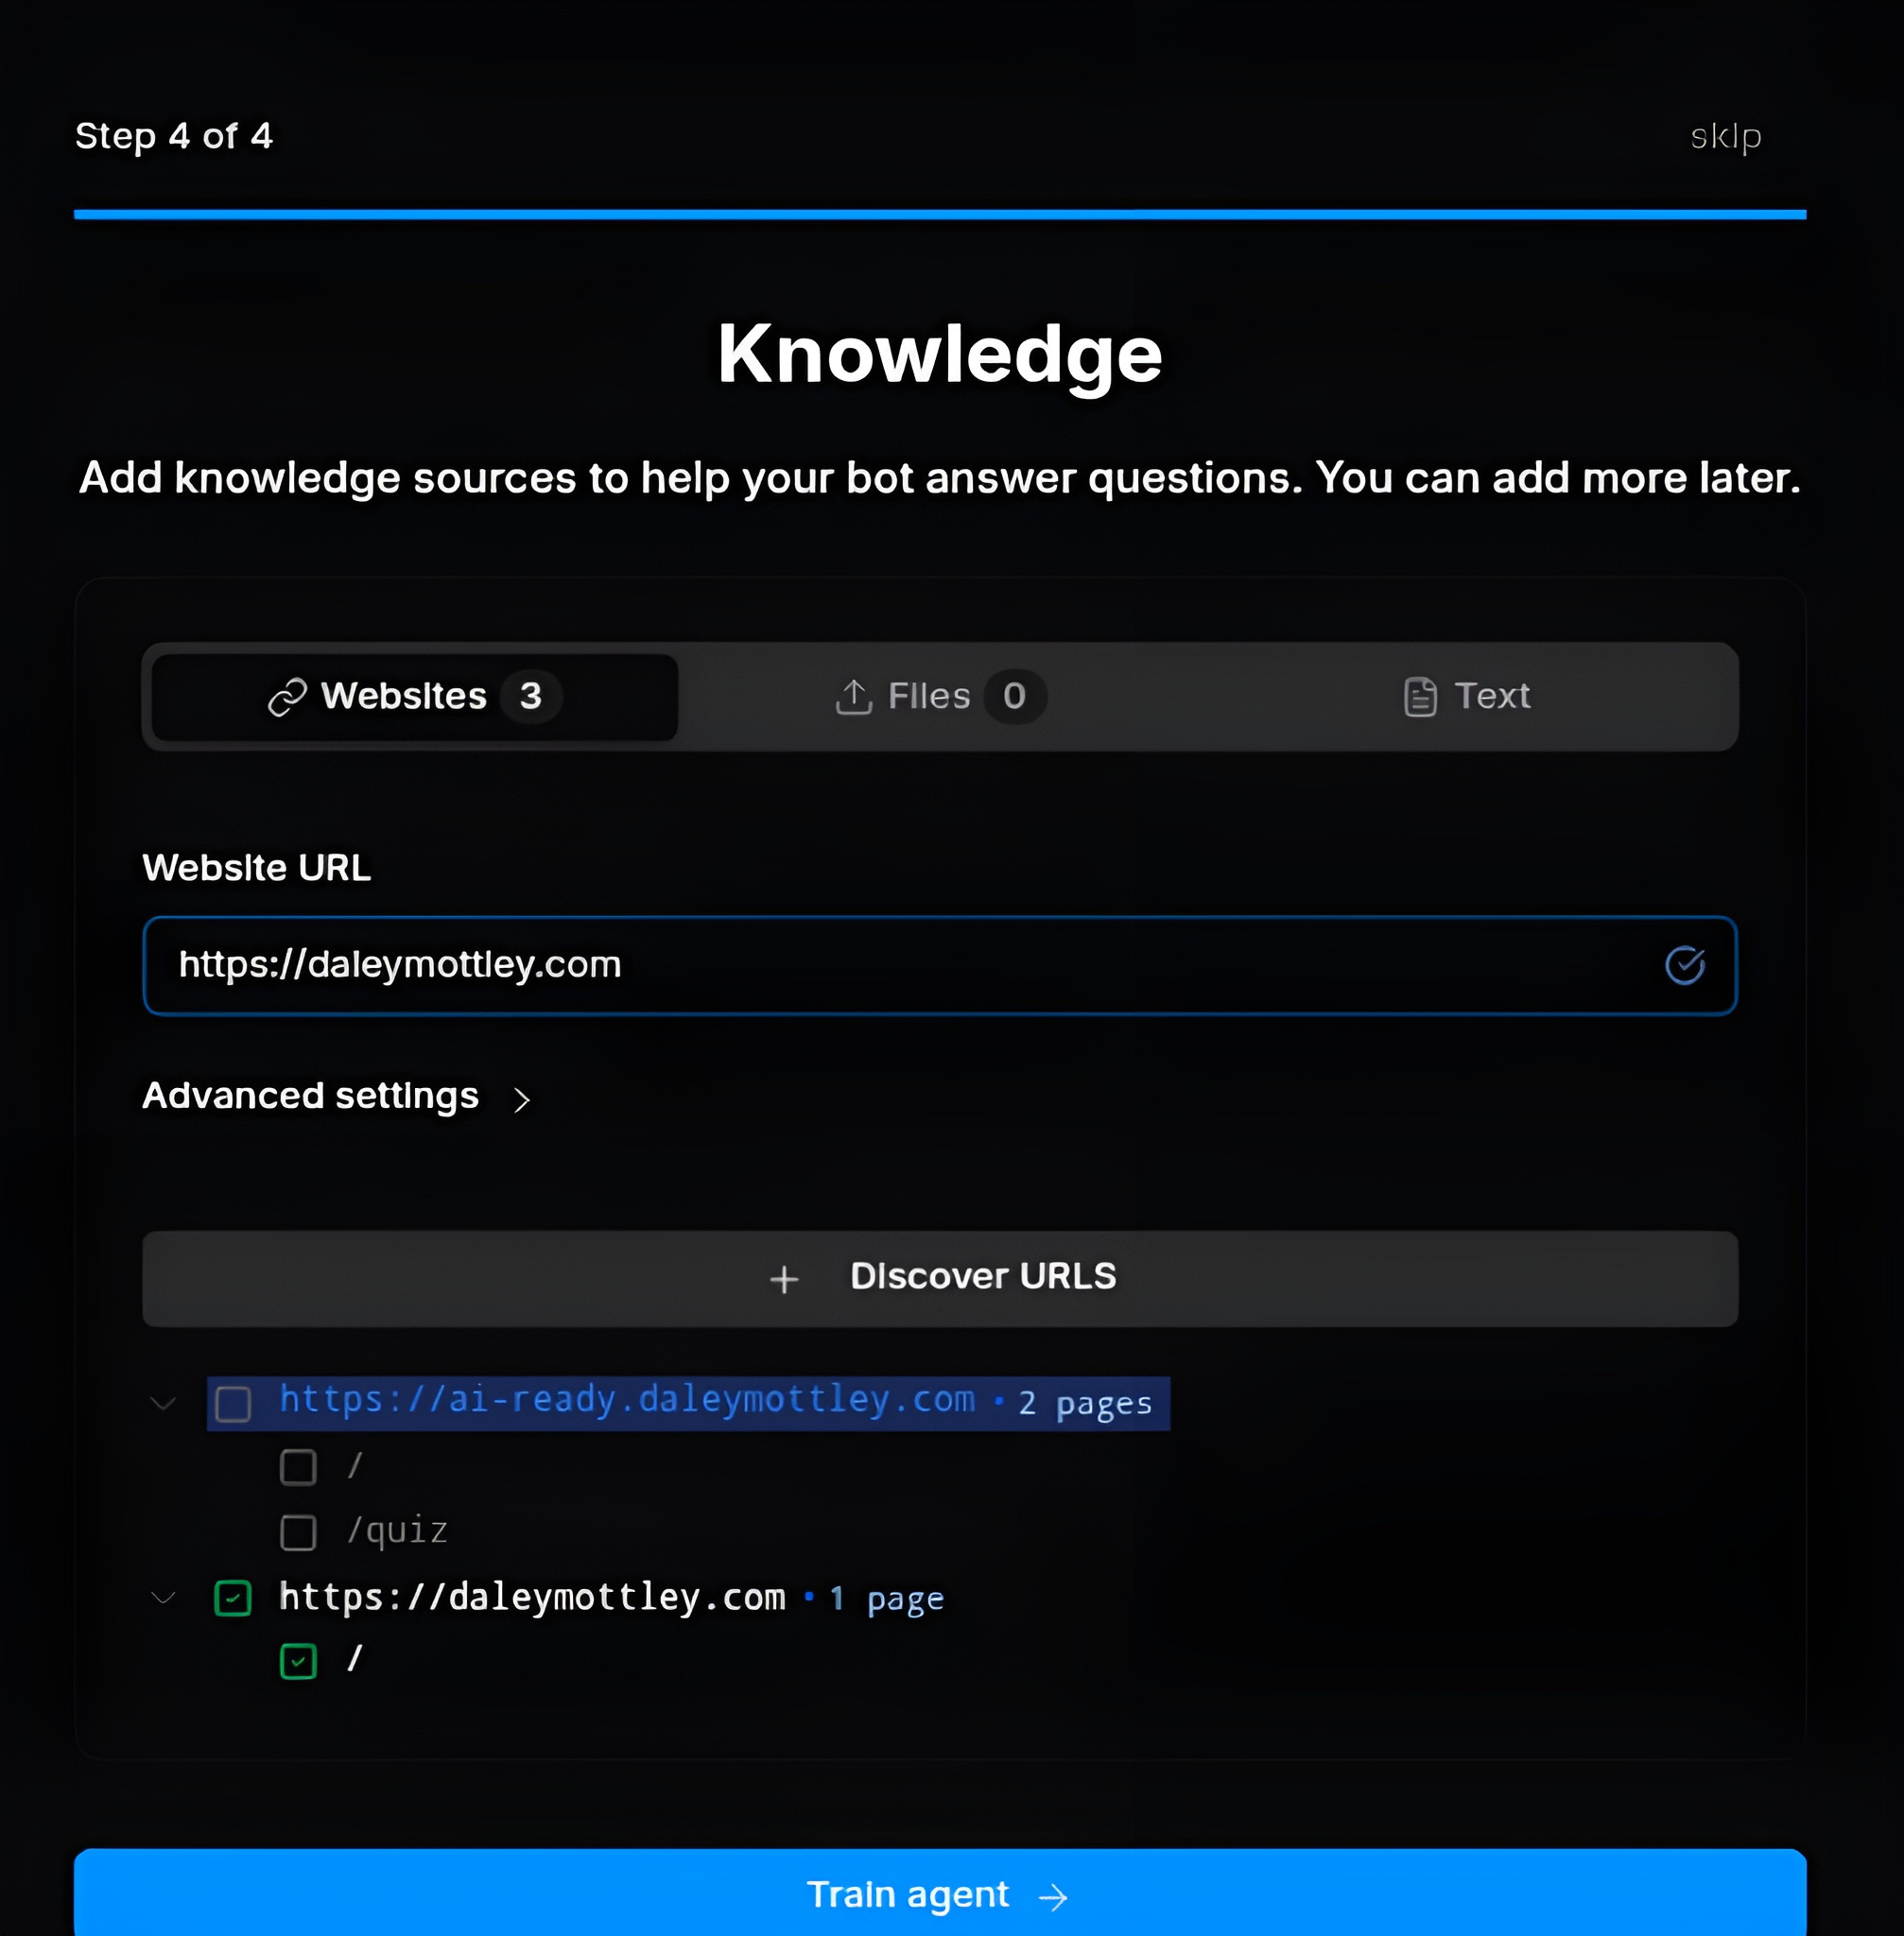
Go to Knowledge
Choose either ‘Website’, ‘Files’ or ‘Text’

Type your website link or upload any content you wish to train your bot on.
Click Train Agent
🎯 Goal: Make sure your bot understands and responds correctly.
Click Test your bot in the right sidebar
Type sample questions:
“What do you offer?”
“How do I contact you?”
“Do you have pricing?”
Review the answers
✔️ Checkpoint: Your bot should respond clearly and confidently to basic questions.
🎯 Goal: Embed the chatbot so it appears on your site.
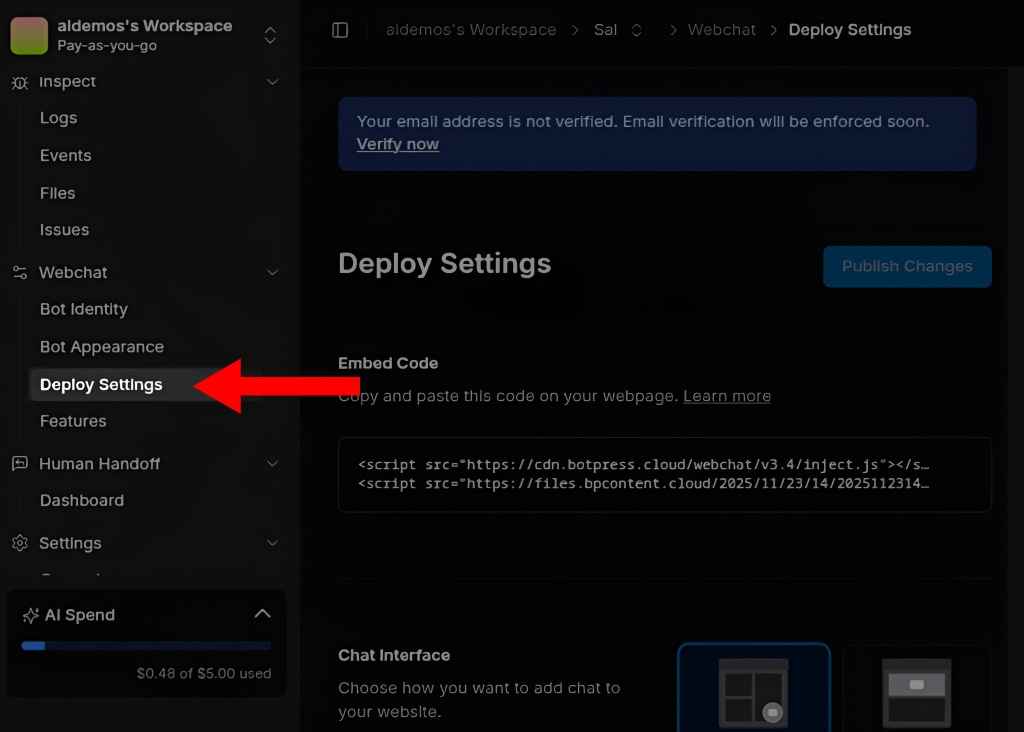
In your Botpress dashboard, click Publish
In the left sidebar, select Deploy Settings

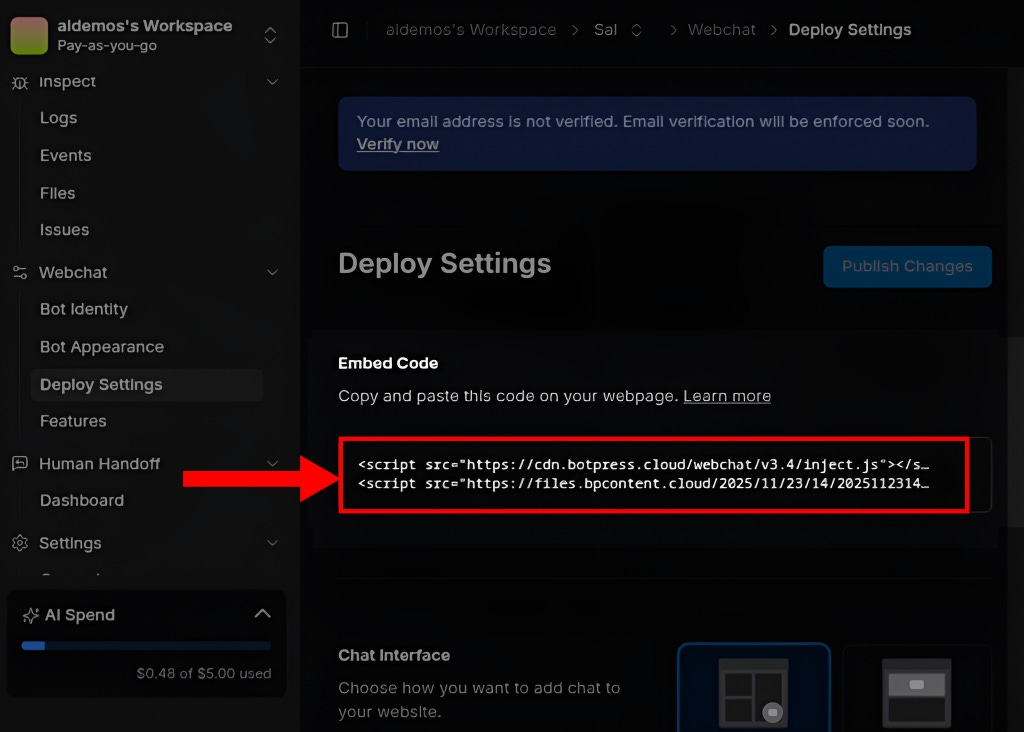
Copy the embed code shown.
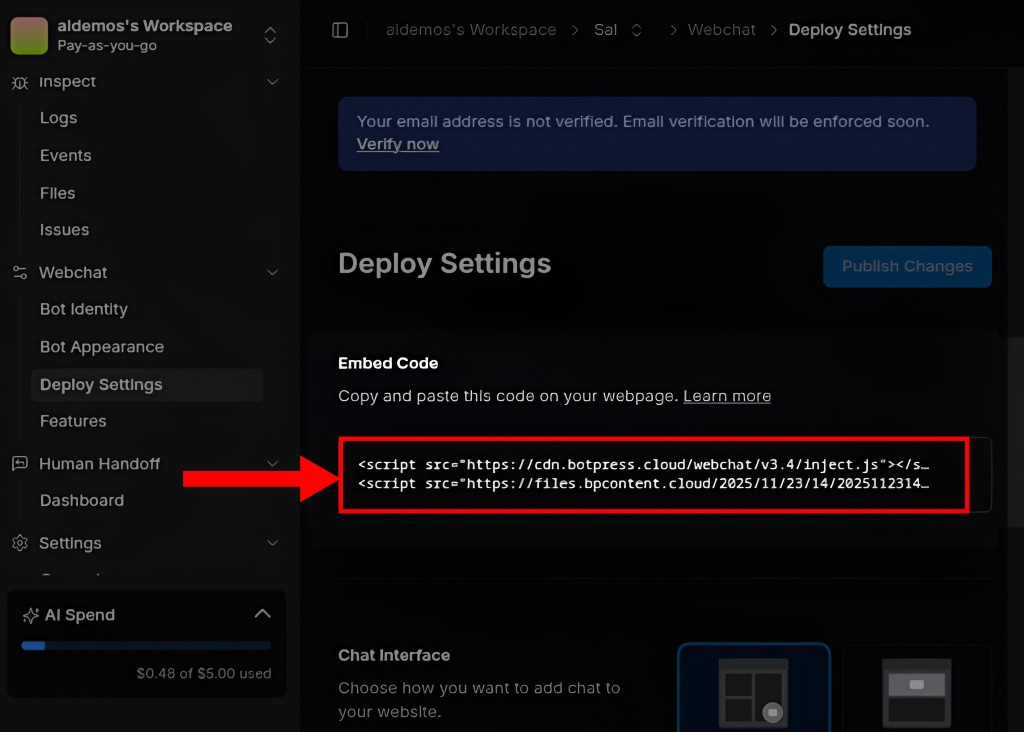
Paste it into your website
Go to Lovable
Go to your project
Go to the Chat window
Insert the embed code in the following prompt
“Add the Botpress webchat embed script to my project in the correct file and ensure it loads on every page.
[EMBED CODE]”
Enter the prompt in the chat and tap the Send button
💡 Note: Any new changes you make inside Lovable will automatically appear on the live website.
🎯 Goal: Confirm that your bot is live and working.
Visit your website
Look for the chat bubble at the bottom corner
Click it and try a test conversation
Congratulations, you've just launched your first AI assistant! 🎉
You can now greet visitors, answer questions, and capture leads around the clock without lifting a finger.
Feel free to leave your website or bot link in the comments.
I’d love to see your AI assistant in action! 😁
If you want more articles like this, tap the ‘❤️’ and ‘🔁’ to show your vote.
Bookmark ‘⭐’ AI Ready Tips in your browser or inbox 💌
Thanks for sharing, I truly appreciate your feedback 👍
If you found this helpful, share it with a friend who could use these AI-ready tips too. Have a great day! 🙂
Comments
Nothing yet. Say the first thing.
Sign in to join the conversation.