
Hey there! This is an ⭐️ exclusive open edition of AI-First Designer (by ADPList) ⭐️, to help designers transition into successful AI-First builders. Members get access to proven strategies, frameworks, and playbooks.
For more: Get free 1:1 mentorship | Be first to win in career as an AI-First Designer | Claim your AI Design Guide for free
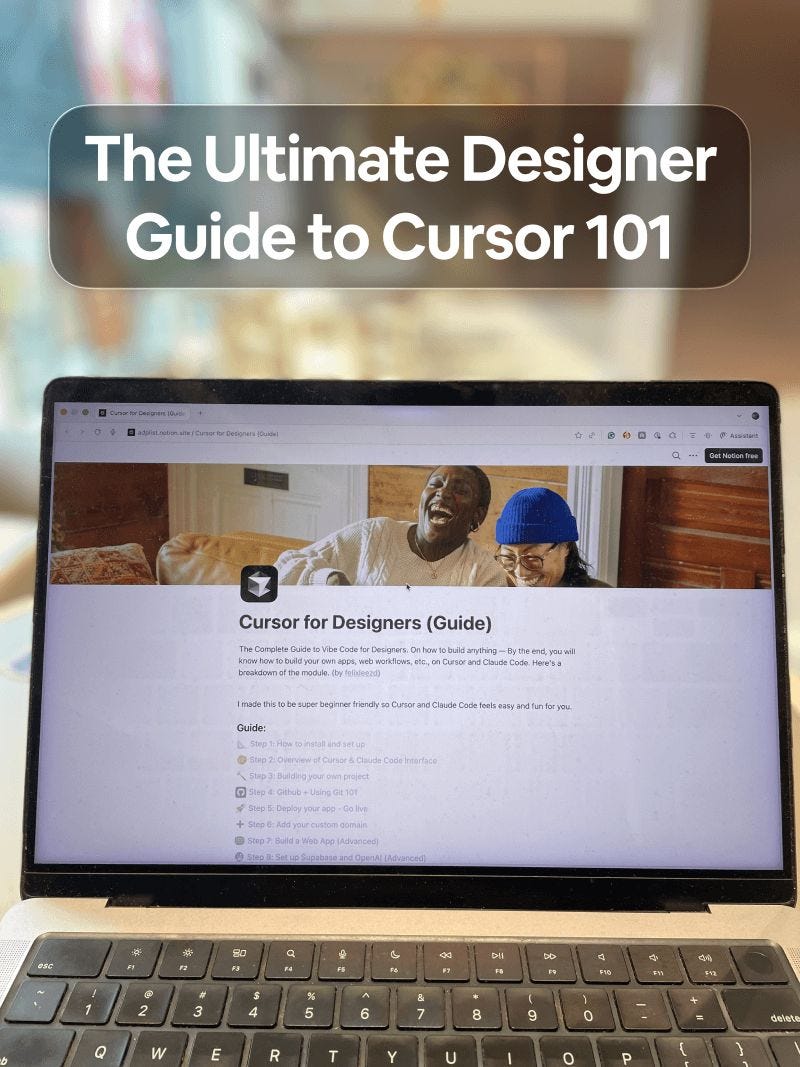
Designers Who Code Ship 10x Faster. And Get Paid 10x More. Learn vibe coding with Claude Code & Cursor → go from Figma to shipped prototypes in 7 days. No coding background required.
I’m not a developer. I’m a designer.
The future of design is here.
I’m going to walk you through exactly how this works - step by step, command by command, so you can do the same.
For a decade, the advice was the same: learn to code.
I tried. JavaScript tutorials. Codecademy. Each time, I hit a wall, because traditional coding optimizes for syntax and precision.
Designers think in flows, systems, and experiences.
Different operating system.
What changed everything was realizing that the bottleneck was never my coding ability. It was the translation layer between my vision and implementation. AI removes that layer entirely.
With tools like Cursor (an IDE) and Claude Code (a coding agent), you describe what you want in plain language, and the AI writes the code.
You don’t need to understand the syntax. You need to understand what you’re building.
This is what they call vibe-coding, and it changes the entire equation for designers.
Public love from the things I vibe-coded. Grateful for the support.
Now let’s dive in… (this is going to be a lot, so I suggest bookmarking/liking this first) 🔖
I wanted a portfolio that could hold a conversation. When someone visits, they can ask the AI questions about my background, my projects, my philosophy — and it responds intelligently.
Before these tools, I would have needed to either learn a stack (React, Node, OpenAI API integration) or hire someone. Instead, I described the experience I wanted, let Claude Code generate the implementation, and iterated in real time.
48 hours. Fully deployed (with custom domain)!

Felix Lee@felixleezd
I have a new website. felixlee.dev I am not a developer but this blew my mind. I built it entirely on Claude Code + Cursor. It isn't perfect, but I think its cool and proud for v1. I'm optimistic. Take a look!
2:59 PM · Oct 29, 2025 · 62.3K Views
25 Replies · 14 Reposts · 526 Likes
An internal tool for analyzing metrics and suggesting design experiments. Database-backed. User authentication. AI-powered recommendations.
5 days. A FULL working product. Live! So wild.
These weren’t prototypes in Figma. These were real applications. You can try it too, seriously.
Felix Lee@felixleezd
Day 9 of vibe coding as a designer Companies pay $5k-15k for UX audits that take 2 weeks. Meanwhile 88% of users won't return to a site after bad UX. So I built a tool that does it instantly ⚡️: > Upload any screenshot > Get conversion-focused feedback in seconds > Based on
3:56 PM · Dec 28, 2025 · 44.2K Views
63 Replies · 32 Reposts · 544 Likes
I wrote a complete 101 guide on this.
Here’s the full breakdown with exact commands and prompts.
Everything you need to know (designers/non-technical edition)👇
You need two tools: Claude Code and Cursor.
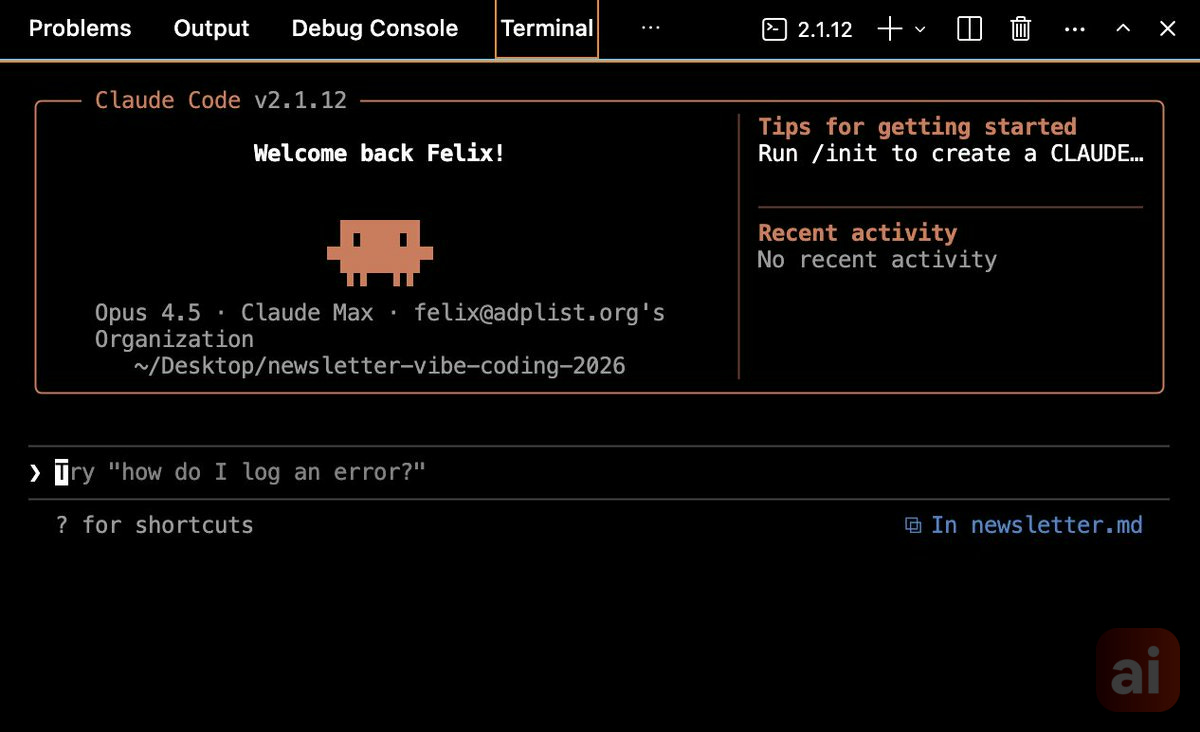
Install Claude Code:
On Mac, open Terminal and run:
npm install -g @anthropic-ai/claude-codeIf you don’t have npm, install Node.js first from https://nodejs.org
On Windows, use the native installer from Anthropic’s website.
After installation, verify it works by typing:
claudeYou should see Claude Code launch in your terminal.
Install Cursor: Download from: https://cursor.com
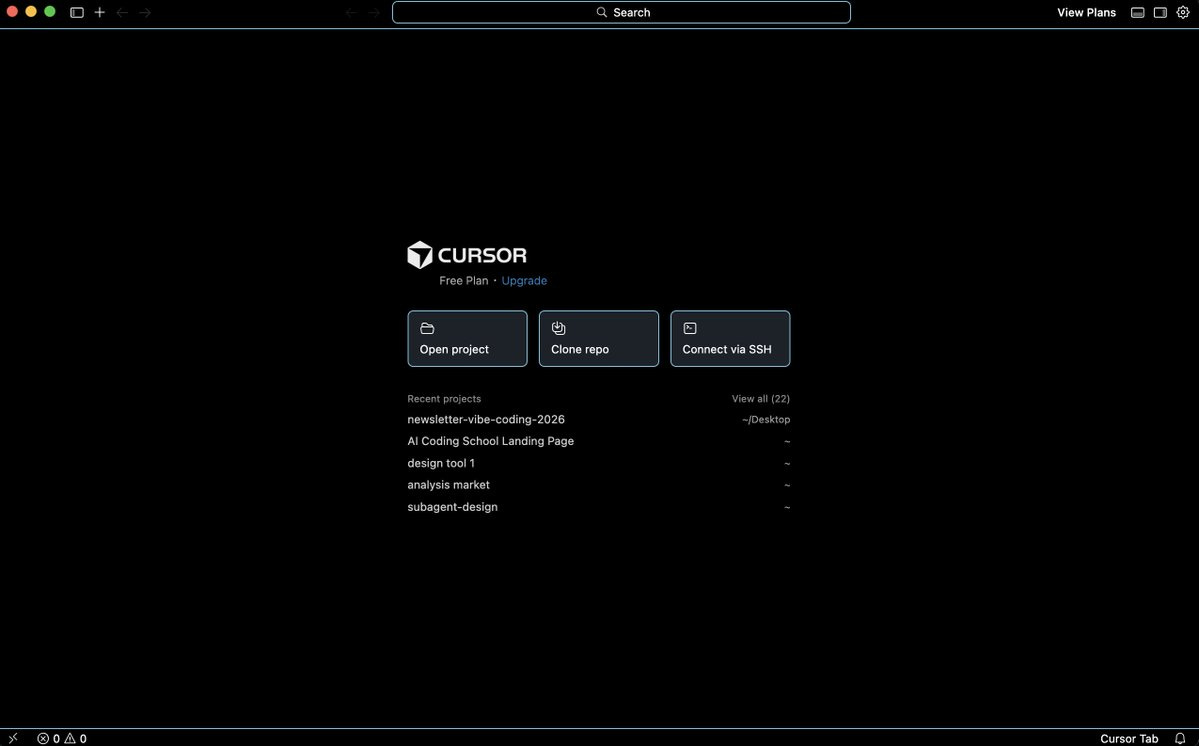
Install like any normal app. Open it. That’s it.
How they connect:
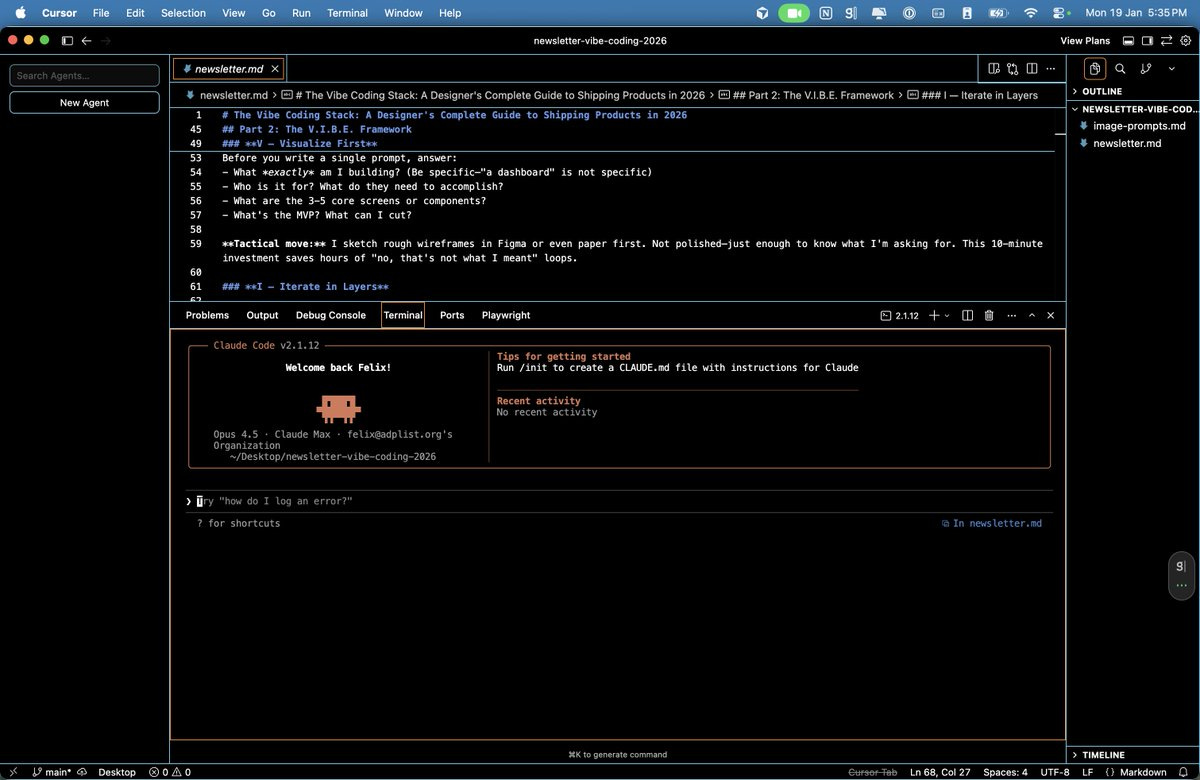
Cursor has a built-in terminal. You can run Claude Code directly inside Cursor — so you see your files, your code, and your AI assistant all in one window.
To open the terminal in Cursor: View → Terminal or press Cmd+J.
The terminal:
This is where you talk to Claude Code. It looks like a black box with text. You type commands, press Enter, and things happen.
Key commands you’ll use:
claude                    # Start Claude Code
cd folder-name            # Navigate into a folder
cd ..                     # Go back one folder
ls                        # List files in current folder (Mac)
dir                       # List files in current folder (Windows)
Cursor Interface:
Left panel: File tree (your project’s folders and files)
Center: Code editor (where you see and edit code)
Bottom: Terminal (where you run Claude Code)
Right: Optional panels you can ignore for now
You don’t need to understand every button. Just know where things are.
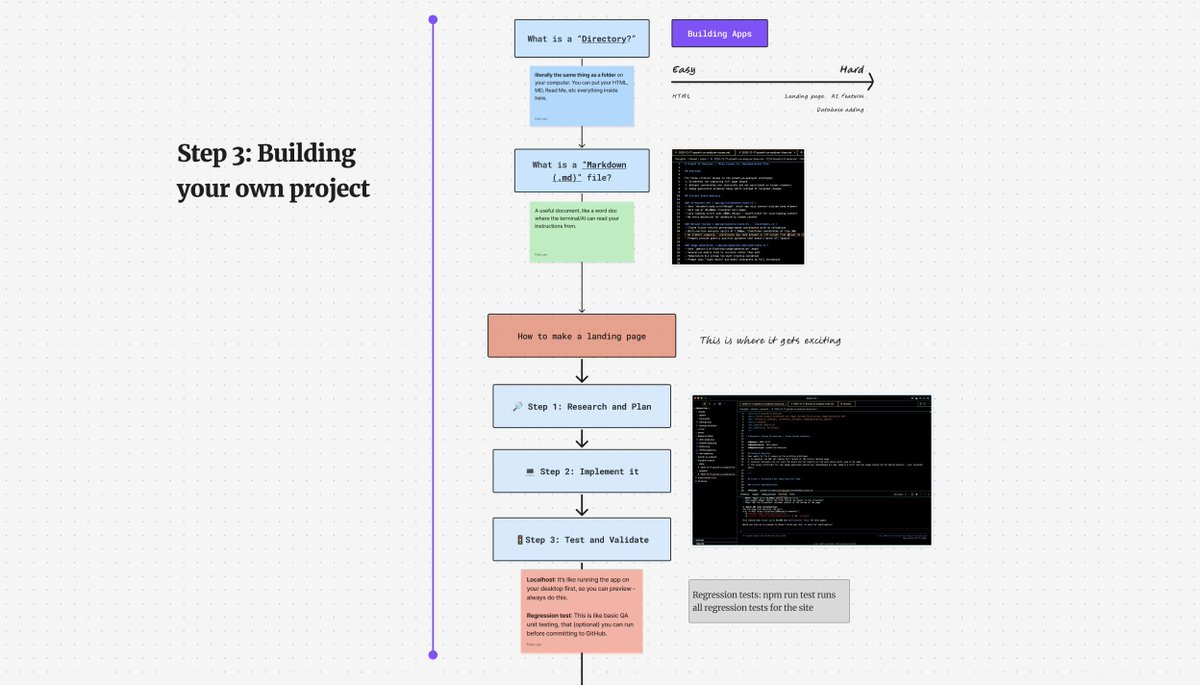
Create a project folder:
In Cursor, go to File → Open Folder and create a new empty folder. Name it something like my-portfolio.
Open the terminal inside Cursor and start Claude Code:
claudeThe Planning Phase (Critical):
Before writing any code, ask for a plan. Here’s the sample prompt I use:
I want to build a personal portfolio website with:
- A hero section with my name and tagline
- A projects section showing 4 recent works
- An about section with my bio
- A contact section with links to Twitter and LinkedIn
Research the best way to build this and create a plan.md file with:
1. Recommended tech stack
2. File structure
3. Design considerations
4. Step-by-step implementation plan
Claude Code will create a plan.md file in your project. Open it in Cursor and review it.
Approve or Adjust:
If something looks off, tell Claude:
In the plan, change the tech stack to use vanilla HTML/CSS instead of React. Keep it simple.Implement:
Once the plan looks good:
Implement this project according to plan.md . Start with the HTML structure, then add CSS styling. Watch as files appear in your file tree: index.html, styles.css, maybe an images folder.
Preview Locally:
Ask Claude:
How do I preview this in my browser? Open in localhostIt will either open a local server or tell you to simply open index.html in your browser.
For a proper local server, you can run:
npx serveThen open http://localhost:3000 in your browser.
Iterate:
Now the fun part. Look at your site and give feedback:
Make the hero section full-height (100vh). Center the text vertically.
The projects section looks cramped. Add more padding between cards — at least 32px.
Add a subtle hover effect on the project cards. Scale up slightly and add a shadow.
Change the font to Inter from Google Fonts.
Make it responsive. On mobile, stack the project cards vertically.
Each prompt → code change → refresh browser. The loop is fast.
Think of GitHub like Google Drive for your code and everything you’ve done in an IDE (like Cursor).
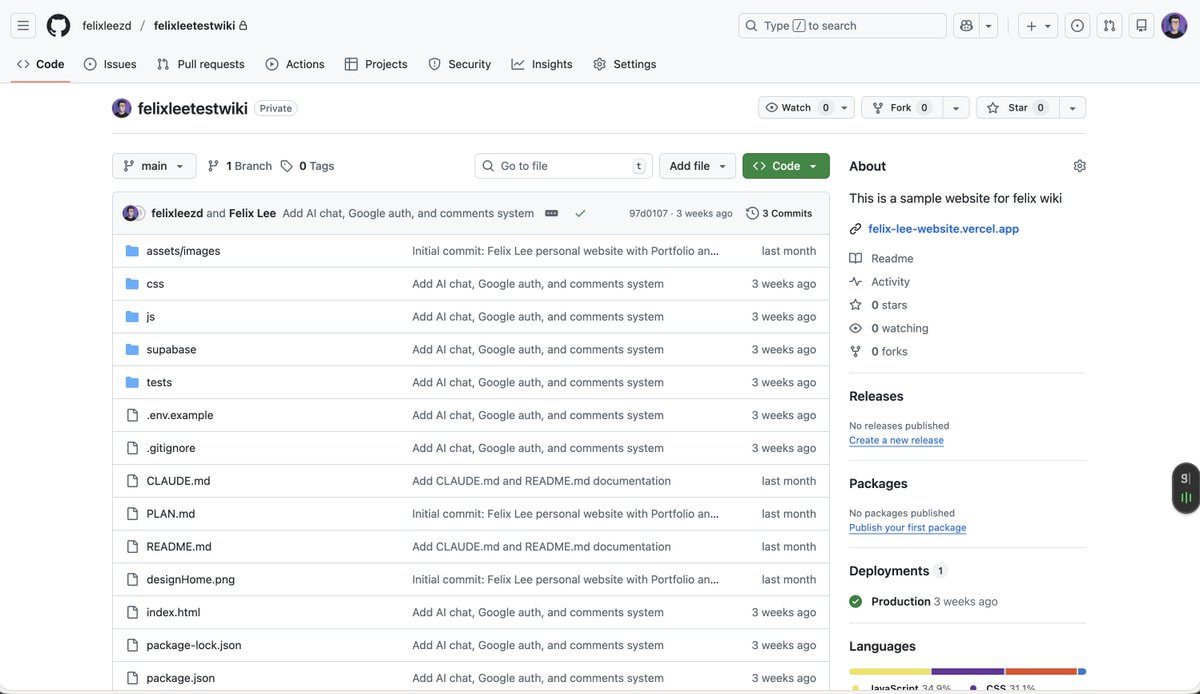
Create a GitHub account: Go to https://github.com and sign up (free).
Create a new repository:
Click the + icon → New repository
Name it (e.g., my-portfolio)
Keep it Public or Private (your choice)
Don’t initialize with README (we’ll create our own)
Click Create repository
Copy the repository URL (looks like https://github.com/yourusername/my-portfolio.git)
Connect your project:
In Claude Code:
Initialize git in this project and connect it to my GitHub repository: https://github.com/yourusername/my-portfolio.gitOr manually:
git init
git remote add origin https://github.com/yourusername/my-portfolio.git
Create documentation:
Create a README.md that explains what this project is, what it does, and how to run it locally.Create a claude.md file that describes the project architecture, my preferences for code style, and context for future sessions.Commit and push:
Commit all files with the message "Initial commit - portfolio site" and push to GitHub.Or manually:
git add .
git commit -m "Initial commit - portfolio site"
git push -u origin main
Your code is now saved online.
Create a Vercel account:
Go to https://vercel.com and sign up with your GitHub account.
Deploy:
Option 1: Through the Vercel dashboard:
Click Add New → Project
Import your GitHub repository
Click Deploy
Option 2: Through Claude Code:
Deploy this project to Vercel.This one is straightforward, if you connect that repo to Vercel, it just deploys automatically when you commit (after your first time).
It will walk you through authentication and deployment.
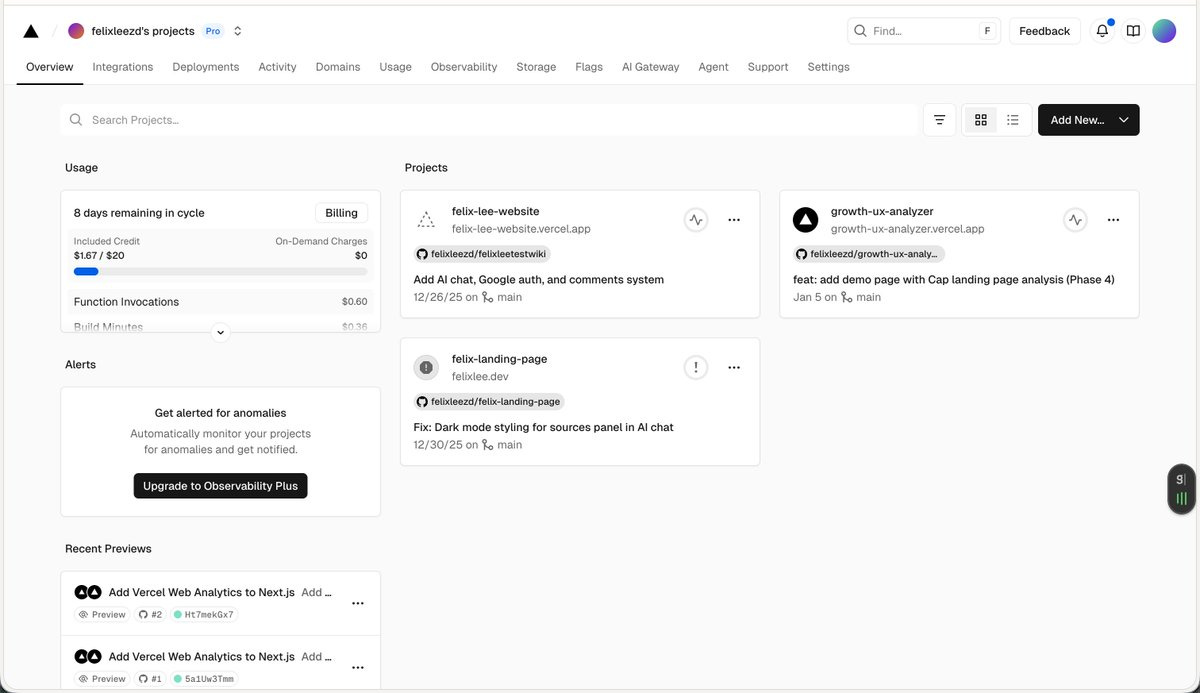
Result:
Vercel gives you a live URL like https://growth-ux-analyzer.vercel.app/. Your site is now on the internet. Share it with anyone.
Automatic updates:
From now on, every time you push to GitHub, Vercel automatically redeploys. Your live site always matches your latest code.
Buy a domain:
Options:
Directly in Vercel (easiest — auto-configures everything)
From Namecheap, Google Domains, Cloudflare, etc.
Connect to Vercel:
In your Vercel project dashboard:
Go to Settings → Domains
Add your domain (e.g., felixlee.dev)
Vercel shows you DNS records to add
Update DNS (if you bought elsewhere):
Go to your domain provider’s DNS settings and add:
Type: A
Name: @
Value: 76.76.21.21
Type: CNAME
Name: www
Value: cname.vercel-dns.com
Wait 5-30 minutes for DNS propagation.
ALWAYS Verify: Visit your custom domain. Your site should load.
Going further: Building real web apps
Steps 1 -> 6 cover static sites. Now let’s build something with users, data, and AI.
I wanted to add to my portfolio:
User authentication (visitors can sign in with Google)
AI chat (ask questions about my work)
Comment system (people can leave feedback)
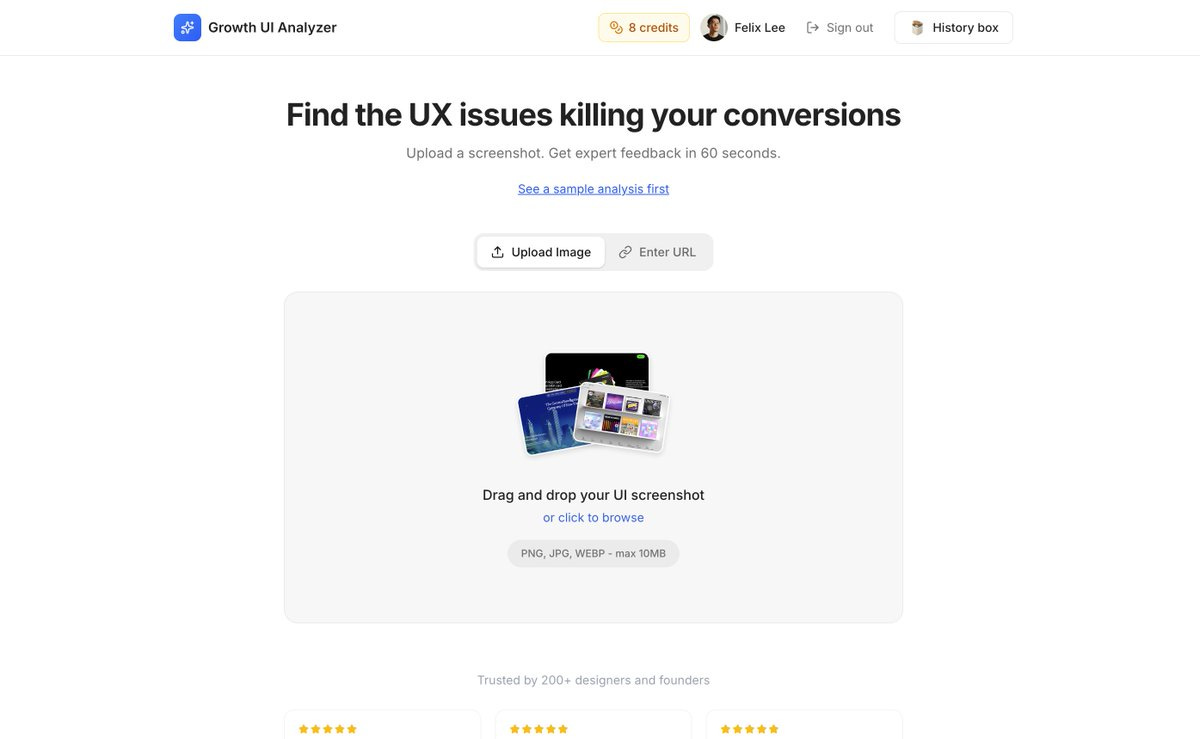
Research prompt:
The growth design tool!
I want to expand this portfolio into a web app with:
- Google sign-in authentication
- An AI chat widget that answers questions about my work
- A comment section where signed-in users can leave messages
Research the best approach and create an implementation-plan.md with:
1. Services needed (auth, database, AI)
2. Architecture overview
3. Security considerations
4. Step-by-step implementation phases
Environment variables:
For apps with API keys, you need a .env file:
Create a .env file for storing API keys. Also create a .gitignore file that excludes .env from being uploaded to GitHub.Your .env file will look like:
SUPABASE_URL=https://xxxxx.supabase.co
SUPABASE_ANON_KEY=eyxxxxx
OPENAI_API_KEY=sk-xxxxx
Important: Never commit .env to GitHub. The .gitignore file prevents this. You can make sure of this by telling Claude Code agent or Cursor.
Supabase (database + auth):
Go to https://supabase.com and create an account
Create a new project
Go to Settings → API and copy:Project URL
anon public key
Enable Google Auth:
In Supabase: Authentication → Providers → Google → Enable
You’ll need a Google Cloud OAuth client ID
Go to https://console.cloud.google.com
Create a project → APIs & Services → Credentials → Create OAuth Client ID
Copy the Client ID back to Supabase
OpenAI API:
Go to https://platform.openai.com
Create an API key
Store it in Supabase Edge Functions (not in frontend code):
Settings → Edge Functions → Add Secret
Name: OPENAI_API_KEY
Value: your key
Implementation prompt:
Implement the web app according to implementation-plan.md.
Use:
- Supabase for auth and database (credentials in .env)
- OpenAI for the chat feature (key stored in Supabase Edge Functions)
- Google sign-in only (no email/password)
Start with authentication, then add the AI chat, then the comment system.
Testing locally:
Run the project locally and test:
1. Google sign-in flow
2. AI chat responses
3. Leaving a comment as a signed-in user
Debugging:
If something breaks:
I'm getting this error: [paste error message]. What's wrong and how do I fix it?Common fixes involve database permissions. Claude will often generate SQL to run in Supabase:
-- Example: Allow authenticated users to insert comments
CREATE POLICY "Users can insert comments" ON comments
FOR INSERT WITH CHECK (auth.uid() = user_id);
Deploy:
Once it works locally:
Commit all changes with message "Add auth, AI chat, and comments" and push to GitHub.Vercel auto-deploys. Add your production environment variables in the Vercel dashboard (Settings → Environment variables).
Deployed my growth design tool (https://growth-ux-analyzer.vercel.app/)
That’s it - and you’re ready to build your first app!
🔖 Like/Bookmark this guide. (Full notion link here)
📘 Other free resources our team created: Design with AI eBook and 90 Moonshot Design Tactics ebook (from companies like Figma, Airbnb, etc).
Thank you for reading.
🔄 If you find this helpful, let’s repost or forward it and share your thoughts. Because more designers can learn to build!
Thanks for reading,
Felix
Comments
Nothing yet. Say the first thing.
Sign in to join the conversation.